---
title: Embedded AI Assistant Installation - Azure OIDC
excerpt: ''
deprecated: false
hidden: false
metadata:
title: ''
description: ''
robots: index
next:
description: ''
---
# Installing Embedded AI Assistant with a Code Snippet and Azure OIDC
This guide walks you through the Azure SSO OIDC setup for Embedded AI Assistant (M4W). This will create an Azure application that will then allow customers to copy a code snippet of the AI Assistant and paste it onto any page governed by Azure SSO, and Embedded AI Assistant will just work, automatic authentication and all.
### Prerequisite Questions
* Does the site/page you want to include Embedded AI Assistant on allow for HTML/JavaScript editing?
* If you want it to be everywhere on the site, does it support site templates, master pages, headers, footers, or other similar global page elements that support HTML/JavaScript editing?
* Is the site/page governed by Azure SSO?
### Installation Prerequisites
* On the day of installation, we need an individual who has **Global Administrator** access in your Azure tenant
The Azure OIDC silent authentication only works if users are logged into only one MS tenant. Make sure users logged out from other testing tenants when testing webchat bot. This should be rare if the end users are logged into multiple tenants at once.
## Step 1: Azure App Setup Instructions
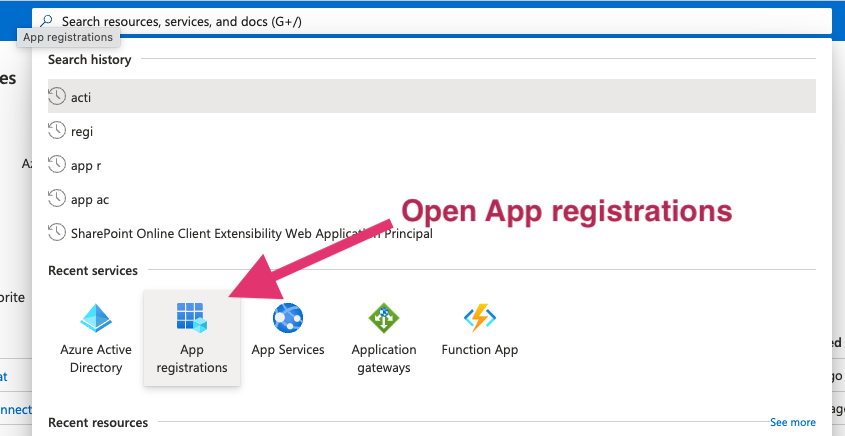
1. Go to the [https://portal.azure.com/](https://portal.azure.com/) that lets you create Applications.
2. Click on **App registrations**
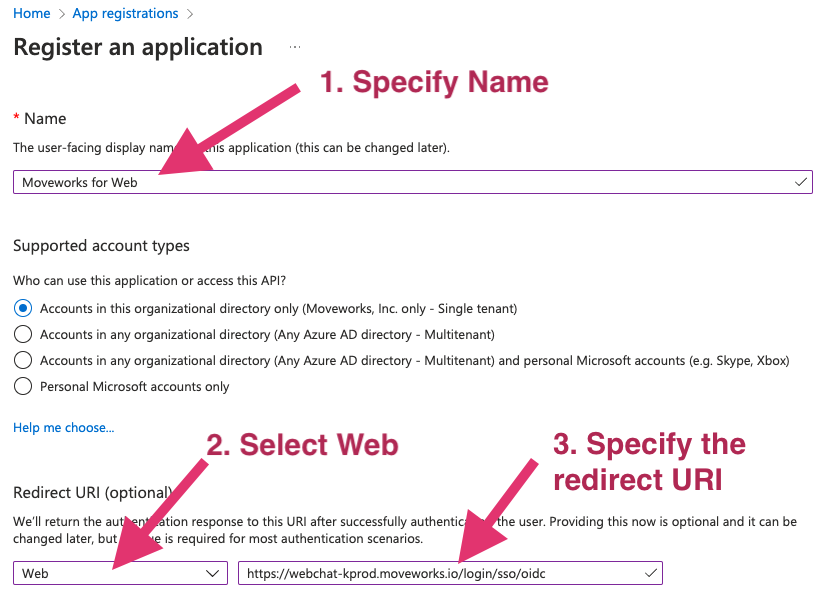
3. Select New Registration in the next screen.

1. Specify a name for the application. We recommend using your bot’s name.
2. Configure the application.
1. Based on your Moveworks environment, set the **Redirect URI** as one of the following:
**Commercial Environment**: `https://webchat-kprod.moveworks.io/login/sso/oidc`
**GovCloud Environment**: `https://webchat.prod.am-usge1.moveworks.io/login/sso/oidc`
**EU Environment**: `https://webchat.prod.am-euc1.moveworks.io/login/sso/oidc`
**Canada Environment**: `https://webchat.prod.am-cac1.moveworks.io/login/sso/oidc`
**AU Environment**: `https://webchat.prod.am-apse2.moveworks.io/login/sso/oidc`
3. Select options as shown below.
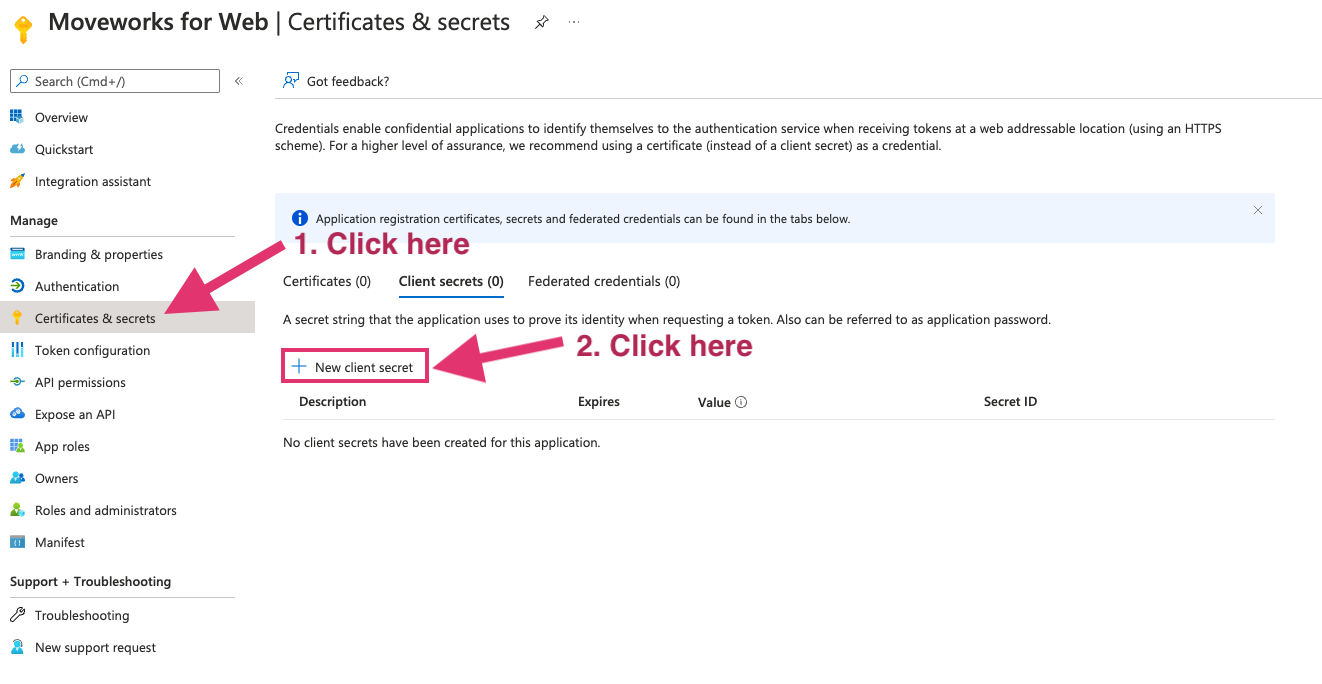
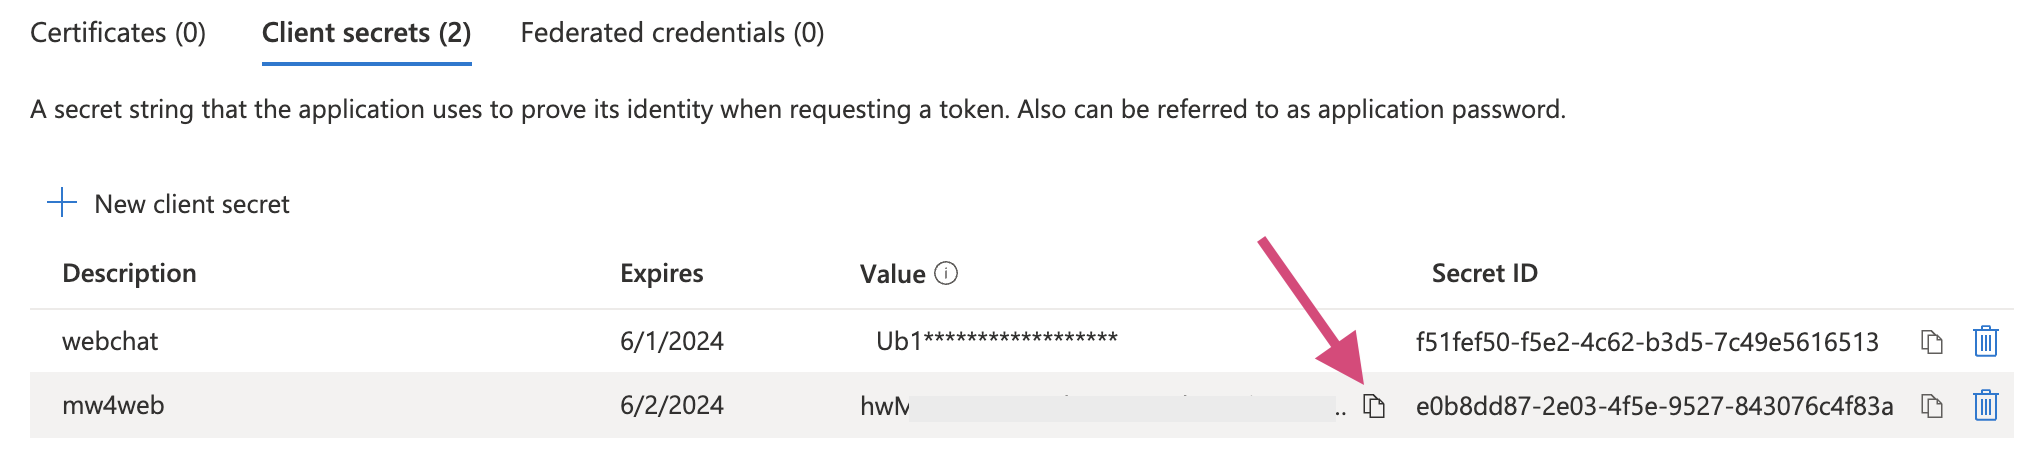
1. Go to **Certificates & secrets** on the left
2. Click **New client secret**
3. Add **Description** and **Expires**. 24 months is our recommended option to go with as it is the longest time possible. You can have multiple secrets at once, so before one expires you can create another for a seamless cutover.
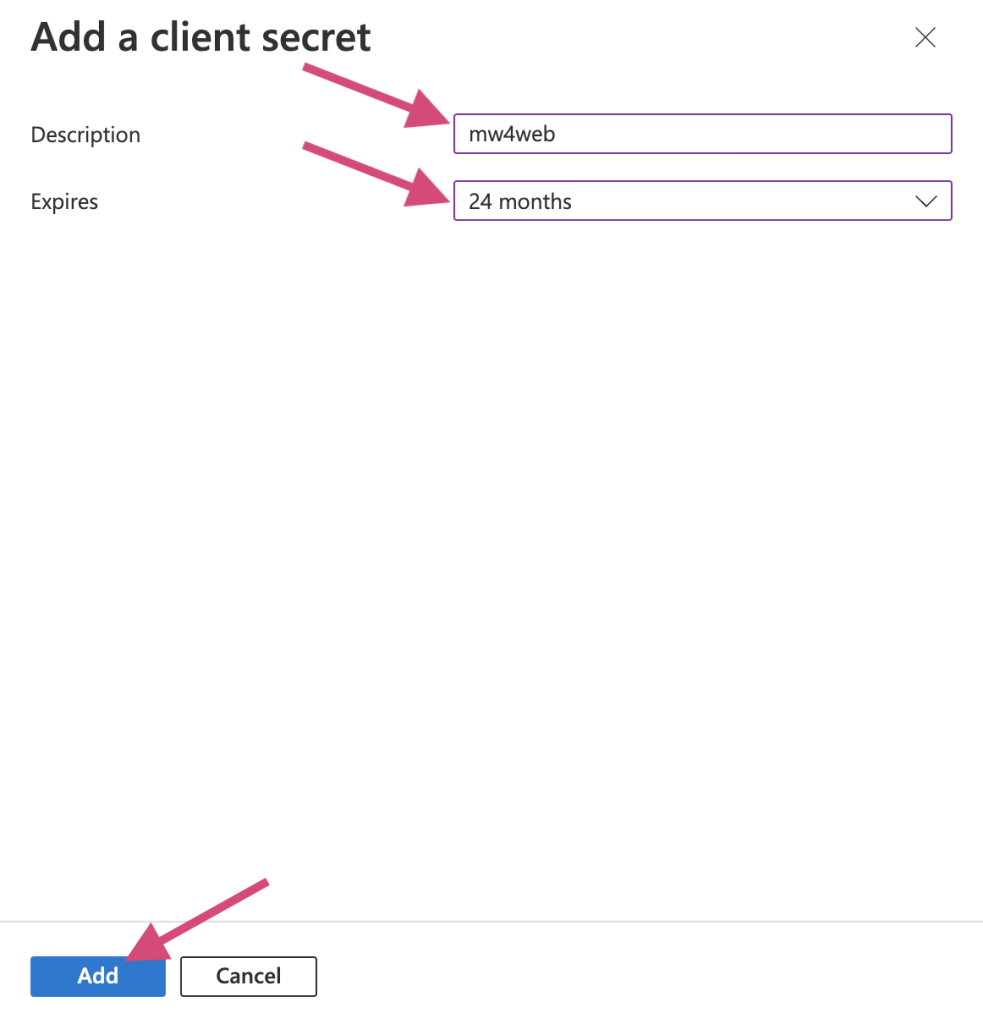 Once the secret is created, copy the value and send to Moveworks engineer. Note that this value is only accessible at the time of creation. You will need to create a new one if the previous one isn’t saved before leaving the page.
1. Go to **Azure Active Directory**
2. Go to **Enterprise Application** under **Manage**
3. Find the application just created and open
4. Go to **Permissions** and click **Grant admin consent for\**

After setup is complete, use the following information to add the SSO configuration within Moveworks setup:
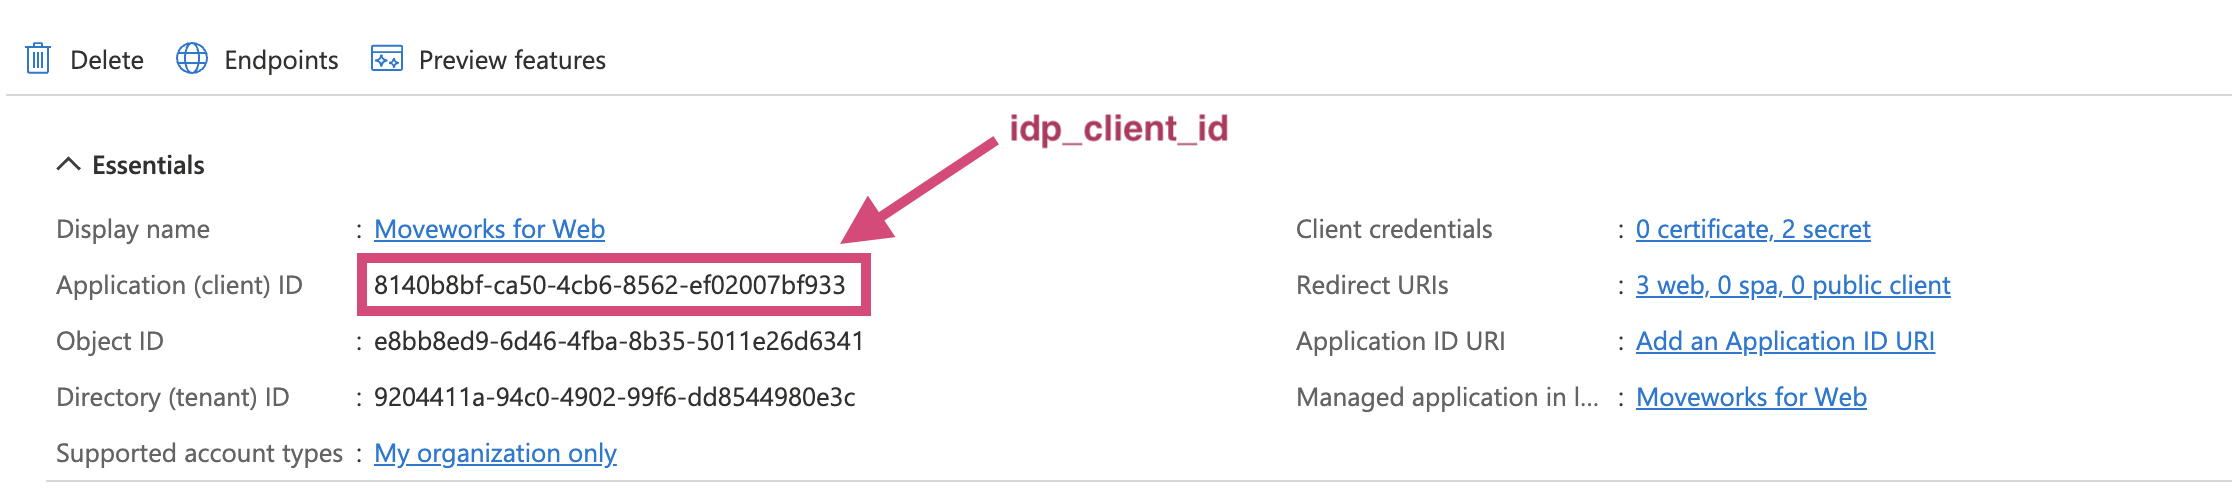
1. Go the **Overview** in App registrations → your app just created.
1. `idp_client_id`
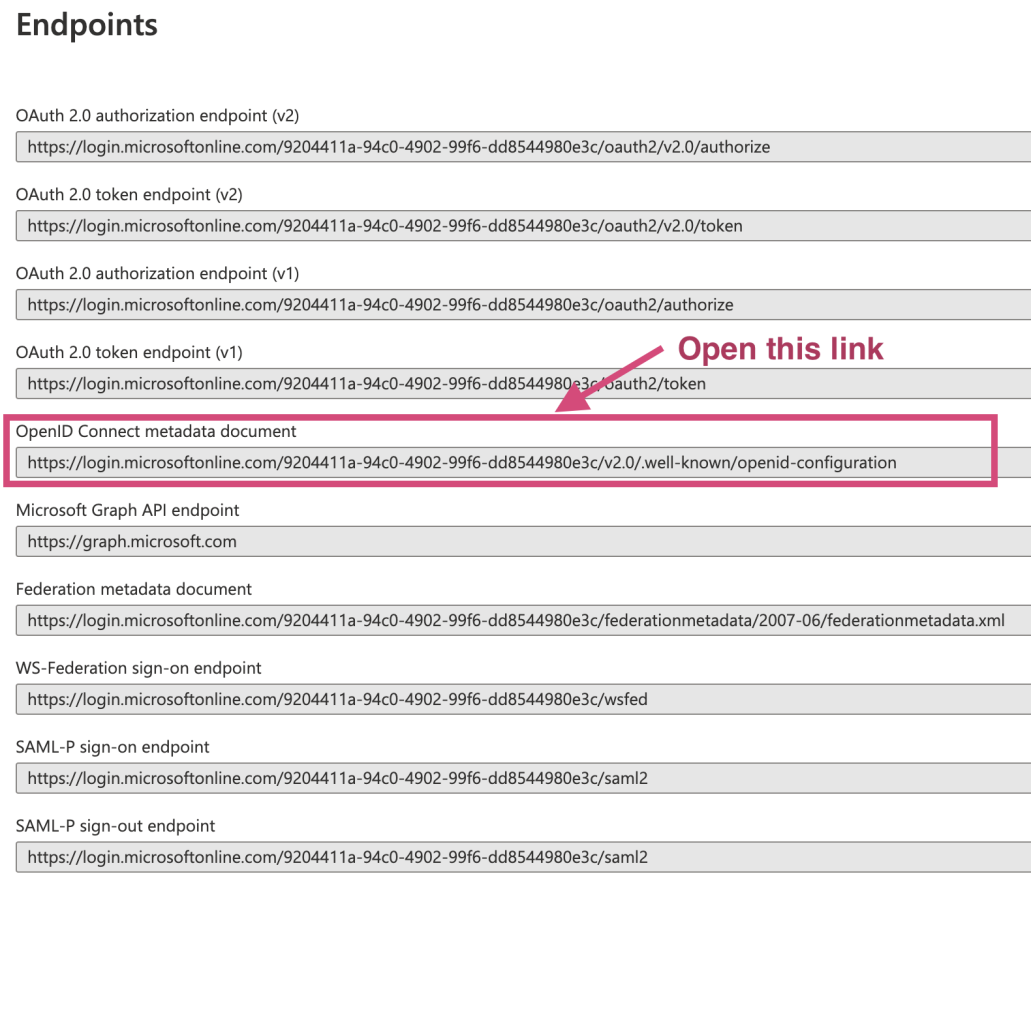
2. `idp_issuer`


3. `idp_secret` (saved locally in the previous step)
2. Within Moveworks Setup, navigate to Single Sign-on (SSO)
3. Click **create** to create a new SSO configuration
4. Input the following details:
1. Moveworks Product: Movewebchat
2. Select Connector: ms_graph
3. Authentication Protocol: OIDC
4. IDP redirect URL
5. IDP issuer
6. Client ID
7. Client Secret
Once the secret is created, copy the value and send to Moveworks engineer. Note that this value is only accessible at the time of creation. You will need to create a new one if the previous one isn’t saved before leaving the page.

1. Go to **Azure Active Directory**
2. Go to **Enterprise Application** under **Manage**
3. Find the application just created and open
4. Go to **Permissions** and click **Grant admin consent for\**

After setup is complete, use the following information to add the SSO configuration within Moveworks setup:
1. Go the **Overview** in App registrations → your app just created.
1. `idp_client_id`

2. `idp_issuer`


3. `idp_secret` (saved locally in the previous step)
2. Within Moveworks Setup, navigate to Single Sign-on (SSO)
3. Click **create** to create a new SSO configuration
4. Input the following details:
1. Moveworks Product: Movewebchat
2. Select Connector: ms_graph
3. Authentication Protocol: OIDC
4. IDP redirect URL
5. IDP issuer
6. Client ID
7. Client Secret
You will need to [follow this section here](/docs/moveworks-for-web#how-to-embed-my-bot-on-a-web-page) to paste the code snippet onto your website.
**Congrats! You did it!** By pasting this onto a given page, or template for a page, the AI Assistant will appear if the user successfully authenticates. Authentication is seamless, and no login prompt will ever be seen by the user. If the user is not authenticated, the AI Assistant will simply not appear. This is true for all websites governed by Azure OIDC SSO, thus you are now free to paste this snippet anywhere that supports it.
By default, this behavior is NOT enabled for all users. Work with your CS team to first create an allowlist of users who can test the web AI Assistant before having them enable it to all users.