---
title: 'Lab Setup: Salesforce and JIRA Connectors'
excerpt: >-
Get access to third-party systems and your Moveworks environment for your
developer lab.
deprecated: false
hidden: false
metadata:
title: ''
description: ''
robots: index
next:
description: ''
---
# Sign up for a developer trial of Salesforce and JIRA
1. Sign up for a free [Salesforce Developer Instance](https://developer.salesforce.com/signup). Ensure you use a personal email address, as sometimes company email addresses already have one allocated. **If you are challenged with a "birth city" and you didn't or don't remember filling it in, the default is San Francisco.**
1. Did not receive an account activation link?
1. Go to [Forgot Your Password](https://login.salesforce.com/secur/forgotpassword.jsp?locale=us) to reset your password
2. Sign up for a free [JIRA Trial Account](https://www.atlassian.com/try/cloud/signup?bundle=jira-software\&edition=free\&skipBundles=true). Ensure you use a personal email address, as sometimes company email addresses already have one allocated. This trial will be good for 30 days.
**If you do not wish to sign up for a Salesforce Developer Instance, you can leverage one that Moveworks has provisioned with an existing connector.**
# Create a connected app in Salesforce
**Skip this section if you have not signed up for your own Salesforce instance**\
We must set up a connected app in Salesforce to obtain API credentials.
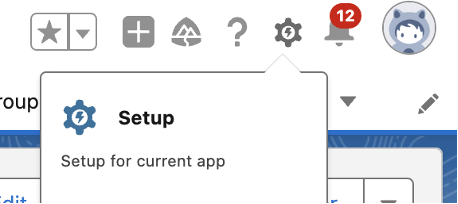
1. Navigate to Setup
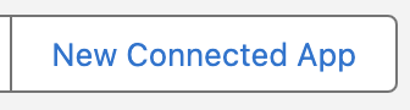
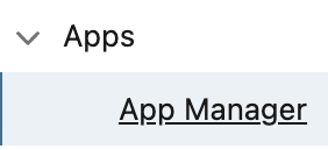
2. On the left bar, navigate to Apps \> Apps Manager, then choose the “New Connected App” button on the top right corner.
3. In “Basic Information”, fill in the required fields. You can use the following in the screenshot

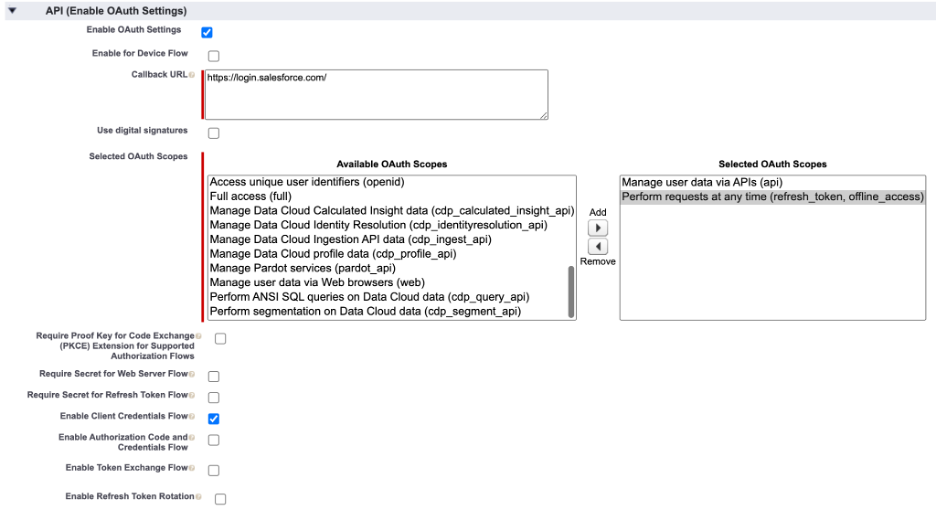
4. Click “Enable OAuth Settings” and enter the following information.
* Callback URL: [https://login.salesforce.com/](https://login.salesforce.com/)
* Selected OAuth Scopes:
* Manager user data via APIs
* Perform requests at any time
* Check “Enable Client Credentials”
* Leave PKCE, Secret for web server flow and other boxes unchecked
5. Save your changes and you will see a message saying it could take up to 10 minutes for changes to take effect. Click “Continue”.
6. On the left sidebar, go back to Apps-\>App Manager
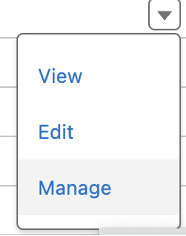
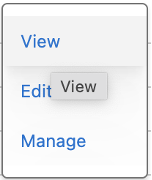
7. Find the connected App you just created, and on the right side click the dropdown and select “Manage”
8. Click the “Edit Policies” button

9. If the settings below are not already, set OAuth Policies to the following
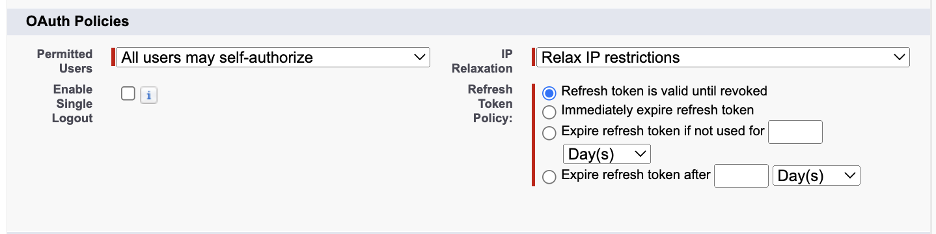
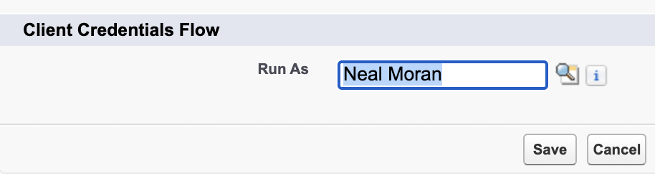
10. On the bottom under “Client Credentials Flow” choose “Run As” and you can select your own name as the user to authenticate as **and Click Save**. **You must click the magnifying glass to find your name to select from existing users.**
11. Navigate again to Apps-\>App Manager
12. Find the connected App you just created, and on the right side click the dropdown and select “View”
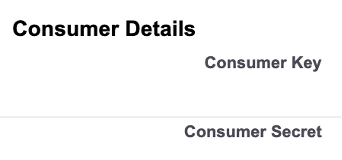
13. Click “Manager Consumer Details”

14. You may be asked to verify your identity. Salesforce will send a code to the email you registered your Salesforce account with.
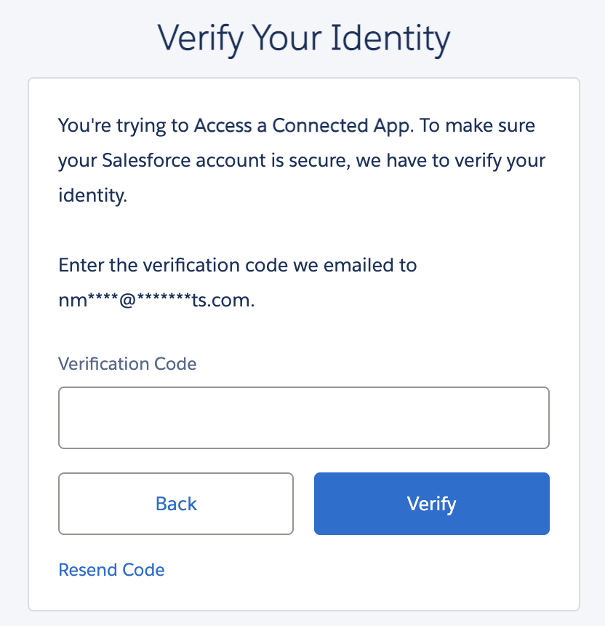
15. Once you verify, you should see a Consumer Key and Consumer Secret. **Be sure to copy and paste both of those values to use later.**
# Create a JIRA API token
1. Navigate to [https://id.atlassian.com/manage-profile/security/api-tokens](https://id.atlassian.com/manage-profile/security/api-tokens)
2. Click “Create API Token”
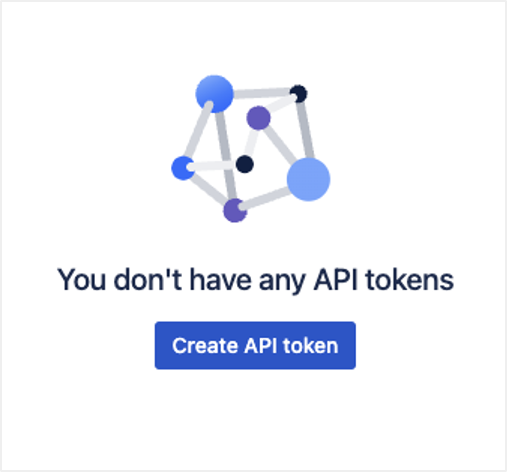
3. Call it “Moveworks” or whatever you like and click “Create”
4. It will generate a token for you. **IMPORTANT: Make sure to copy and paste this token down on a notepad for later use. Once you generate it here you will not be able to view it again.**
# Create a Salesforce Connector
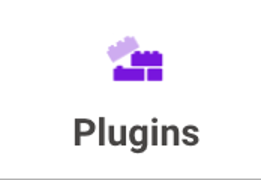
1. Navigate to the “Plugins” section on the top bar
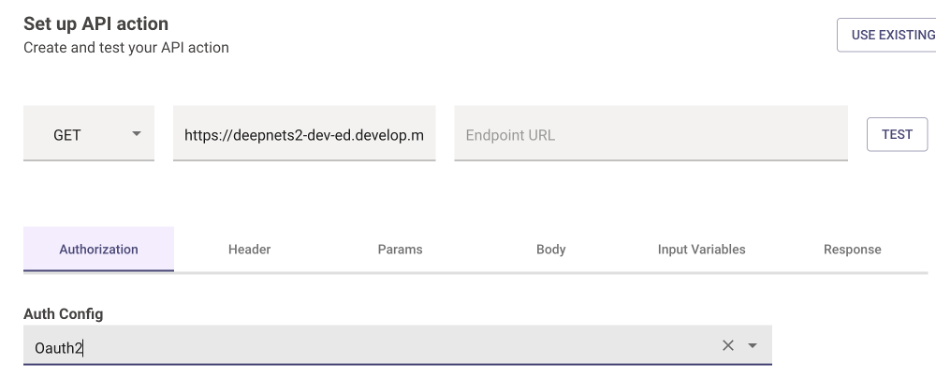
2. Navigate to the “Actions” section and on the top right choose “CREATE”

3. Under the “Authorization” tab choose “Oauth2”
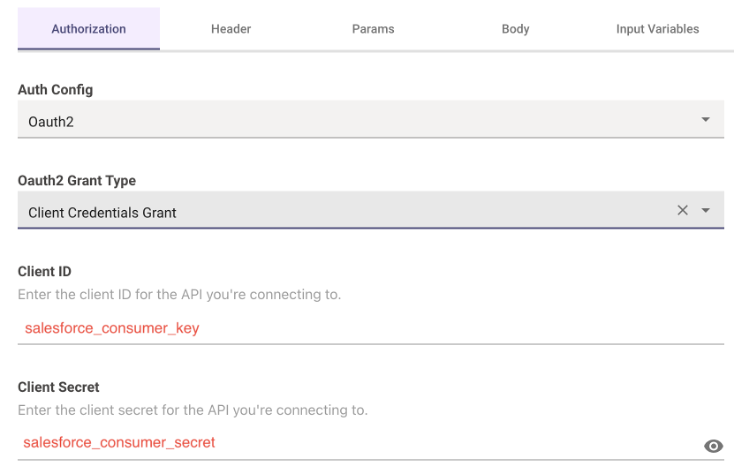
4. Then choose an Oauth2 Grant type of “Client Credentials”\
Insert the Salesforce Consumer Key and Secret that you retrieved from prior steps
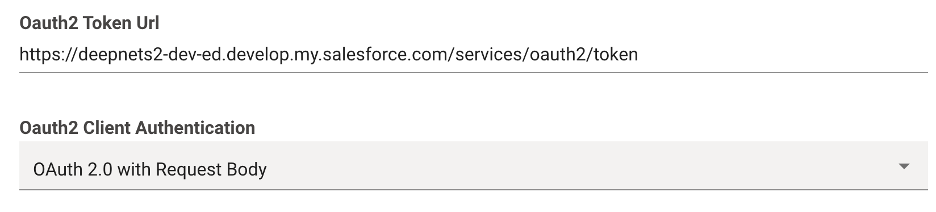
5. The **OAuth token URL** will be your Base URL from step 3 in addition to **/services/oauth2/token**. See the example below. Your OAuth2 Client Authentication will be “OAuth 2.0 with Request Body”
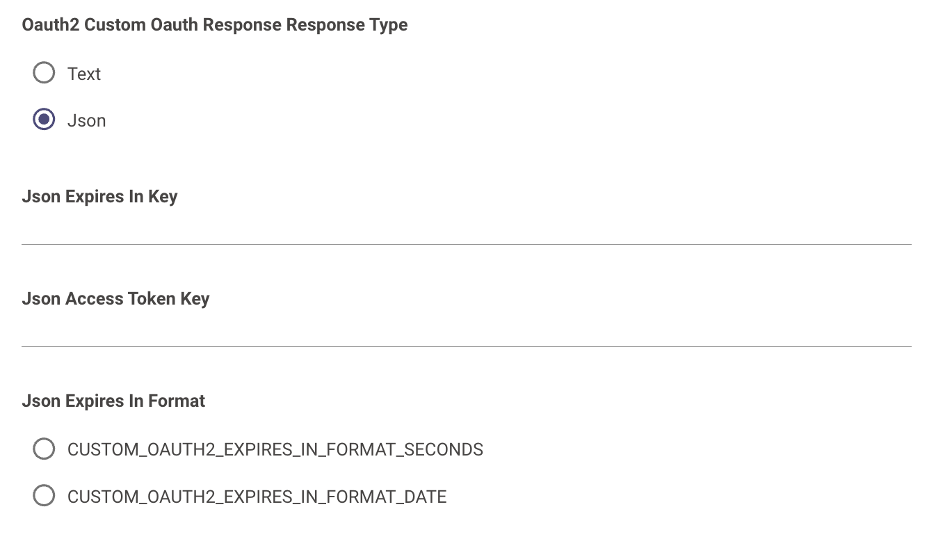
6. Pick Json as the response type:
7. Finally in the “Header Auth Value Pattern” enter **Bearer %s** as seen below. This tells Moveworks what format to pass the extracted token in the header.
