***
title: Simpplr Access Requirements
excerpt: ''
deprecated: false
hidden: true
metadata:
title: ''
description: ''
robots: index
next:
description: ''
---------------
Use this document for instructions on how to get the access setup in place for the Moveworks integration with Simpplr.
## Prerequisite
Make sure you have the `salesforce.crt` file handy. The Moveworks team should generate and share this with you.
## Process Walkthrough
Please play close attention to the listed values while configuring access. These must be exact matches - they are not just examples.
1. **Create a Connected App** in your Salesforce instance
1. Under Setup > App Manager: Click `New Connected App`
2. Fill basic info: \{Connected App Name: Moveworks\_Server, API Name: Moveworks\_Server, Contact Email: [support@moveworks.ai](mailto:support@moveworks.ai)}
3. Select *enable oAuth settings* under API (Enable oAuth Settings) & add \{Callback URL: [https://login.salesforce.com/](https://login.salesforce.com/)}
4. Check *Use digital signatures*. Upload the *salesforce.crt* that was provided as a pre-req.
5. Add oAuth scopes to:
1. api
2. refresh\_token, offline\_access
3. visualforce (only required for Simpplr)
6. Click *Save* & Note down the `Consumer Key` and the `Consumer Secret`
7. After saving Update OAuth Policies, click
1. *`Manage`> Edit Policies*
2. And in the *OAuth policies* section, change *Permitted Users* to *Admin approved users are pre-authorized*
3. And in the Session policies section, change *Timeout Value* to *24 hours*
4. Click *Save*
2. **Create a Permission Set** to interact with the Connected App
1. Navigate to Users > `Permission Sets` & click on New
2. Add `moveworks_connected_app` as the Label & Api Names & click Save
3. Now click on the moveworks\_connected\_app Permission Set and Click Assigned Connected Apps
4. Click Edit and add Moveworks\_Server to list of Enabled Connected Apps & Click Save
3. Create **New Service Account** (if it doesn’t exist)
1. Navigate to Users > Users & click on `New User`
2. Enter the following information & click *Save*:
1. Last Name: `Moveworks`
2. Alias: `moveworks`
3. Email, Username & Nickname: `moveworks@{{customer-domain}}.com`
4. Setup profile as `Standard User`
4. **Assign our service user the connected app**
1. Navigate to Users > Users & click on our service user account that we just created
2. *Click on Permission Set Assignment and then Edit Assignments*
3. Now add `moveworks_connected_app` to list of Enabled Permission Sets & Click Save
5. Ensure we have the **required field level permissions** to interact with all the columns
1. Note down our service account’s Profile Name under Users > Profiles
2. Navigate to Setup > Object Manager > Click on the object `Label Simpplr Content (Simpplr__Simpplr_Content__c)`
3. Click on the Fields & Relationships tab
4. Then do the steps below for each of the following fields:
```
Id
Simpplr__Title__c
Simpplr__Text_Intro__c
Simpplr__Site__c
Simpplr__Type__c
Simpplr__Is_Archived__c
Simpplr__Is_Deleted__c
Simpplr__Is_Published__c
Simpplr__Is_Unpublished__c
```
Steps:
1. Click on the column name
2. Click the button `Set field-level Security`
3. Make sure `Visible` column is checked for our service account’s noted down profile for each of these columns.
4. Save this configuration
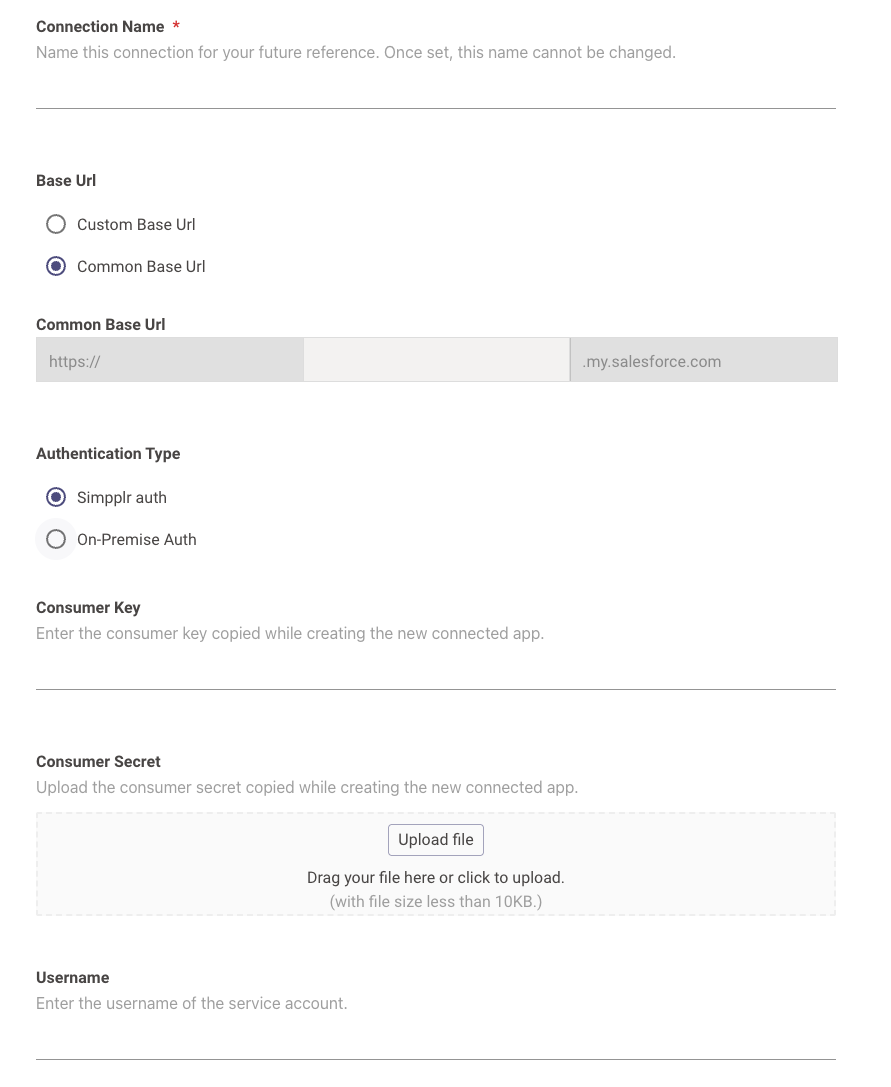
# Create the Connector in Moveworks Setup
Navigate to **Core Platform** > **System Connectors** and create a new connector. Select Simpplr and enter the information below:
* **Connection Name**: simpplr (recommended)
* **Base Url**: Select “Common Base URL” and enter the tenant of your Simpplr instance if it ends with “.my.salesforce.com”. If not, select “Custom Base URL” and enter your Simpplr instance’s URL.
* **Authentication Type**: Simpplr auth
* **Consumer Key**: Enter the consumer key generated while creating the connected app
* **Consumer Secret**: Enter the consumer secret generated while creating the connected app
* **Username:** Enter the username of the service account assigned to Moveworks