***
title: Microsoft Entra Installation Guide (SAML)
excerpt: ''
deprecated: false
hidden: false
metadata:
title: ''
description: ''
robots: index
next:
description: ''
---------------
Moveworks recommends that you set up your Microsoft Entra apps via OIDC. Our OIDC installation will provide a better experience. You can follow the instructions [here (🔗)](/service-management/administration/sso-configuration/microsoft-entra-sso/microsoft-entra-oidc).
# Prerequisites
Before you edit your SSO configuration, make sure you are logged into MyMoveworks. Otherwise, you will not be able to log in and update your SSO configuration details.
**Microsoft Entra Prerequisites**
* Ensure you have **Access to the Azure Admin Portal** with the appropriate IAM permissions in Azure to **register a new Enterprise Application**.
**Moveworks SSO Prerequisites**
* Your Moveworks Environment should be initialized in order to continue. (Verify with your Account Team if this has been completed)
* Note the following values.
* `data_center_domain` - the data center where your organization is hosted (see table below).
| Data Center | data\_center\_domain |
| :----------------------- | :---------------------------- |
| United States (default) | moveworks.com |
| Canada | am-ca-central.moveworks.com |
| EU | am-eu-central.moveworks.com |
| Australia / Asia Pacific | am-ap-southeast.moveworks.com |
| Government Secure Cloud | moveworksgov.com |
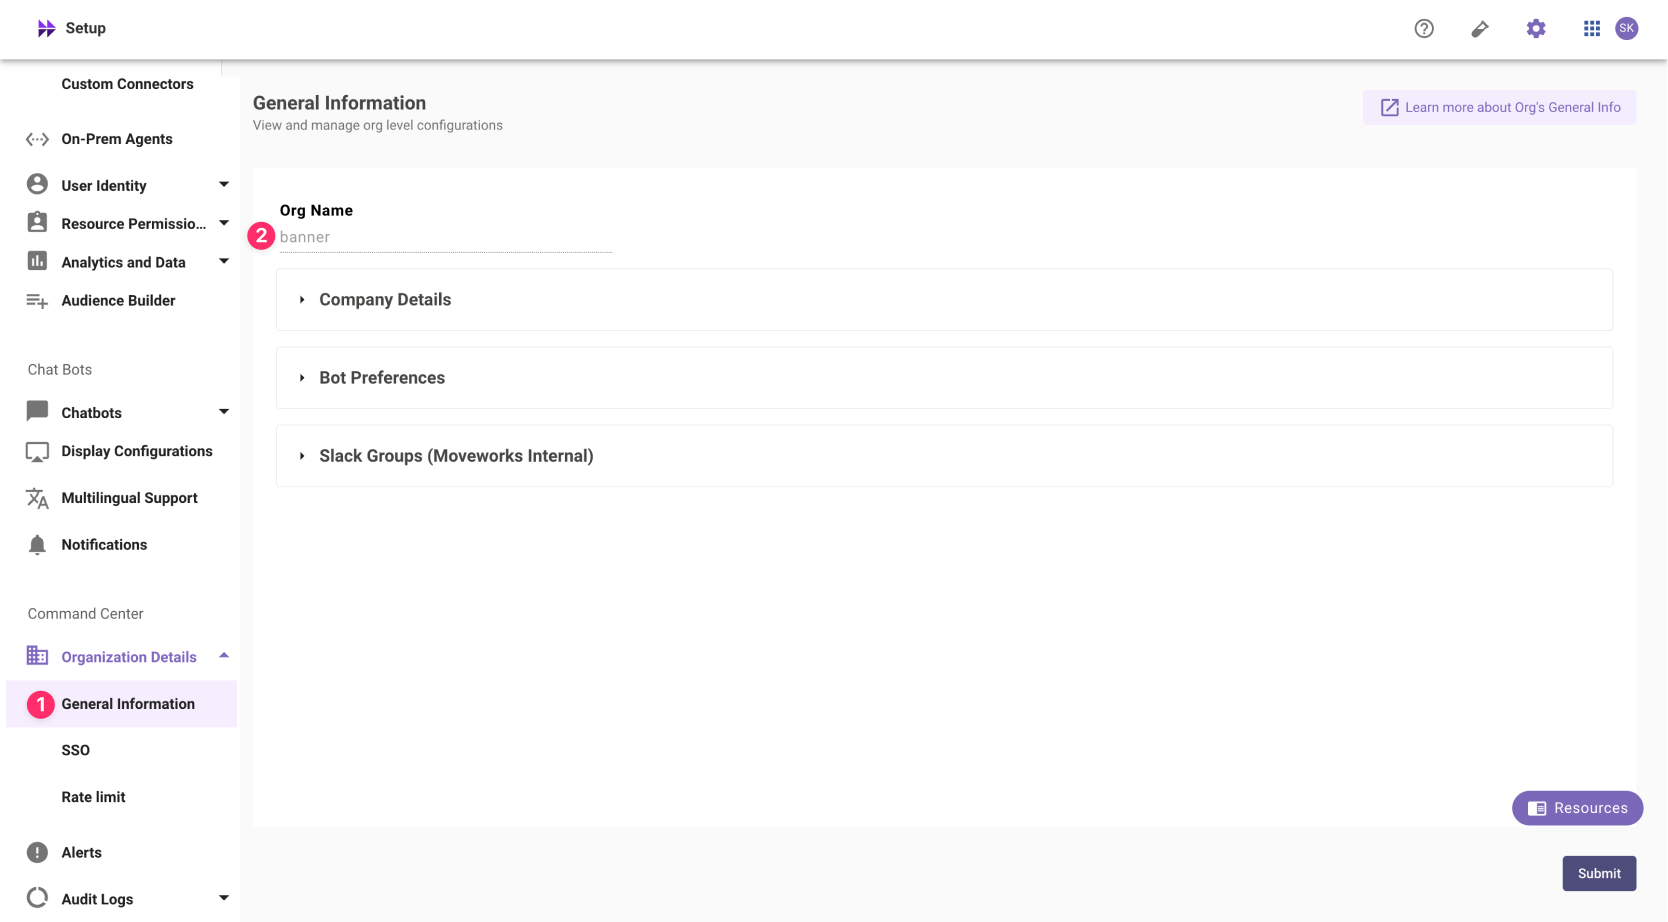
* `subdomain` - your organization's login subdomain. This should match your `customer_id`, which can be[verified from the General Information Page](/service-management/administration/organization-information).
Make sure to use the unique subdomain. For example, if you're organization's login subdomain is **acme.moveworks.com**, then your `subdomain` is **acme** and your `data_center_domain` is **moveworks.com** which is part of the US Data center.
* `customer_id` - The unique identifier for your organization . This is stored as **Org Name** under **Organization Details > General Information**
In exceptional cases where you would like Moveworks to support your organisation with a different subdomain value. Please reach out to Moveworks Support.
# Configuration Steps
## Install Application
1. Navigate to [https://portal.azure.com](https://portal.azure.com)
2. Go to **Enterprise applications** and select **New Application**
3. Search **Moveworks**, select our application, and select **Create**

## Configure Moveworks Settings
1. On the **Single sign-on** tab select **SAML**
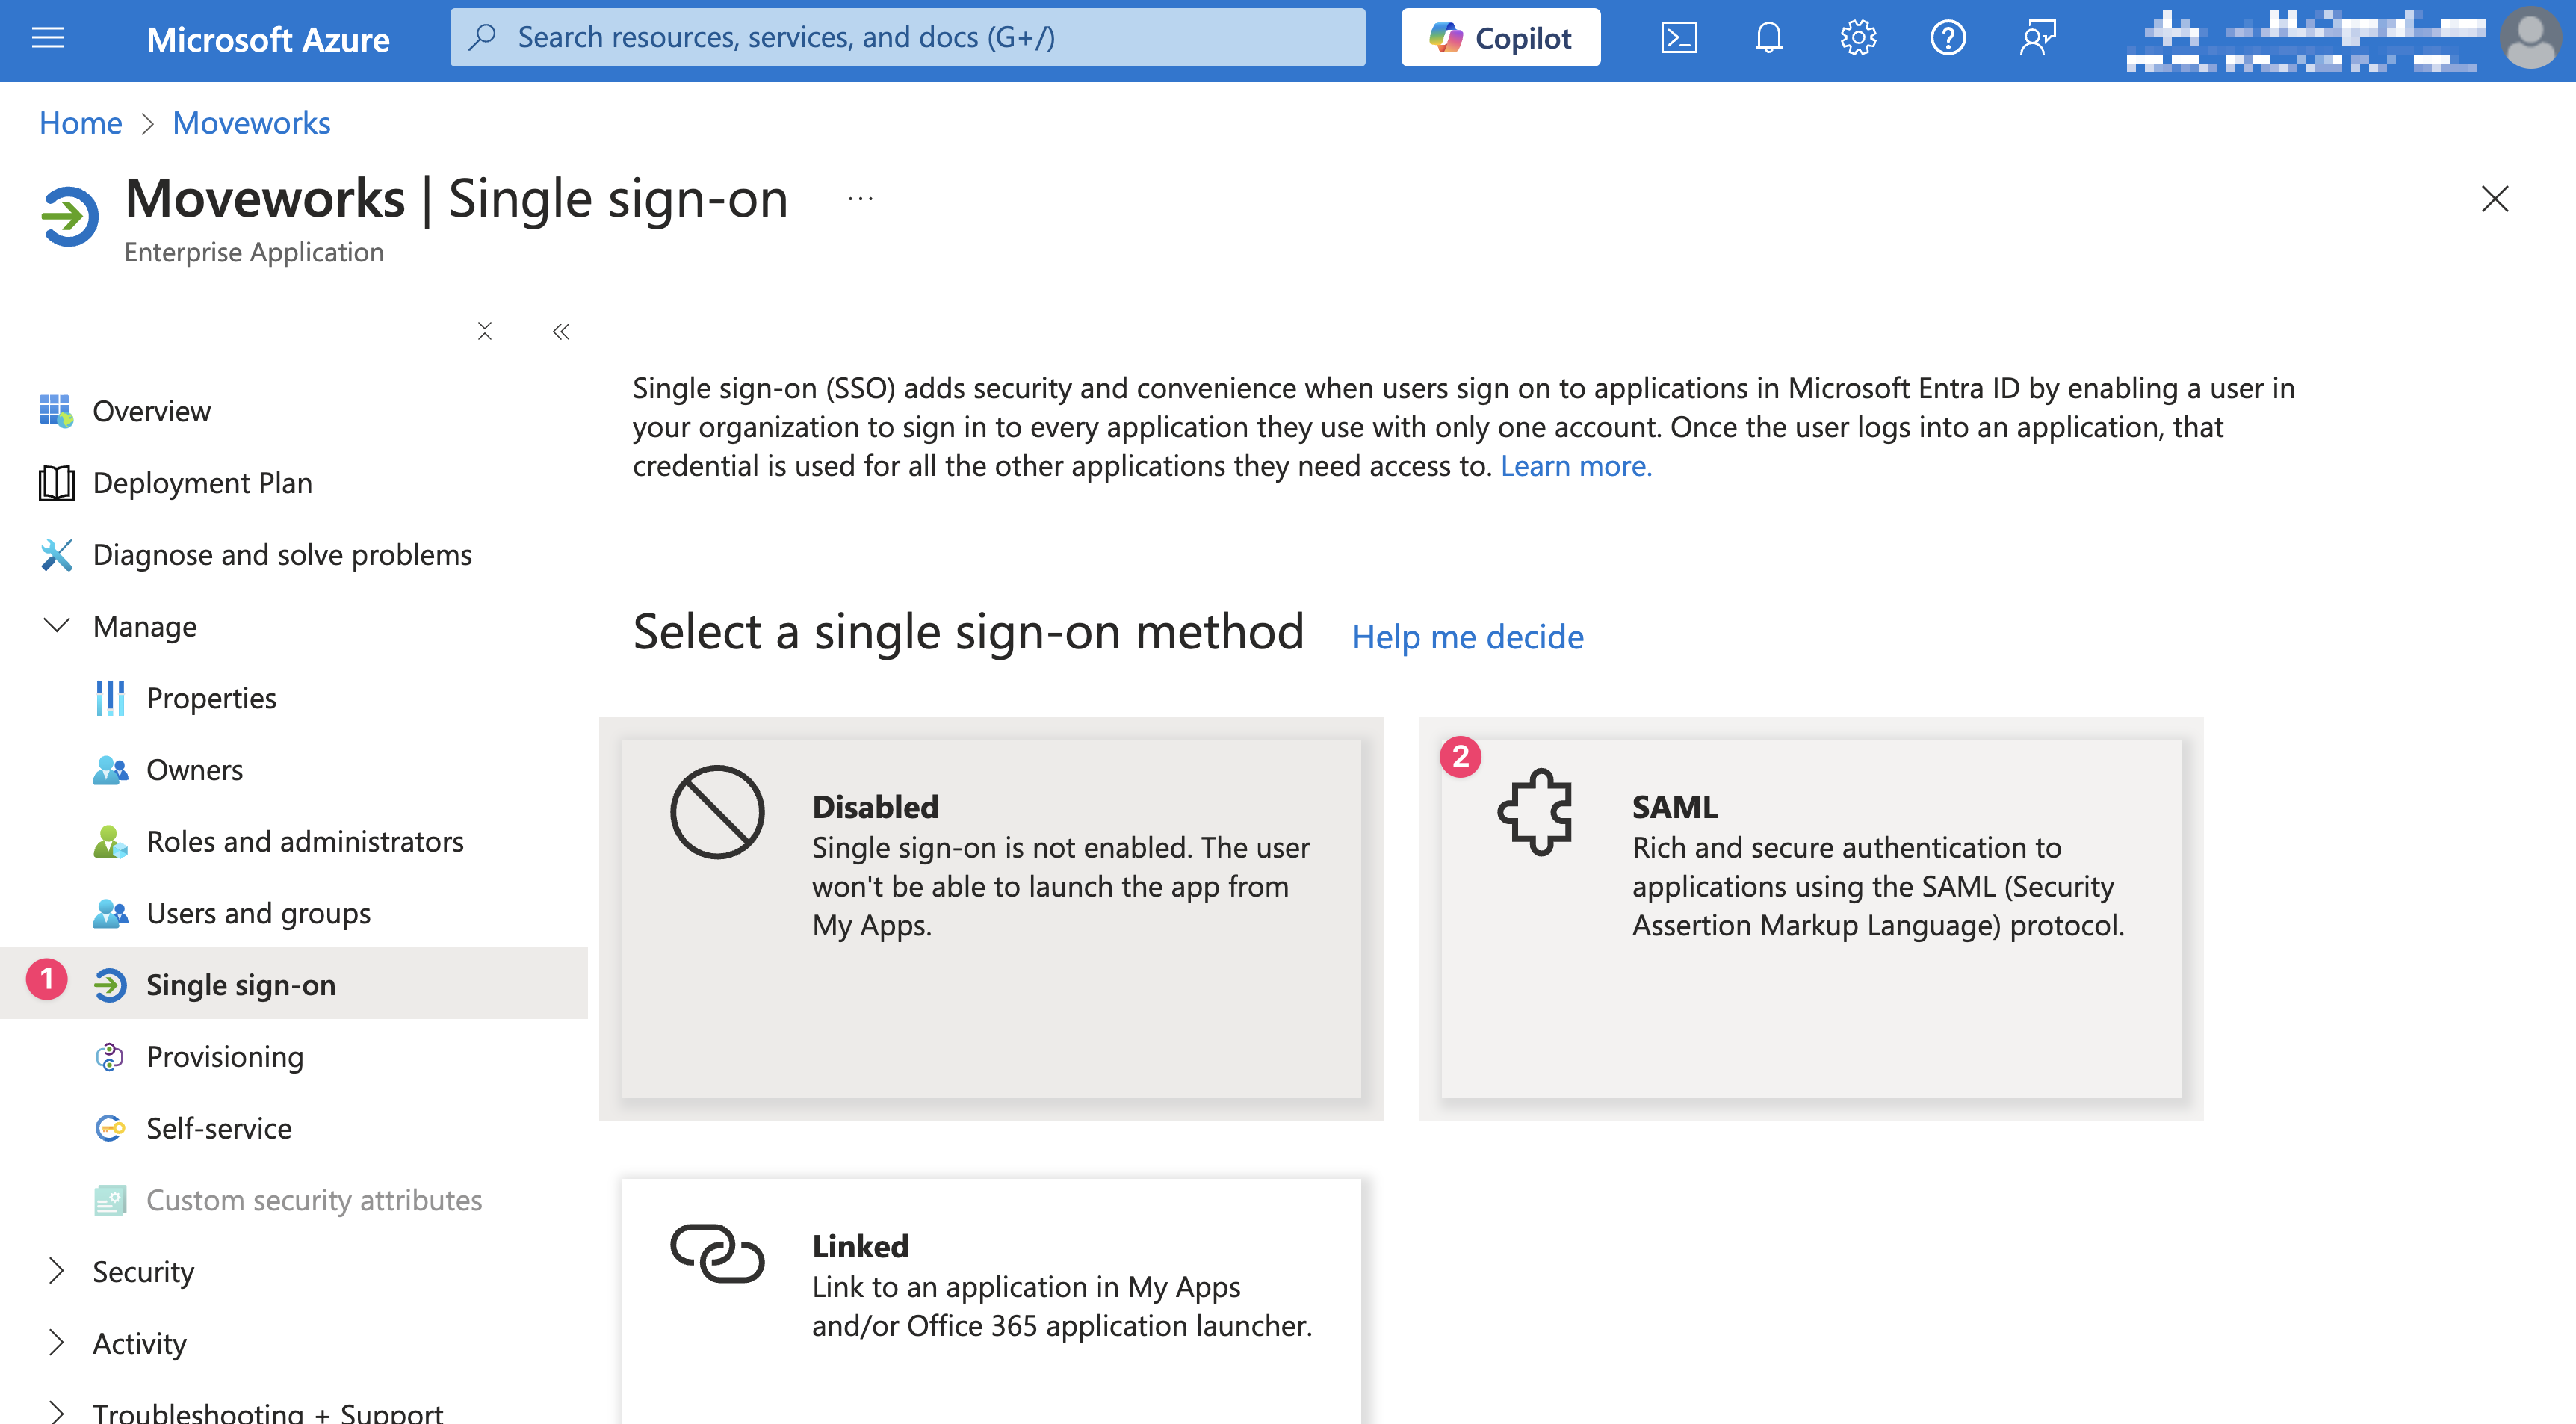
2. Select **Edit** for the **Basic SAML Configuration** (Step 1)
3. Configure your SAML variables using your organization's information and hit **Save**
* **Reply URL**: `https://{{subdomain}}.{{data_center_domain}}/login/sso/saml`
* **Sign-on URL**: `https://{{subdomain}}.{{data_center_domain}}`
* **Relay State**: \{\{customer\_id}}
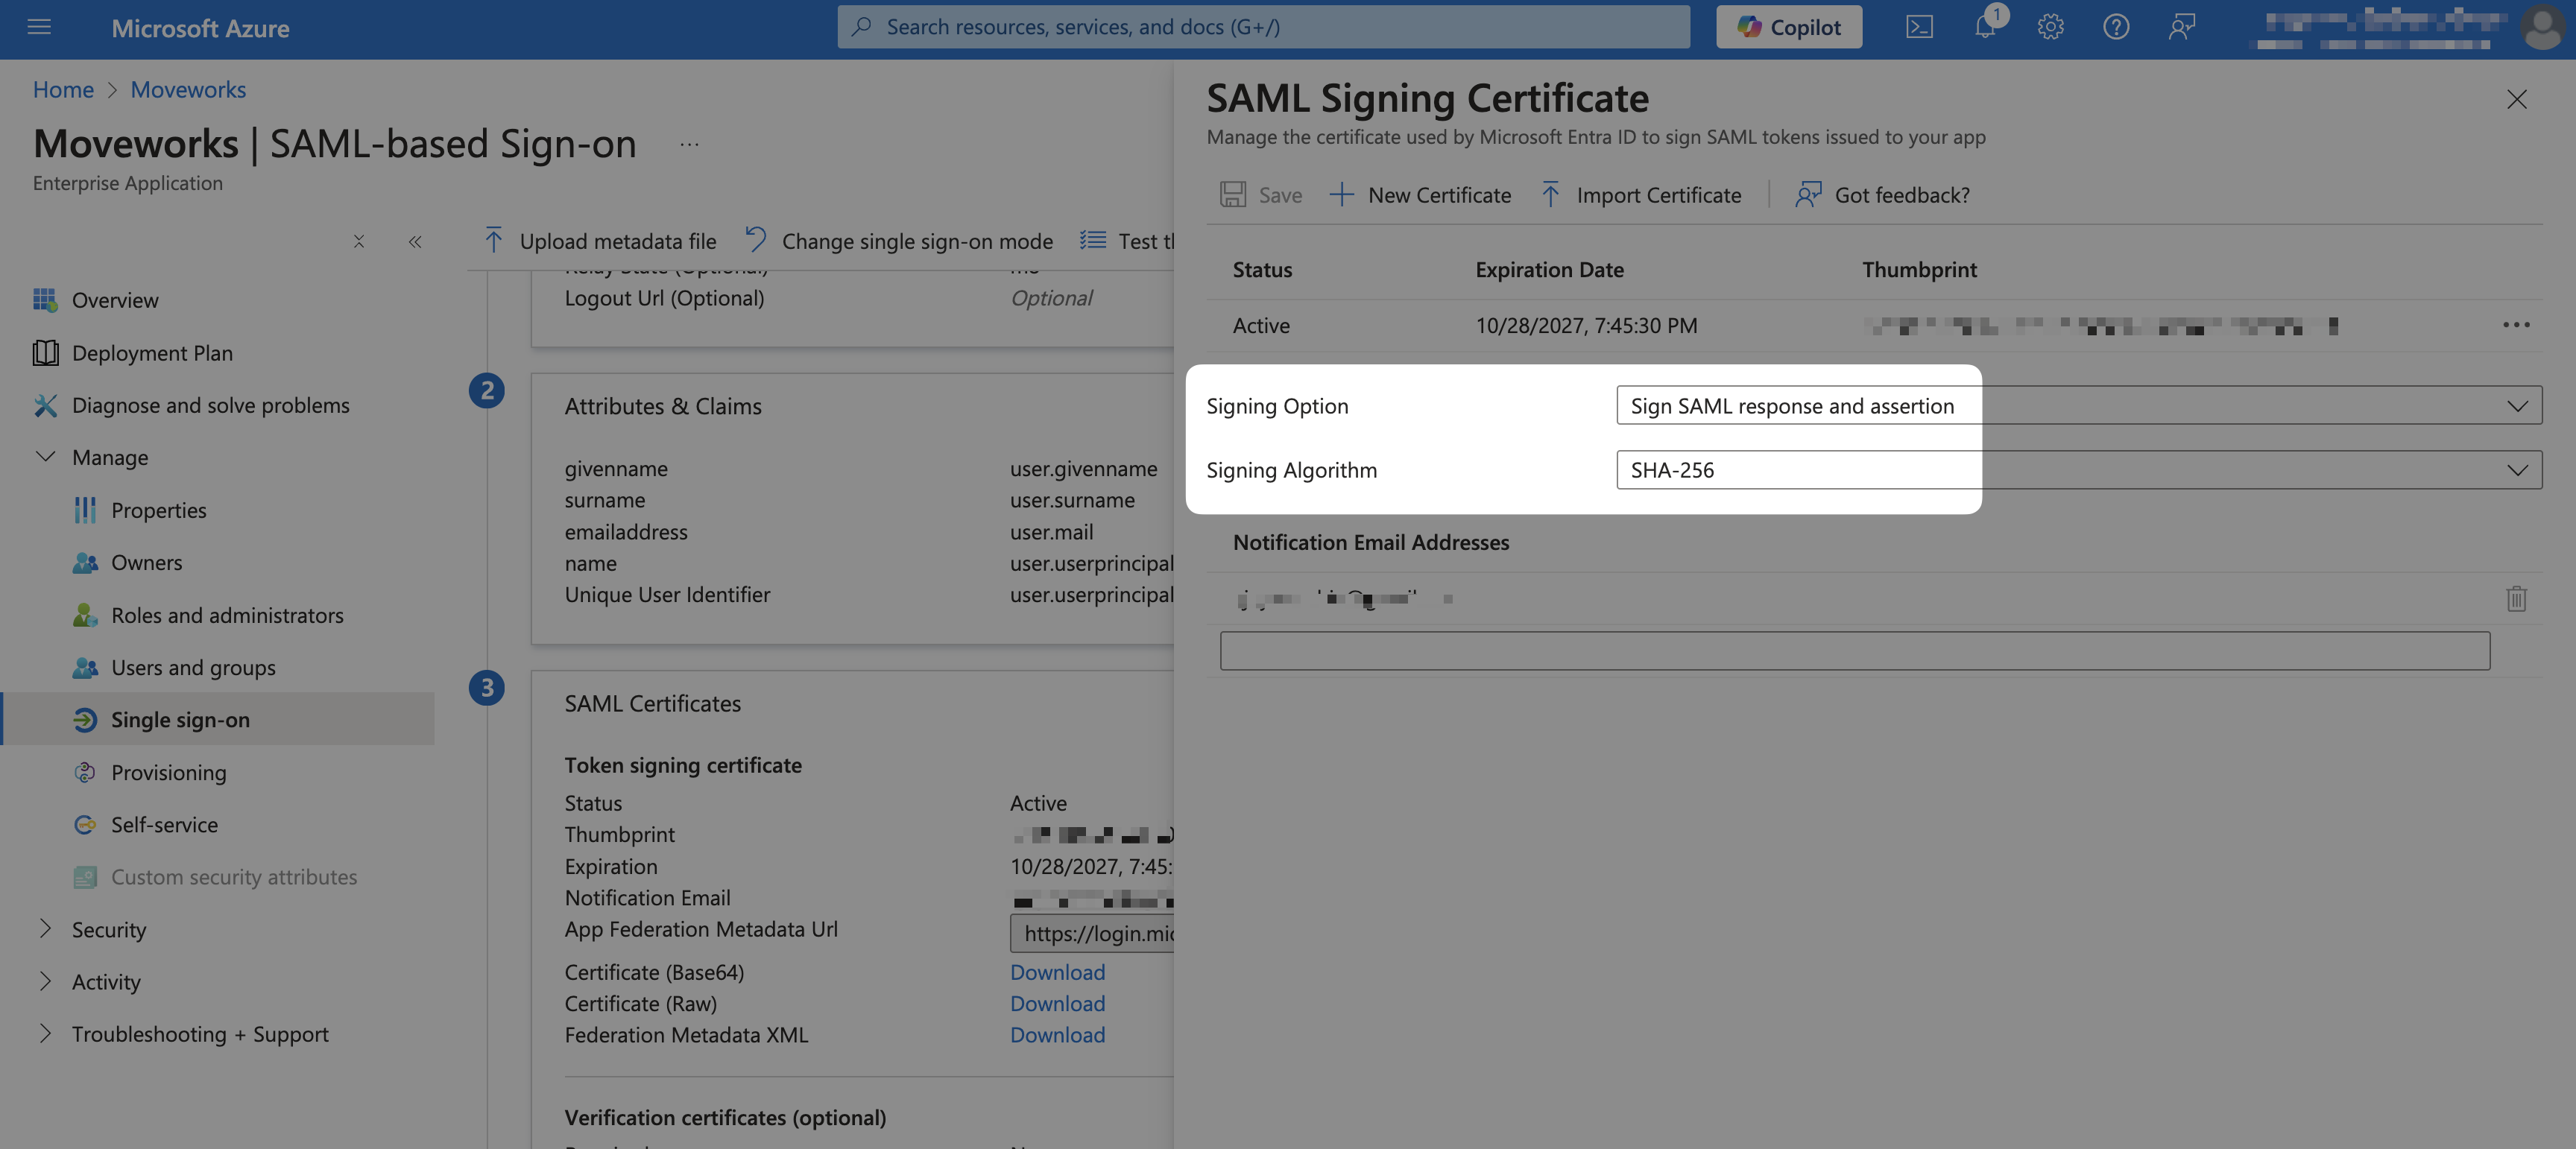
4. Select **Edit** for **SAML Certificates** next to **Token signing certificate**(Step 3)
5. Validate that the following values are set
* **Signing Option**: `Sign SAML response and assertion`
* **Signing Algorithm**: `SHA-256`
## Enable User Access
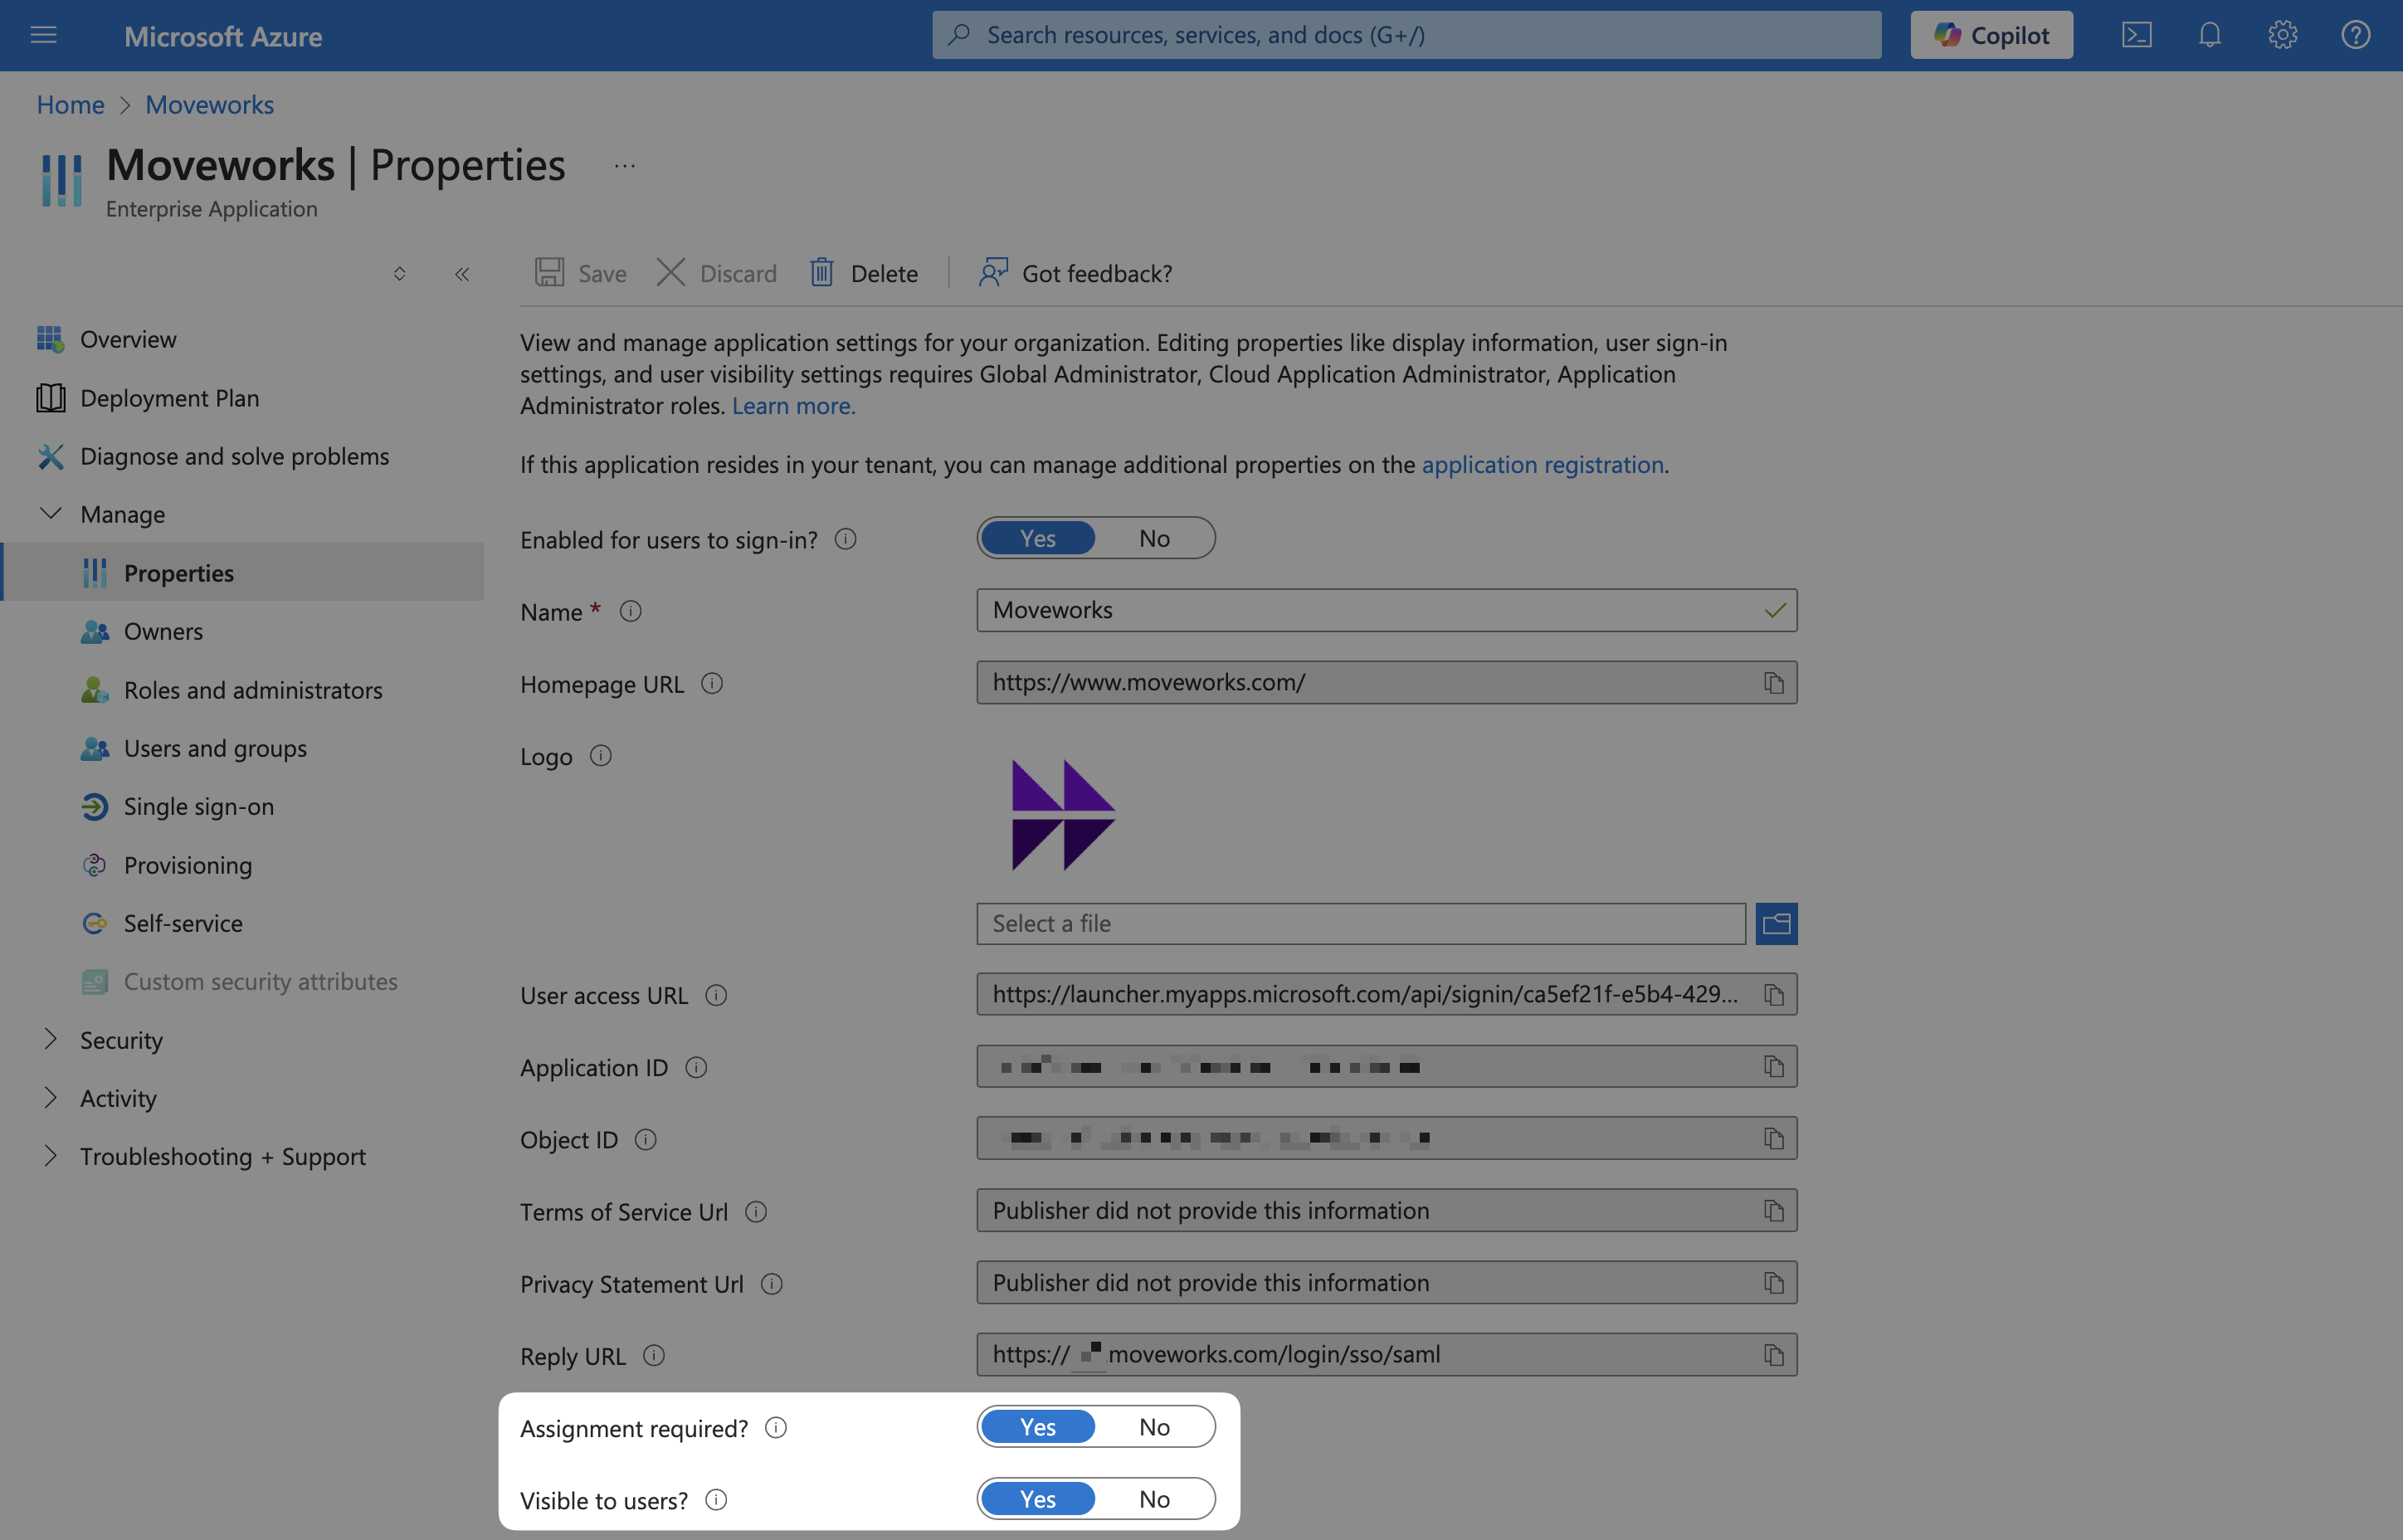
1. Go to **Manage > Properties**
2. Make sure that your app is visible to users.
## Add SAML Configuration in MyMoveworks
1. On the **Single Sign-on** tab, download your X.509 Certification (`x509_certificate`) by clicking on the **Download** link next to **Certificate (Base64)**
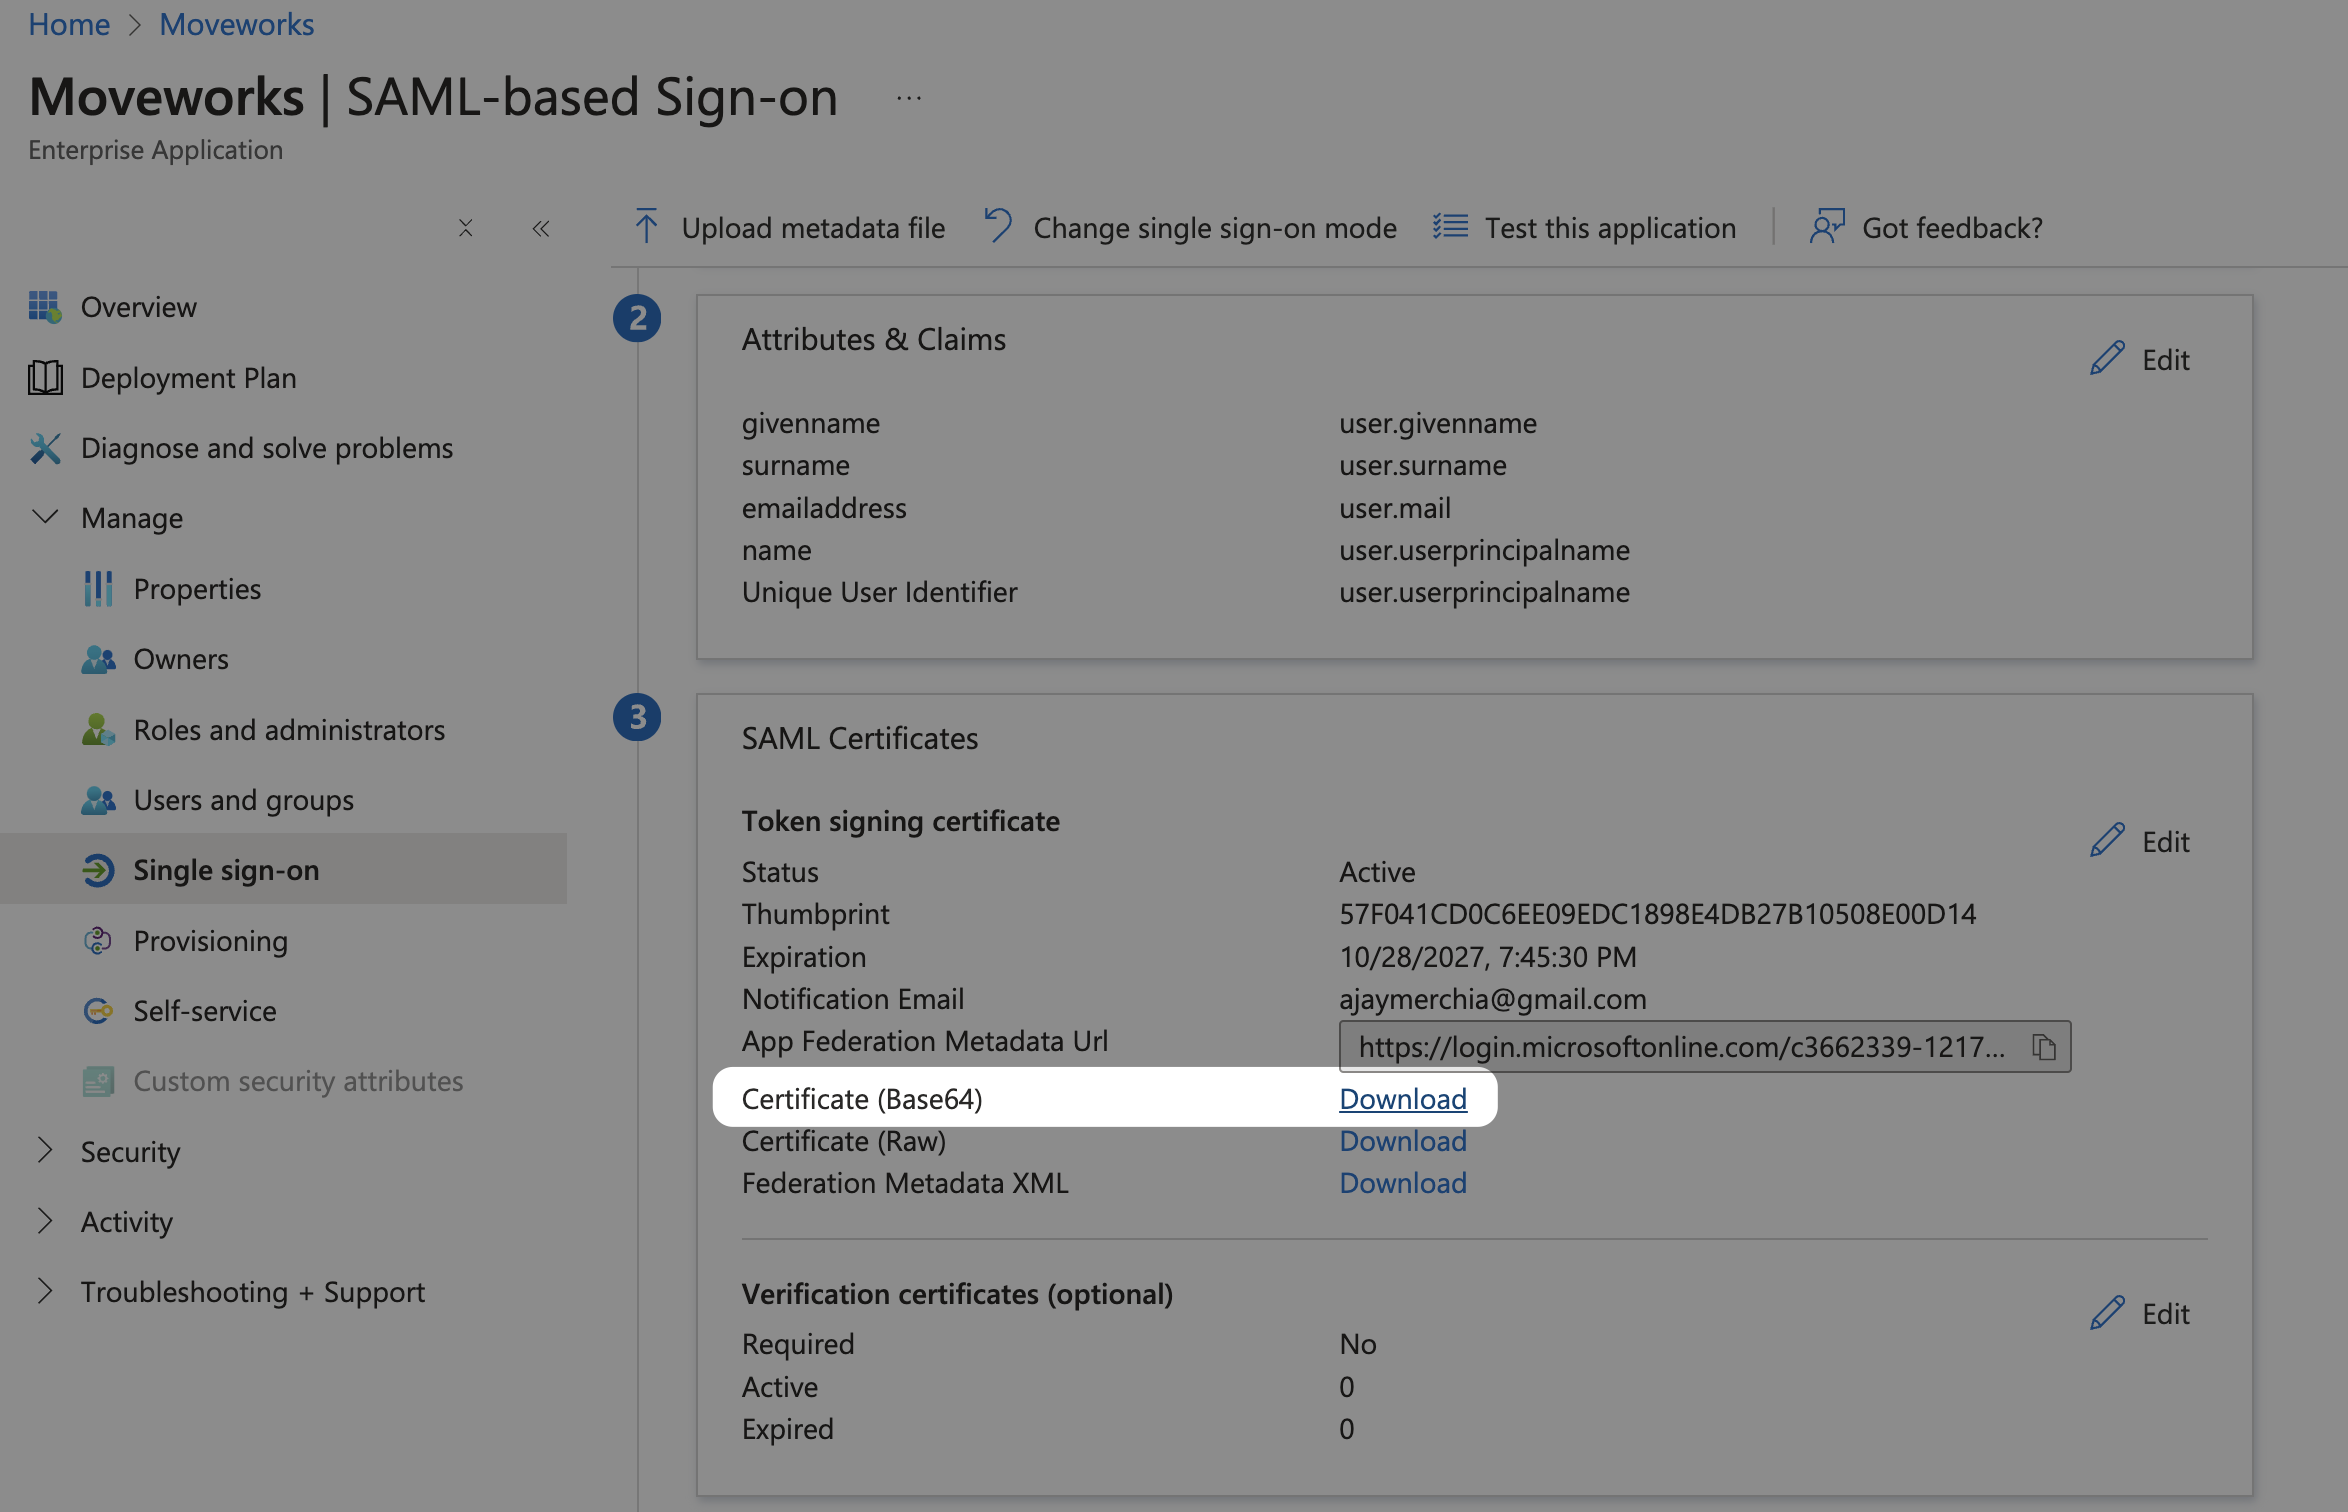
2. Open the downloaded file in a text editor. It should look something like this.
```
-----BEGIN CERTIFICATE-----
****************************************************************************
****************************************************************************
****************************************************************************
****************************************************************************
****************************************************************************
****************************************************************************
****************************************************************************
*********************
-----END CERTIFICATE-----
```
3. From **Step 4** in the **Single Sign-on** tab, copy the remaining SAML variables
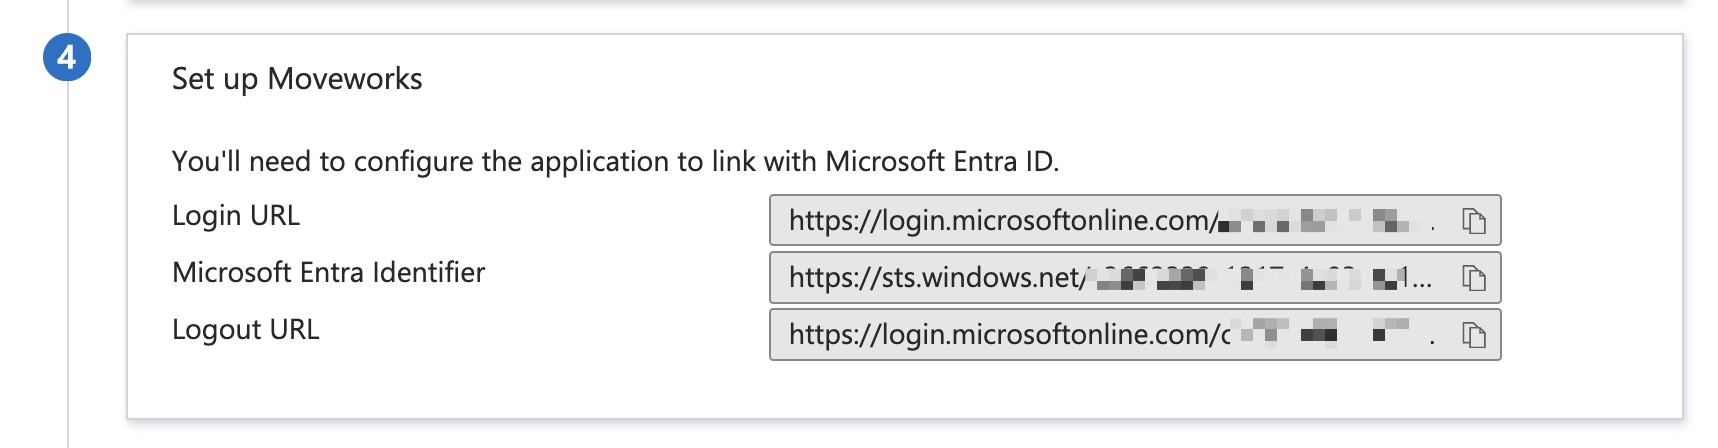
* **Login URL**: this is your `idp_url`
* **Microsoft Entra Identifier**: this is your `idp_issuer`
4. Navigate to SSO Settings in MyMoveworks
5. 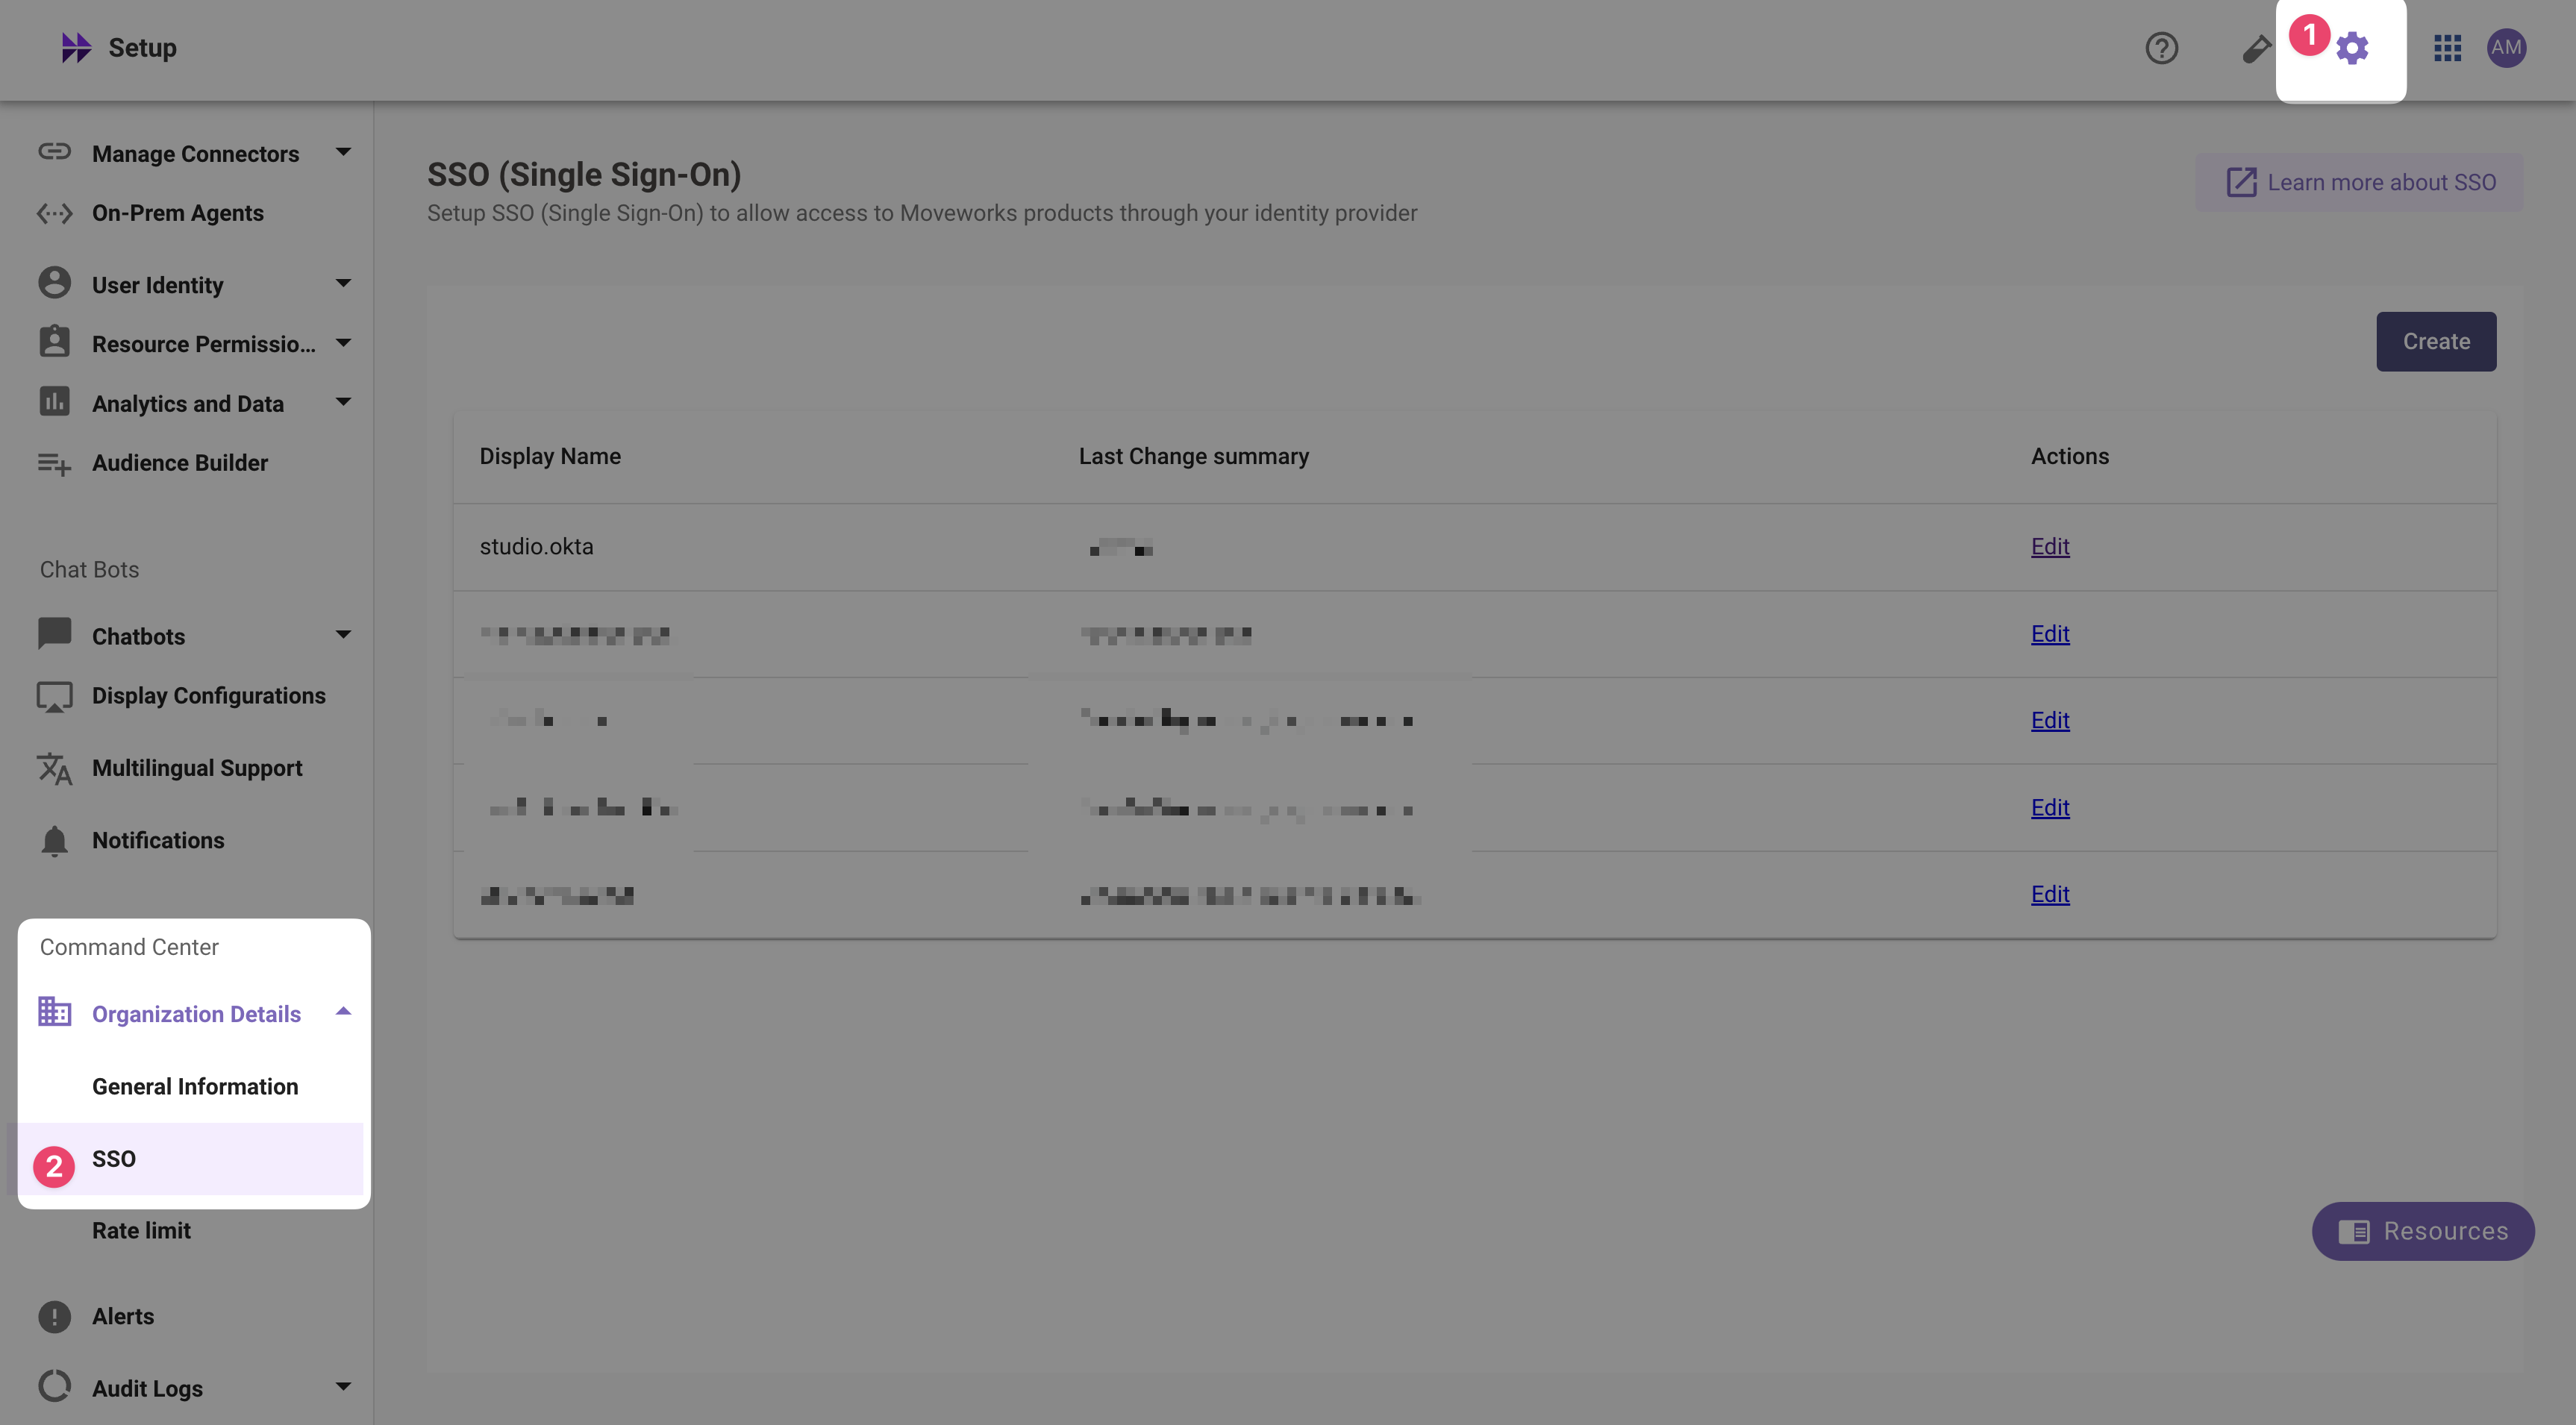
If you already see a `studio` config, edit it. Otherwise, choose **Create**.
6. Add your configuration using the values you've noted above
* **Moveworks Product**: `studio`
* **Select Connector**: `ms_graph`
* **Authentication Protocol**: `SAML`
* **IDP Sign On / SSO URL**: `{{idp_url}}` (From Step 3)
* e.g. `https://login.microsoftonline.com/c3662339-1217-4e03-ac19-15f31311cca7/saml2`
* **IDP Issuer**: `{{idp_issuer}}`(From Step 2)
* e.g. `https://sts.windows.net/c3662339-1217-4e03-ac19-15f31311cca7/`
* **IDP Public Certificate**: `x509_certificate` (From Step 1)
7. Click **Submit**.
8. Wait a few minutes, then attempt to log into your instance at `https://{{subdomain}}.{{data_center_domain}}`