---
title: Configure ServiceNow Live Agent Message Brokering
excerpt: ''
deprecated: false
hidden: false
metadata:
title: ''
description: ''
robots: index
next:
description: ''
---
# Pre-Requisites
* Ensure the required ServiceNow Connector has been created with the necessary permissions. Please refer to the [ServiceNow Access Requirements Doc](/docs/servicenow-access-requirements) for details.
* Ensure access to your tenant's _MyMoveworks_ portal and the _Agent Studio_ module
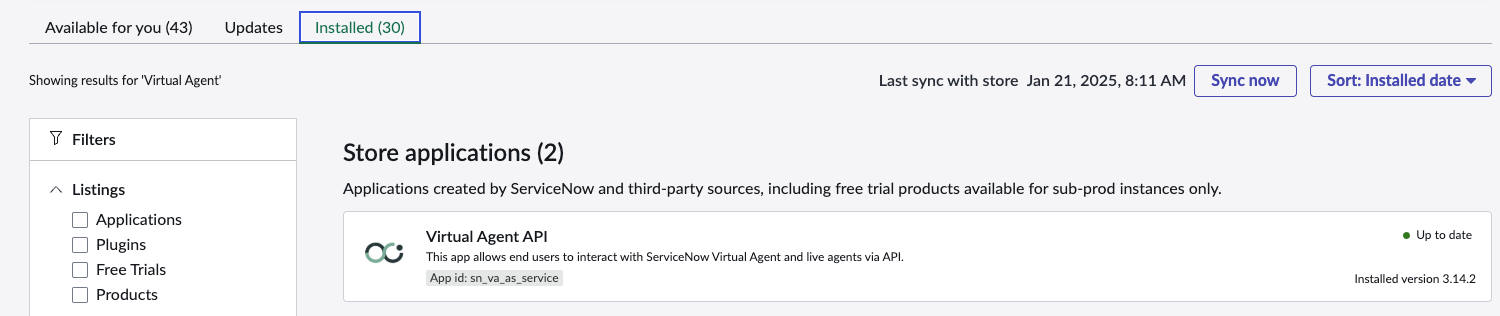
* Verify that the [ServiceNow Virtual Agent APIs](https://www.servicenow.com/docs/bundle/vancouver-servicenow-platform/page/administer/virtual-agent/task/install-virtual-agent-api.html) are available in the ServiceNow instance
* **Note**: If you do not have the Virtual Agent APIs, this integration will not work, and you will need to [follow the steps here](/docs/servicenow-awa) to leverage a Deep Link based approach.
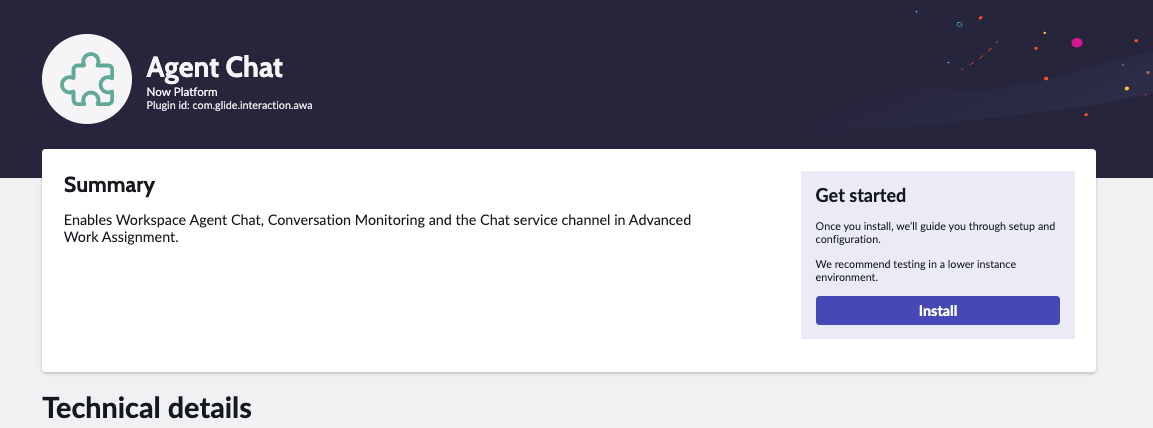
* Verify that the _Agent Chat plugin_ is installed
* For testing, ensure access to the **Service Operations Workspace** module within ServiceNow or ensure that there are agents available within the queue that is being tested
# Configuration Steps
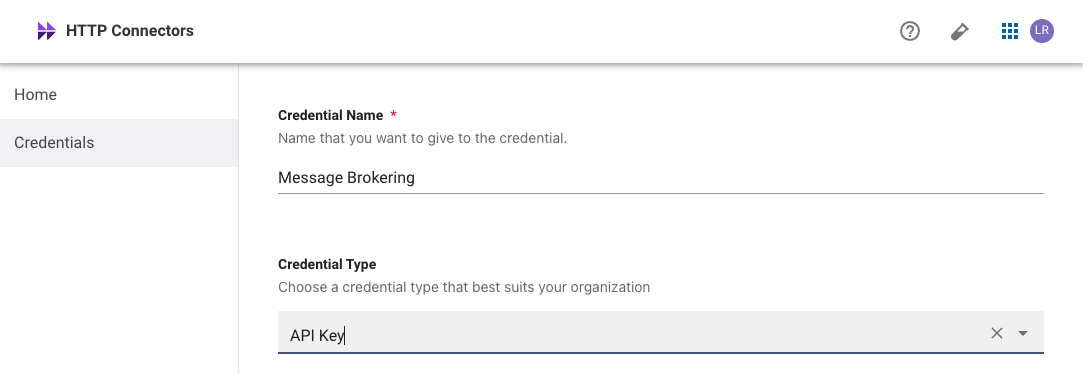
Navigate to the **HTTP Connectors** App within your MyMoveworks portal.
1. Click on **Credentials** and click **Create**
2. Enter a **Credential Name**
3. Choose **API Key**
> ❗️ **WARNING**: When you click _Publish_, please save the API Key in a safe location as this key will not appear again
4. Click **Publish** and save the API Key
Through the Virtual Agent API plugin, the service account will need Virtual Agent permission and **permission to view awa_agent_presence_capacity table.**
The service account will need to have read access to the following tables to be able to view **awa_agent_presence_capacity**:
* awa_agent_presence
* awa_agent_capacity
The service account needs to have the `virtual_agent_admin` role.
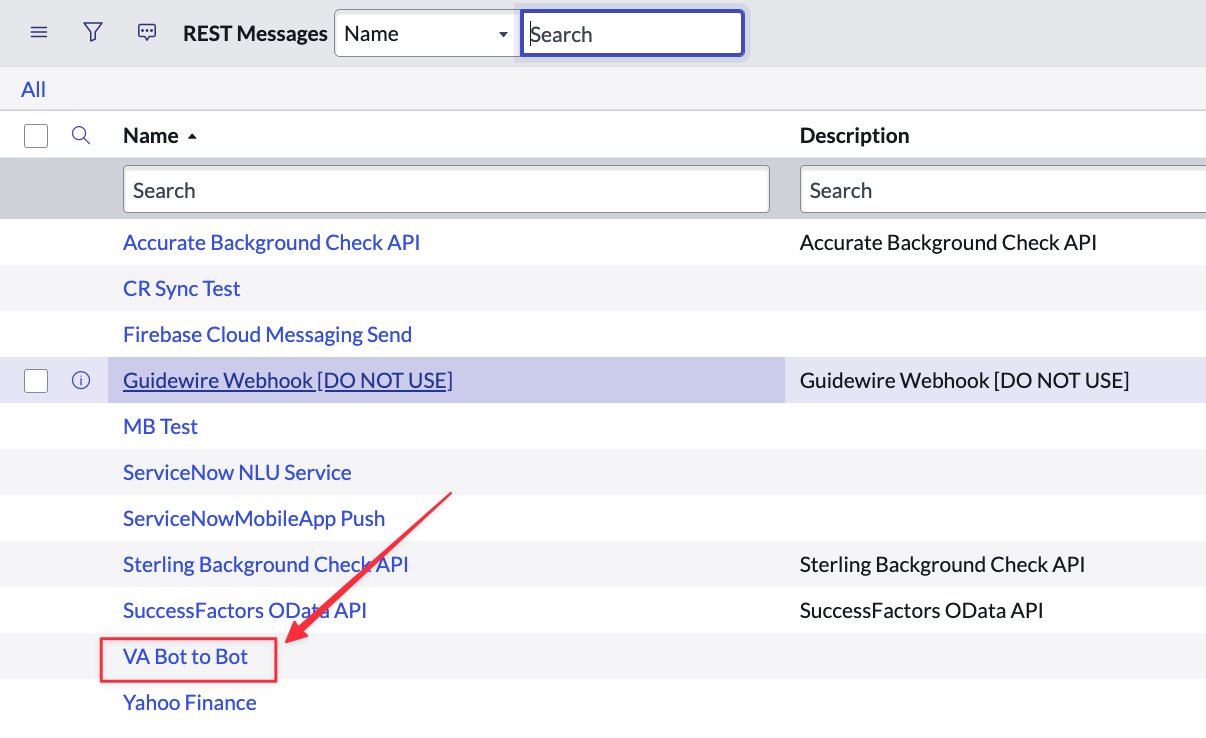
Navigate to **Outbound REST APIs** → **VA Bot to Bot**
1. Set the **VA Bot to Bot record’s REST endpoint** to the correct Rest endpoint based on the Moveworks datacenter being used:
| Data Center | Rest endpoint |
| :----------------------- | :----------------------------------------- |
| United States (default) | `https://api.moveworks.ai` |
| Canada | `https://api.am-ca-central.moveworks.ai` |
| EU | `https://api.am-eu-central.moveworks.ai` |
| Australia / Asia Pacific | `https://api.am-ap-southeast.moveworks.ai` |
| Government Secure Cloud | `https://api.moveworksgov.ai` |

2. As part of **VA Bot to Bot record you will see a POST record. Edit the associated POST record**, and set the endpoint based on the Moveworks datacenter being used:
| Data Center | Rest endpoint |
| :----------------------- | :------------------------------------------------------------------------------------- |
| United States (default) | `https://api.moveworks.ai/rest/LiveAgentService/SnowSendMessageToUser` |
| Canada | `https://api.am-ca-central.moveworks.ai/rest/LiveAgentService/SnowSendMessageToUser` |
| EU | `https://api.am-eu-central.moveworks.ai/rest/LiveAgentService/SnowSendMessageToUser` |
| Australia / Asia Pacific | `https://api.am-ap-southeast.moveworks.ai/rest/LiveAgentService/SnowSendMessageToUser` |
| Government Secure Cloud | `https://api.moveworksgov.ai/rest/LiveAgentService/SnowSendMessageToUser` |

3. In the **POST Record** you will also need to set the **auth profile to a newly created auth profile for Moveworks** — we will need to create a new auth profile by following the steps below:
1. Set Authentication type to **Basic**
2. Set the `username` to `moveworks` — this can be customized to anything else if required, but you will need this for the Moveworks configuration.
3. Set password to the value of the **API key generated in Agent Studio from Step 1**.

Next, verify the token.
1. Navigate to `{snow_url}/token_verification_list.do` and create a new record by clicking new on the top right.
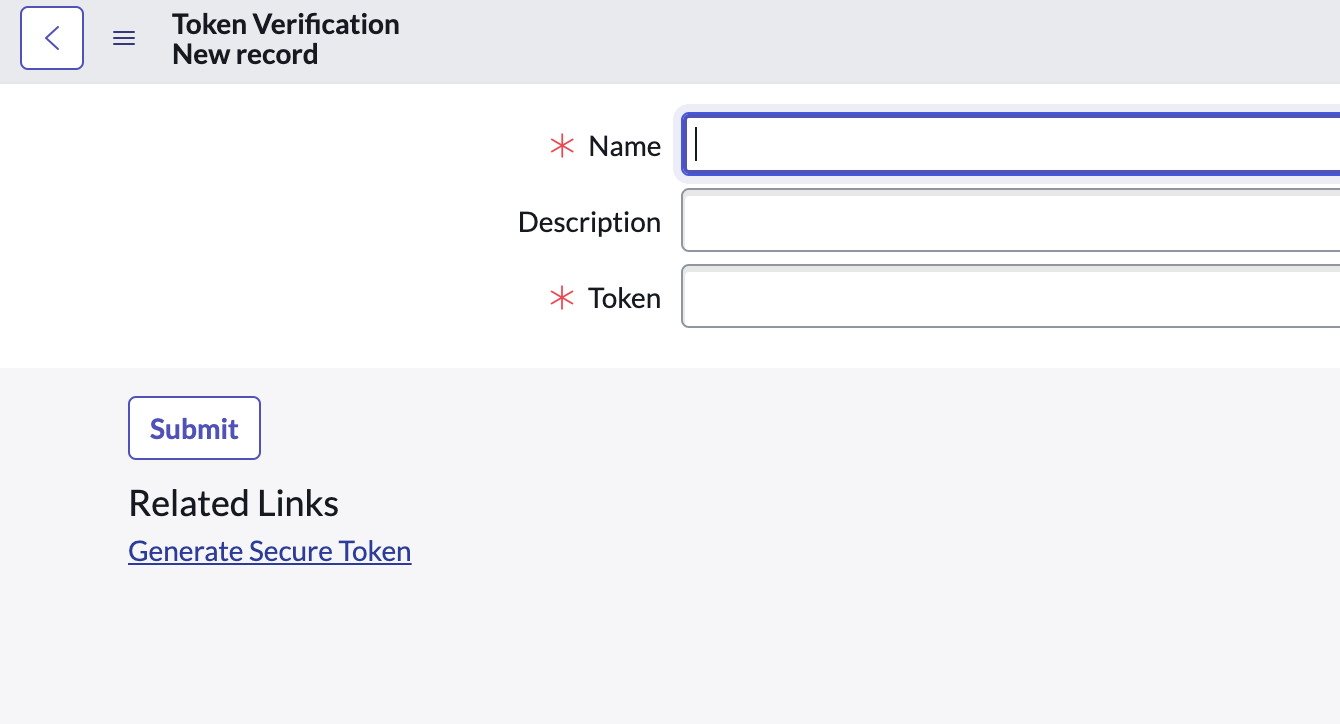
> ❗️ In the next step, save the generated token in a safe location as it will be needed later in the guide
2. Create a password here and store it safely. This will be needed later in the guide. You can give any name you’d like to the token. We recommend `Moveworks Live Agent Message Brokering - {DOMAIN}` e.g: **Moveworks Live Agent Message Brokering - IT , Moveworks Live Agent Message Brokering - HR**, etc.
Next, configure the message auth
3. Navigate to `{snow_url}/message_auth_list.do` and create a new record.
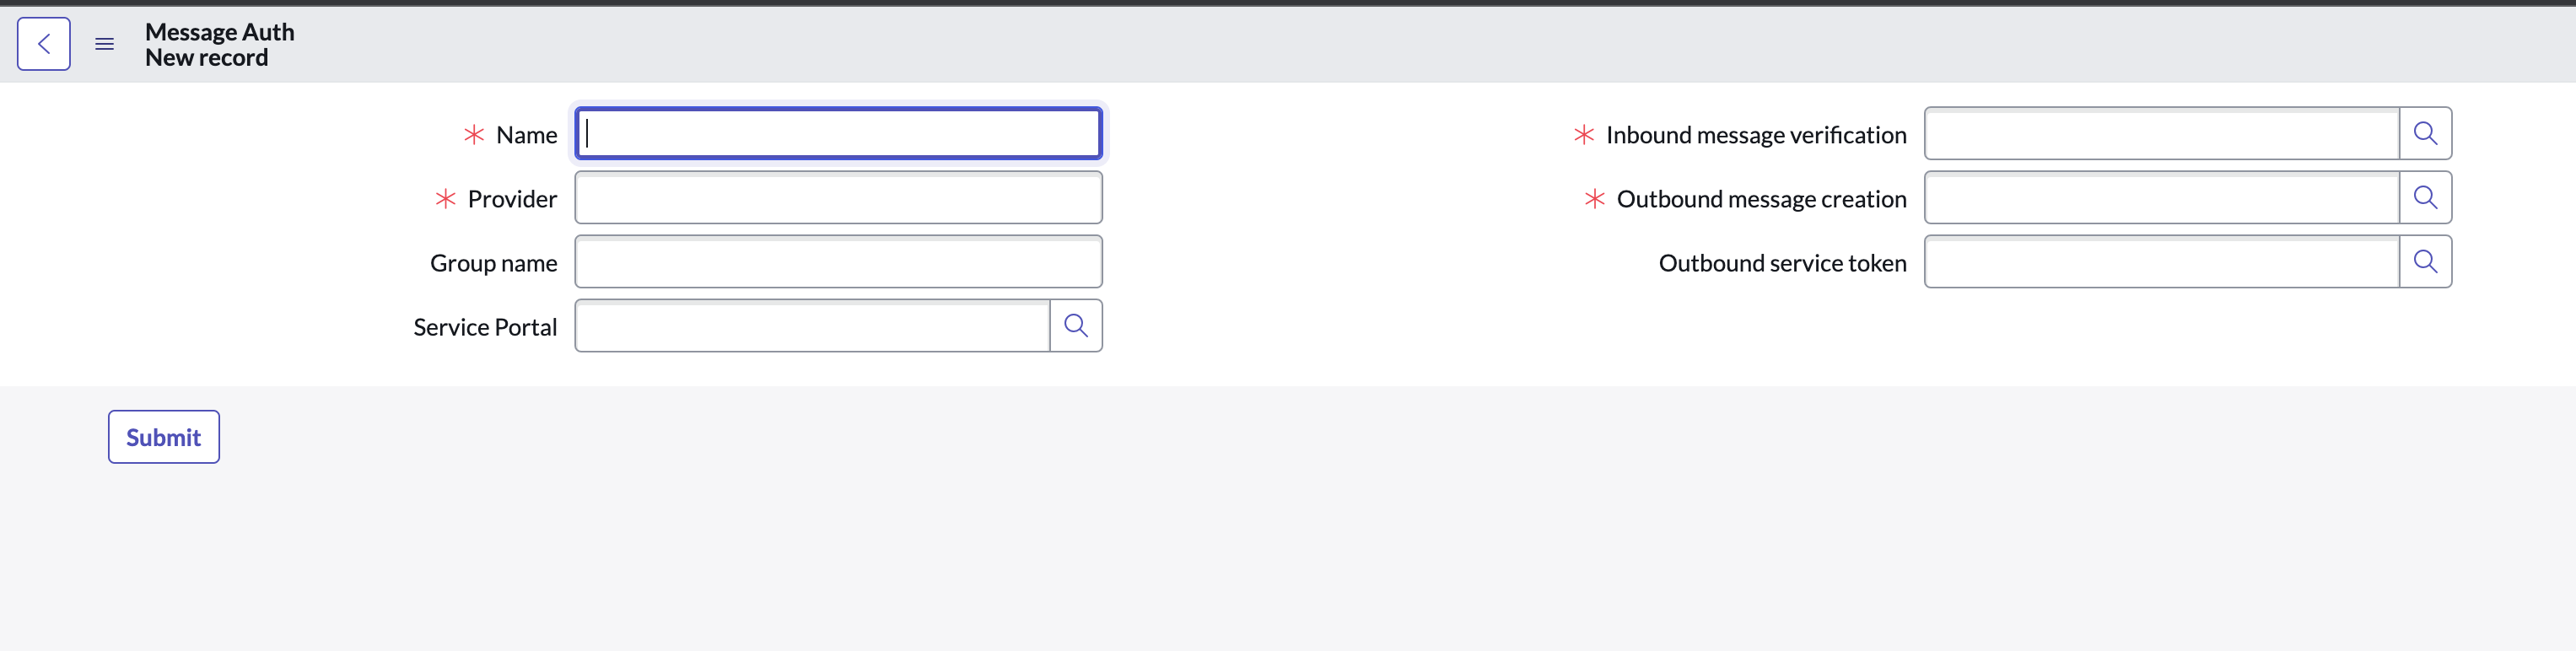
4. Add the token verification you created in the previous step under **Inbound message verification**.
5. Although **Outbound message creation** is not yet supported by VA API, it is recommended that you add the same token verification here as it is required field.
6. **Name** and **Provider** can be named as desired.
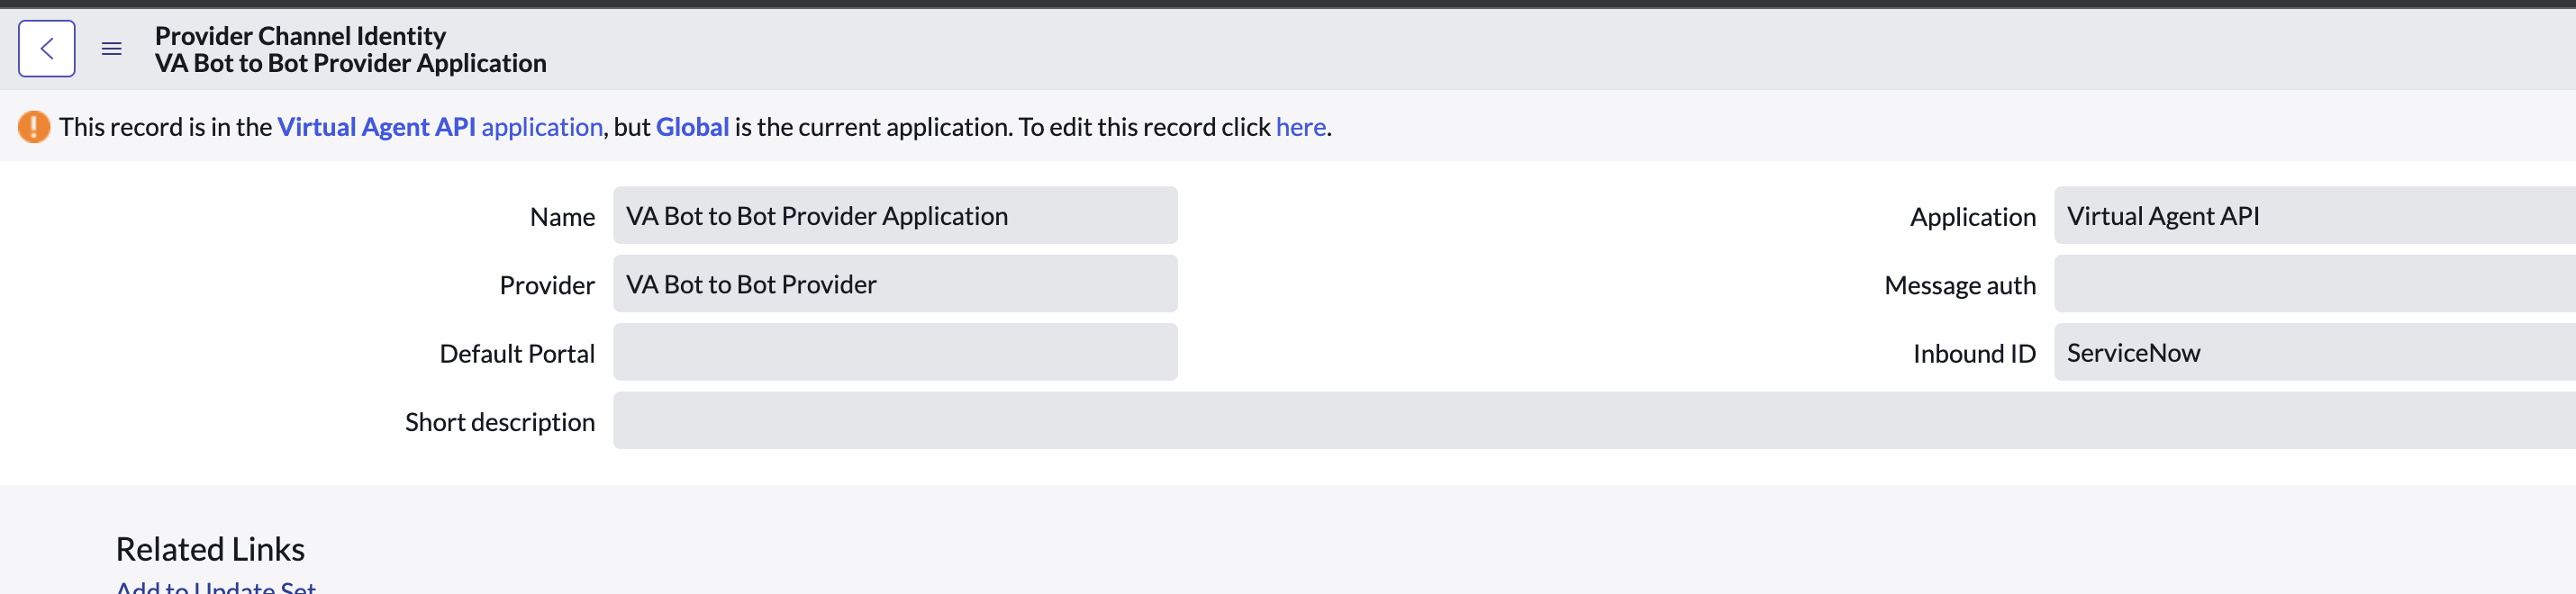
Finally, add the above message auth to **VA Bot to Bot Provider Application**
7. Navigate to `{snow_url}/sys_cs_provider_application_list.do` . You should see **VA Bot to Bot Provider Application** if the VA API application was successfully installed.
8. Open this record and under message auth, add the message auth you configured in the previous instruction.
To enable file attachments from the user to the agent, we need to allowlist the ServiceNow domain.
1. Navigate to `{snow_url}/sys_cs_provider_application_list.do`, you should be in the VIRTUAL AGENT API application scope to be able to make changes here.
2. Click on the gear icon at the top right and add trusted media domains to the list of selected columns.

3. Double click on **Trusted media domains** and add “service-now.com” as pictured below and save.

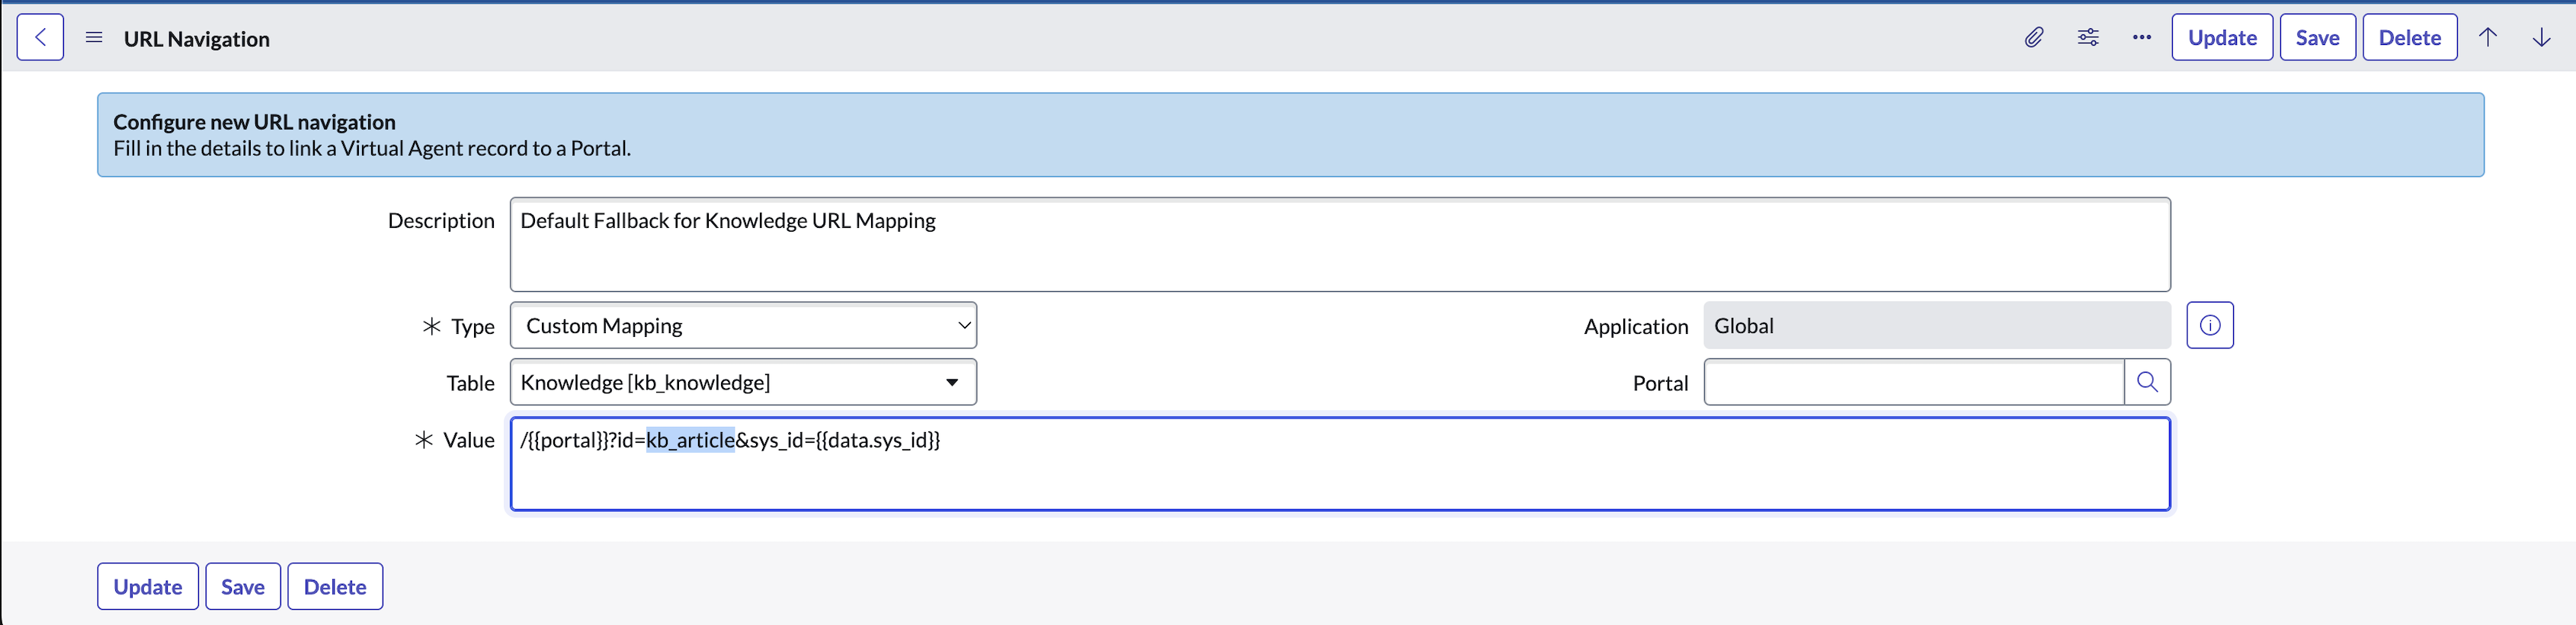
Next, update the Service Portal url for KB and Ticket links.
1. Navigate to `sys_properties_list.do` and update the `com.glide.cs.url_redirect.default.portal` system property with the correct service portal name (if using a service portal other than the default `/sp`)

2. Navigate to `sys_cs_portal_url_mapping_list.do` and update the link for KBs if you use a custom url.
The ServiceNow configurations are now complete, so navigate to your MyMoveworks portal to complete the rest of the steps within Moveworks Setup. First, set up the **Live Agent Handoff** settings.
1. Create a **Live Agent Handoff** configuration and set **Configuration** to **Agent Broker Handoff** (or equivalent).
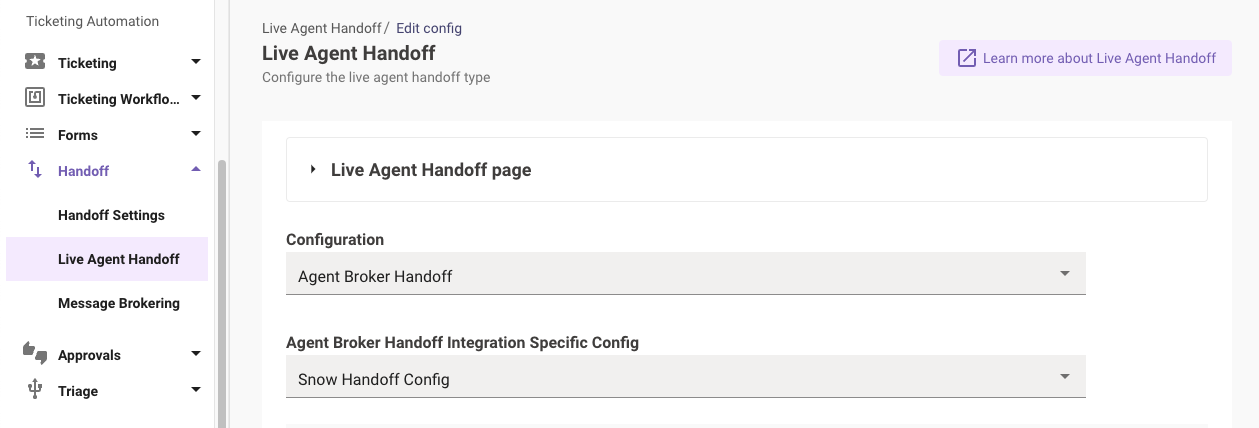
2. Click the **Live Agent Handoff** page dropdown:
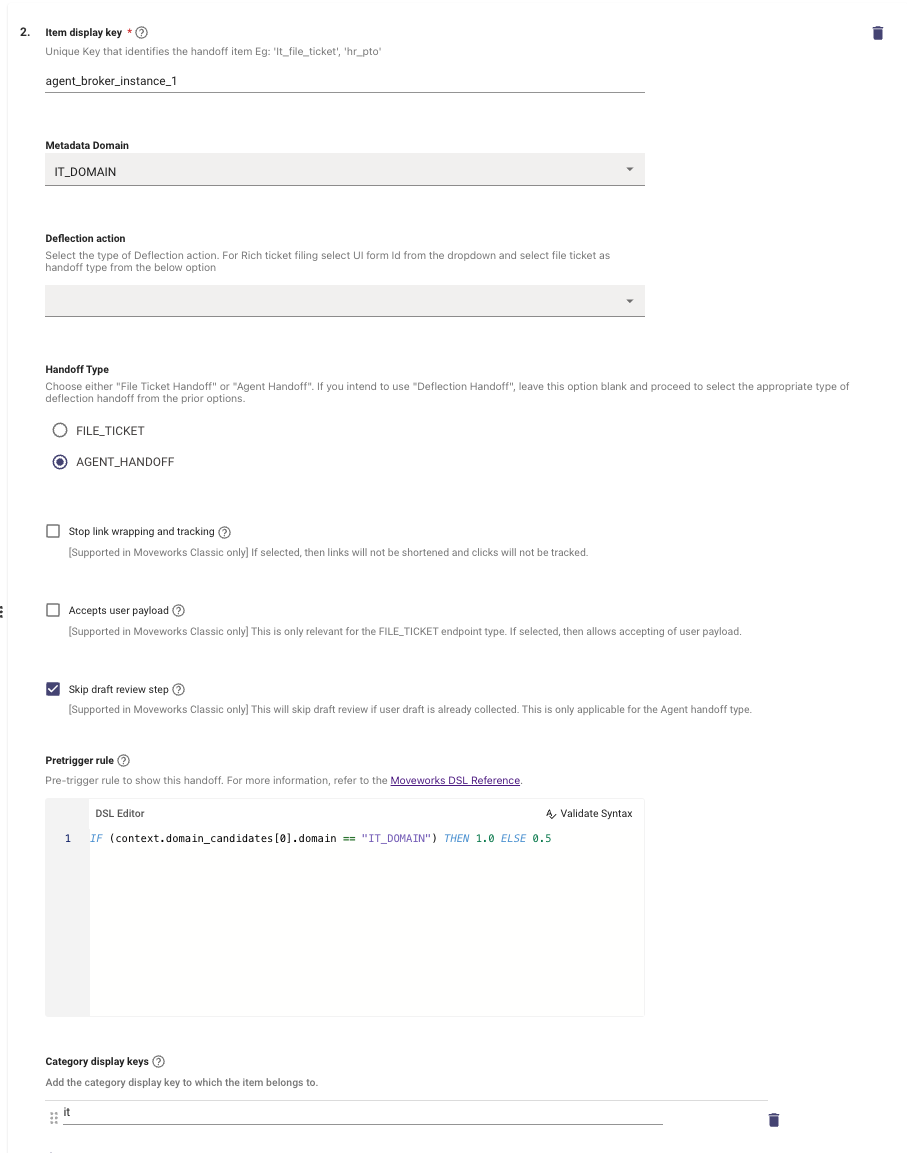
3. Set the **Handoff Identifier** (ex. _agent_broker_instance_1_)

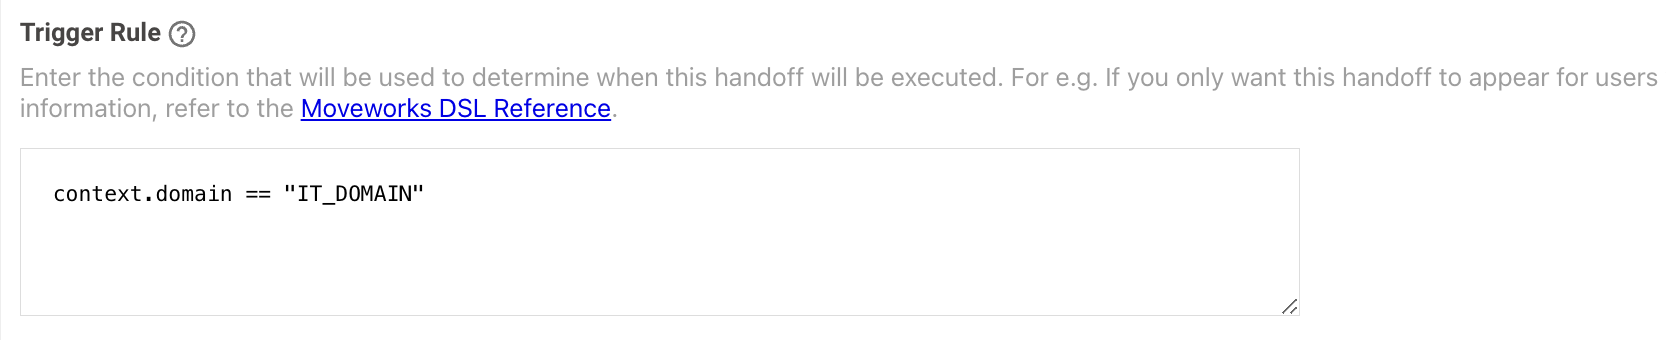
4. Set the **Trigger Rule** based on a specific domain (e.g context.domain == "IT_DOMAIN")
5. **Snow Handoff Config Context Bender** is how we transform our payload to adhere to what is expected by the customers’ ServiceNow instance. It is suggested to have the following as default:
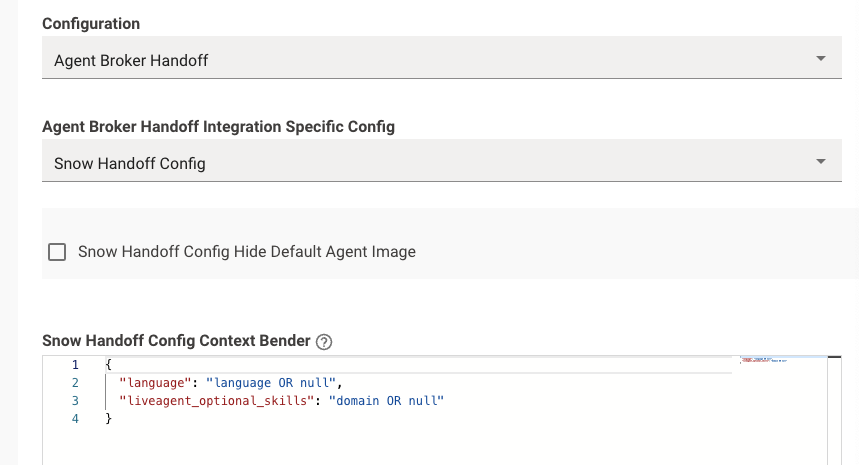
```json json
{
"language": "language OR null",
"liveagent_optional_skills": "domain OR null"
}
```
6. Set the **Integration id** to the connector that will be used as the live agent chat platform. This is needed as some organizations might want to use ServiceNow for IT Live Agent Chat and AWS Connect for HR Live Agent Chat.

7. Set **Enable Live Agent** to **TRUE**
Next, configure the **Smart Handoff** settings with the Live Agent settings that were configured above.
8. Navigate to to **Handoff** and then **Handoff Settings** and add a new Item display key using the details in the screenshot below
```json
IF (context.domain_candidates[0].domain == "IT_DOMAIN") THEN 1.0 ELSE 0.5
```
9. Make sure that the Handoff Identifier (ex. agent_broker_instance_1) is set in **Display Configurations** > **Handoff**. If this is not set, the Start agent chat button will not appear. This **Value** field is what users will see when selecting this handoff option so ensure that this is user friendly.

Finally, update the ServiceNow connector with the token from Step 4.
10. Navigate to **Connectors** and click on **Built-in Connectors**
11. Find the ServiceNow connector in question and click **Edit**
12. Add the token from Step 4 to the **ServiceNow Virtual Agent API Token**
13. Click **Save**

You have completed the configuration :white_check_mark:
# Validation
Next, follow the steps below to verify the feature is working.
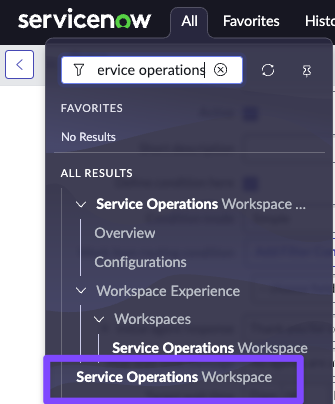
In ServiceNow, search for **Service Operations Workspace** > **Service Operations Workspace**
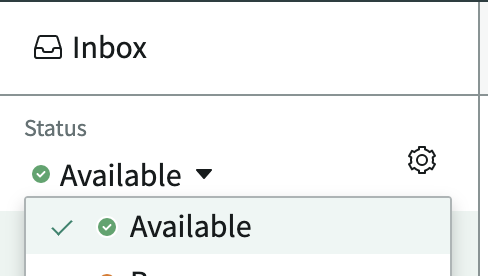
Find your inbox and set yourself to **Available**
**Make sure at least one agent is`Available` in Agent Workspace**.
The “start agent chat” button will only show up in the Moveworks AI Assistant when there are available agents.
Now, trigger the Live Agent Message brokering via the Moveworks AI Assistant.
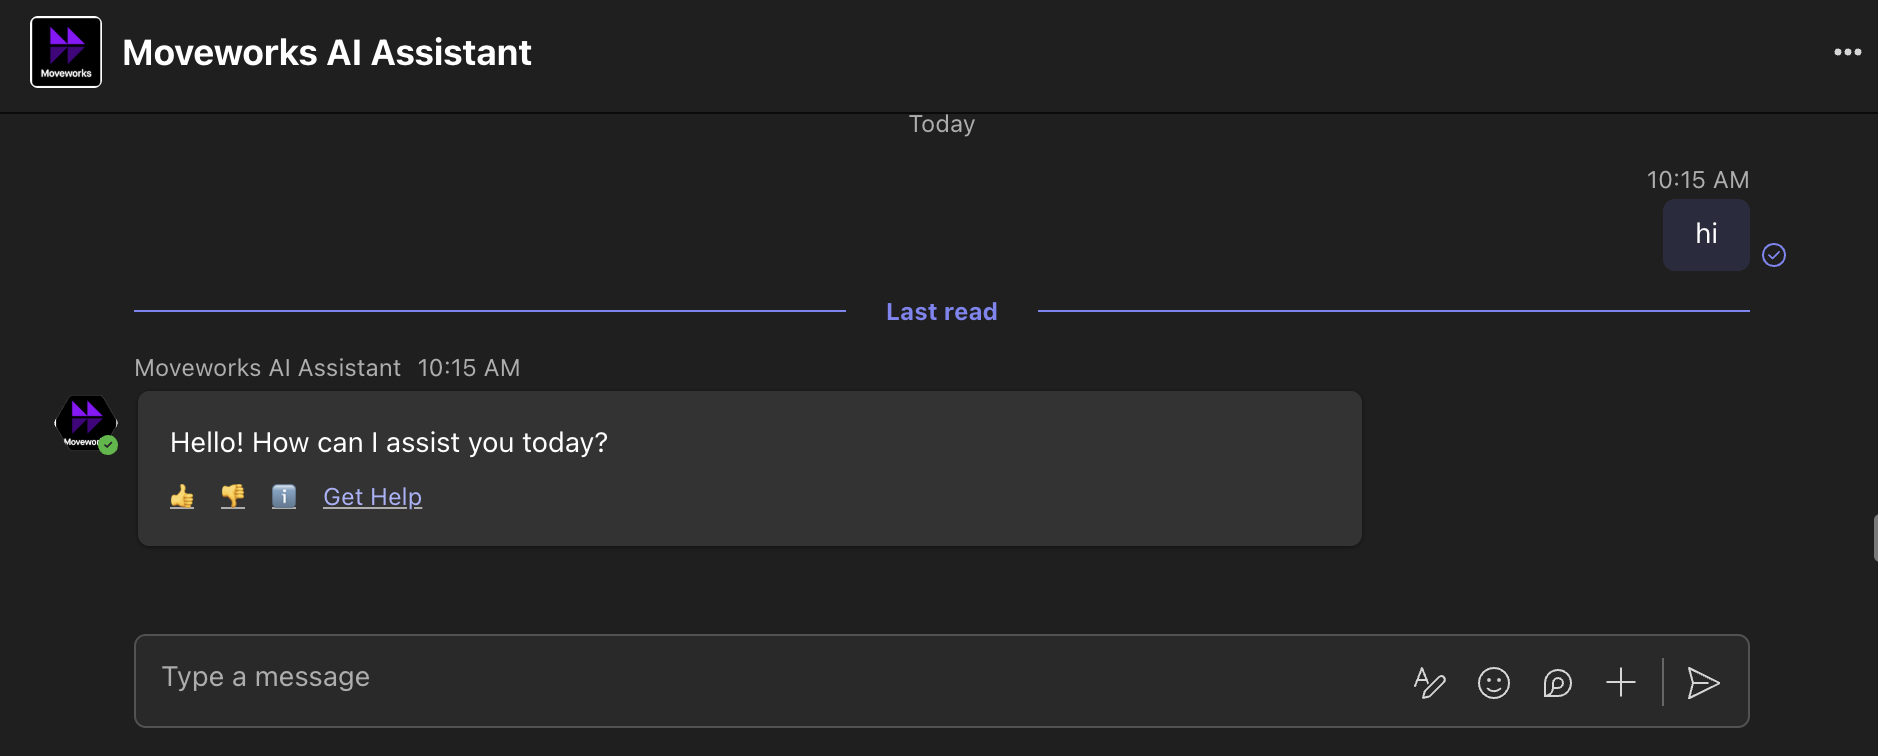
1. Access your AI Assistant within Teams, Slack, service portal, etc.
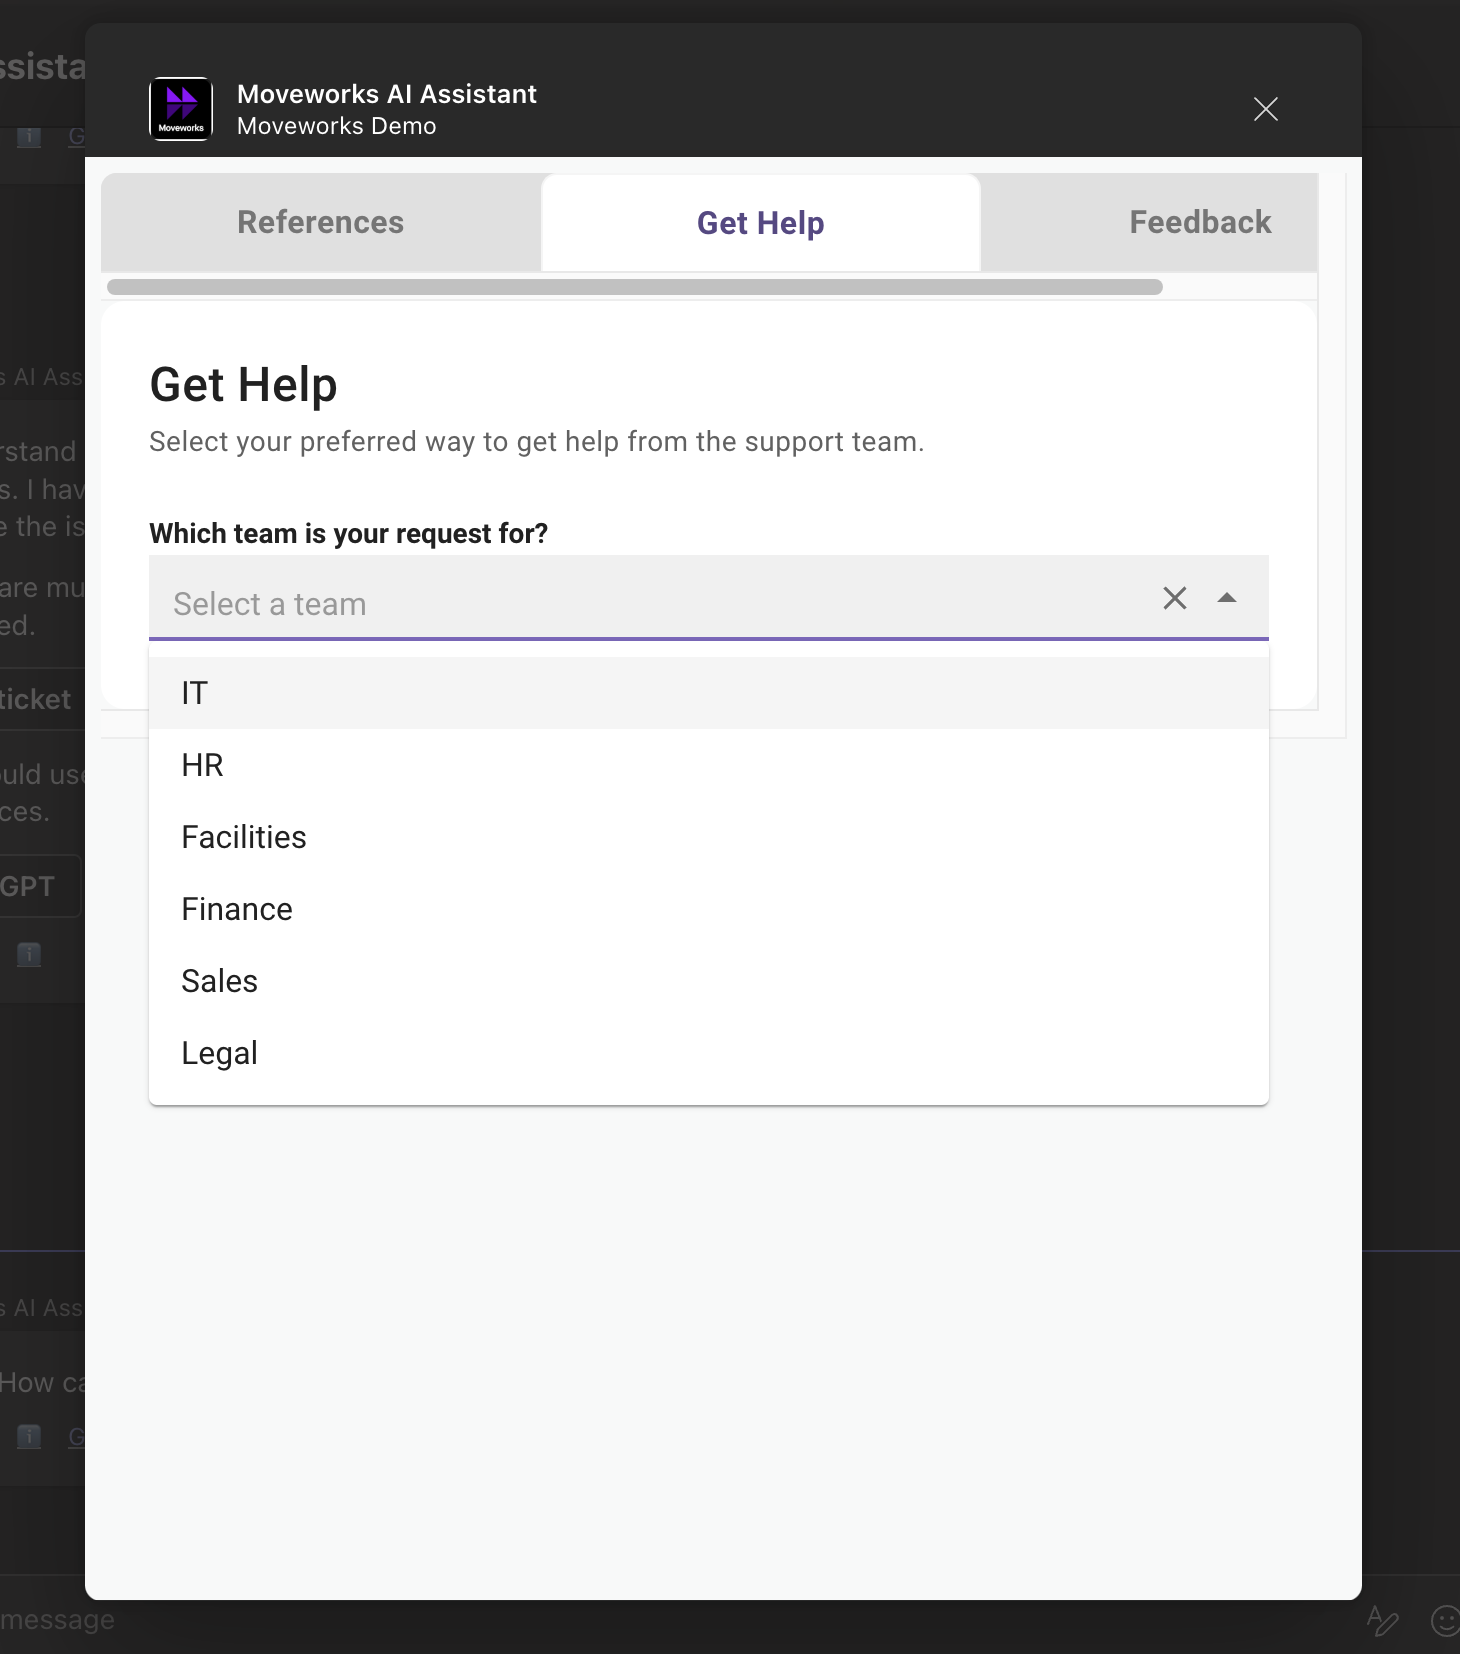
2. Start a conversation with the AI Assistant and click the **Get Help** link
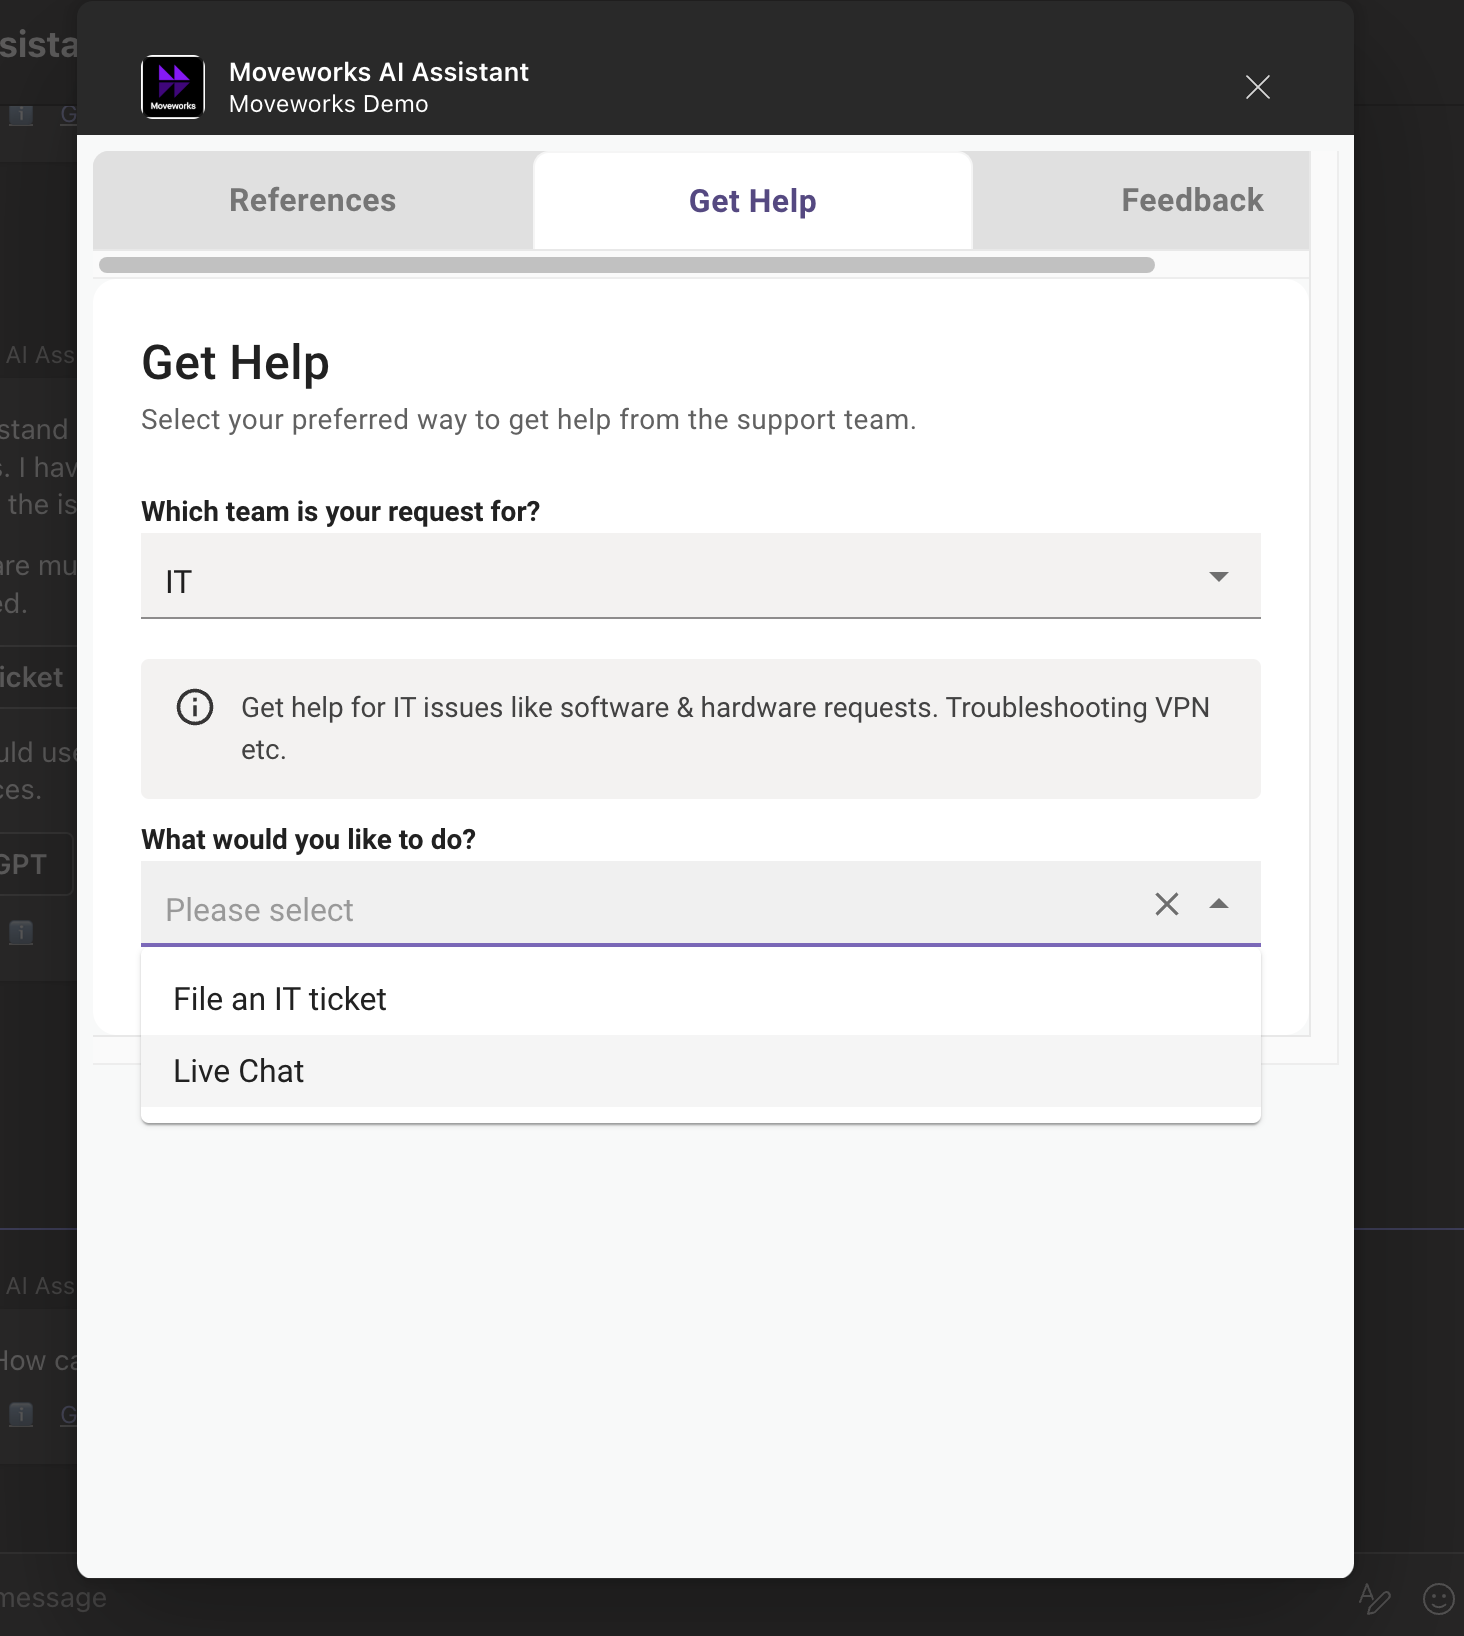
3. Under the **Get Help** tab, choose the correct **Which team is your request for?** that aligns with your Handoff configuration above. In this example, the Handoff aligns with the **IT** team/domain
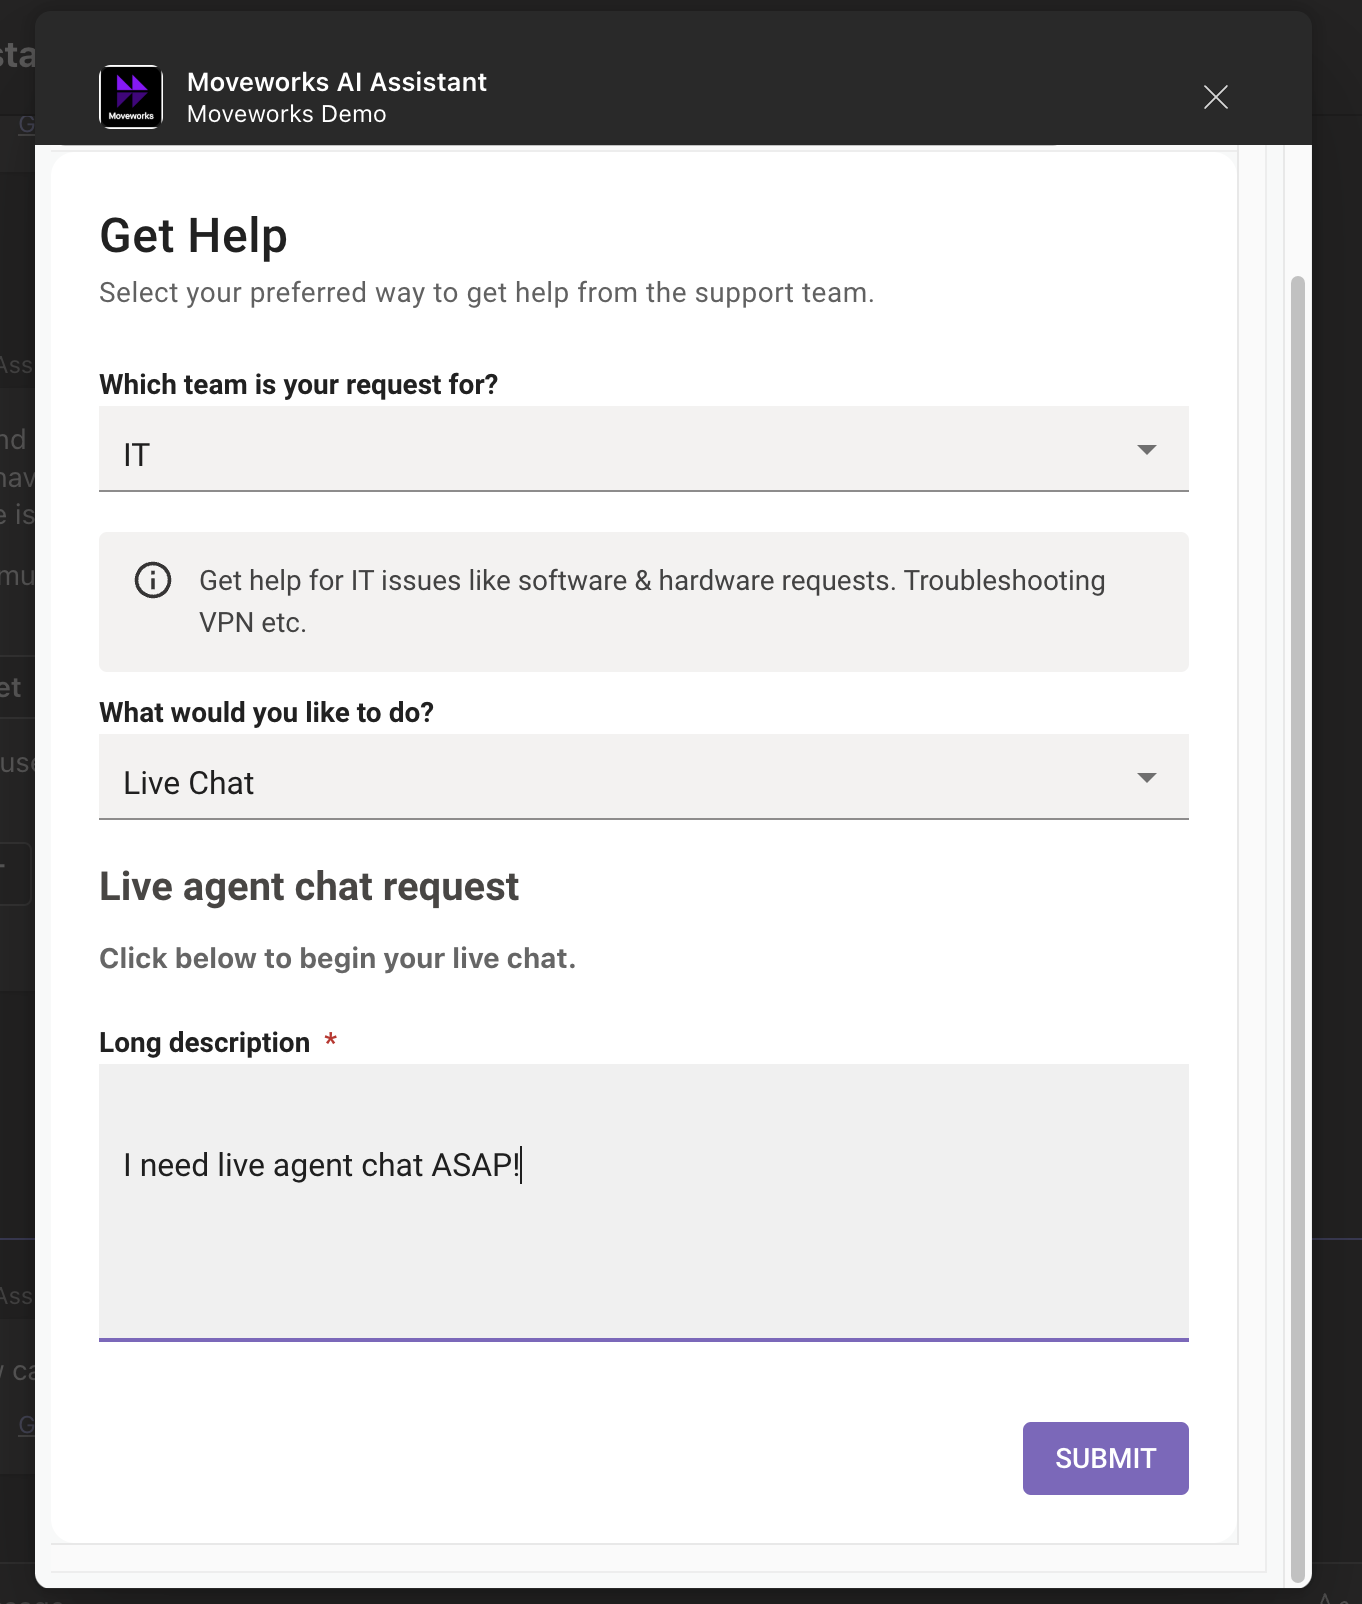
4. Choose **Live Chat** as the **What would you like to do?** since that is the name that was given to the Message Brokering display value within the Display Configurations.
5. Fill out the **Description** or other Rich Ticket Filing fields and click **Submit** to begin the live agent message brokering session. Return back
6. The live agent session will now being in chat if there are any available agents within the queue!
# Appendix
## Configuring Dynamic Queue Routing
There are two ways you can setup queues in ServiceNow either simple or dynamic:
* If these are simple, they don’t expect any value to be sent by Moveworks and by priority, chat should be routed to that simple queue.
* For dynamic / advanced, Moveworks needs to pass that context to route the chat to that specific queue. For example if the live agent platform expects domain and language, then configure to pass this information in the Live Agent Handoff. In this example language and `liveagent_optional_skills` should match with the variables that they expect on their specific queue in SNOW.
To learn more about ServiceNOW, read [Exploring Advanced Work Assignment](https://docs.servicenow.com/bundle/washingtondc-servicenow-platform/page/administer/advanced-work-assignment/concept/awa-overview.html)
```
{
"language": {
"COALESCE()": {
"items": [
"hr_language OR null",
"\"en\""
]
}
},
"liveagent_optional_skills": "domain OR null"
}
```
For example, in the example JSON above, there are 2 attributes being passed:
1. `language` takes in the `hr_language` attribute that the user selects, and fallback to `en` if `hr_language` is not selected by the user.
2. `liveagent_optional_skills` takes in the `domain` of the user's issue.
## Other Configuration Options
1. **Agent Always Available**: Activate this option to bypass checking the agent's availability status from their system.
2. **Enable Pre Chat Sys Msg Limit**: Switch this on to set a cap on the number of system messages sent to the user before connecting with an agent.
3. **Pre Chat Sys Msg Limit Value**: Set the maximum number of system messages. For example, "1" means one system message will be sent to the user before the agent takes over the chat.
4. **Agent Language**: Choose the language in which the agent communicates. For example, "EN" stands for English.
5. **On Demand Machine Translation**: This feature translates messages as required, based on the user's locale and the chosen agent's language.
6. **Live Agent Transcript Date Format**: Sets the date format for the live agent chat transcript. Options include the "ISO 8601" format (YYYY/MM/DD), the "US" format (MM/DD/YYYY), and the "European" format (DD/MM/YYYY).
7. **Enable File Attachment Size Limit**: Turn this on to set a maximum size limit for single file attachments.
8. **File Attachment Size Limit**: Define the maximum file size allowed for a single attachment, in MB.
9. **Enable Total File Attachment Allowed Per Session**: Activate this to limit the total number of file attachments per live agent session.
10. **Total File Attachment Allowed Per Session**: Set the cap for the maximum number of attachments allowed per live agent chat session.
11. **Don't Pass Chat History**: Enable this if you prefer not to send the chat history to the agent when the live agent chat session begins.
1. If this configuration is not enabled, then the previous **20** messages between the user and Moveworks AI Assistant will be sent to the agent by default, including both user's and assistant's messages. This number is configurable using the **Max number of messages to pass** field.
12. **Enable Post Session Trigger Agent Studio Event**: Turn this on to set an event ID from Agent Studio to be triggered after the live agent session ends.
13. **Agent Studio Event UUID**: Specify the event ID from Agent Studio to trigger once the live agent chat session concludes.
14. **App Inbound ID**: Under `Handoff -> Live Agent Handoff ` set Configuration: Agent Broker Handoff, and then select `Snow Handoff Config` , scroll down and set the value in : `App Inbound ID`. This corresponds to the Virtual Agent API integration to use, by default Moveworks leverages `VA Bot to Bot`. However, if you need to run both VA and Moveworks in parallel, you will need to specify an ID here.
