On-Prem Agent Quickstart
On-Prem Agent Quickstart
The fastest path to a working Moveworks On-Prem Agent with minimum requirements.
This guide gets the Moveworks On-Prem Agent running as quickly as possible — one host, one system, basic auth. It uses ServiceNow as the target system because it is the most common system available in a lab or demo context (a free personal developer instance works fine). For production setup, high availability, or non-ServiceNow systems, see the Installation Guide and Configuration Guides.
Prerequisites
Before starting, confirm you have:
- A Linux host (Ubuntu 20.04+ or RHEL 8.0+) with outbound internet access
- Podman installed (recommended), or Docker Engine — the setup script can install either automatically
- Administrator access to Moveworks Setup
- The Org Name (your Customer ID) from Moveworks Setup > Organization Information
- A ServiceNow instance URL and admin credentials
Minimum host requirements: 2 CPUs, 4 GB RAM, 30 GB disk space
Outbound network access required to:
https://agent.moveworks.com(US Commercial)https://public.ecr.aws(to pull the agent container image)
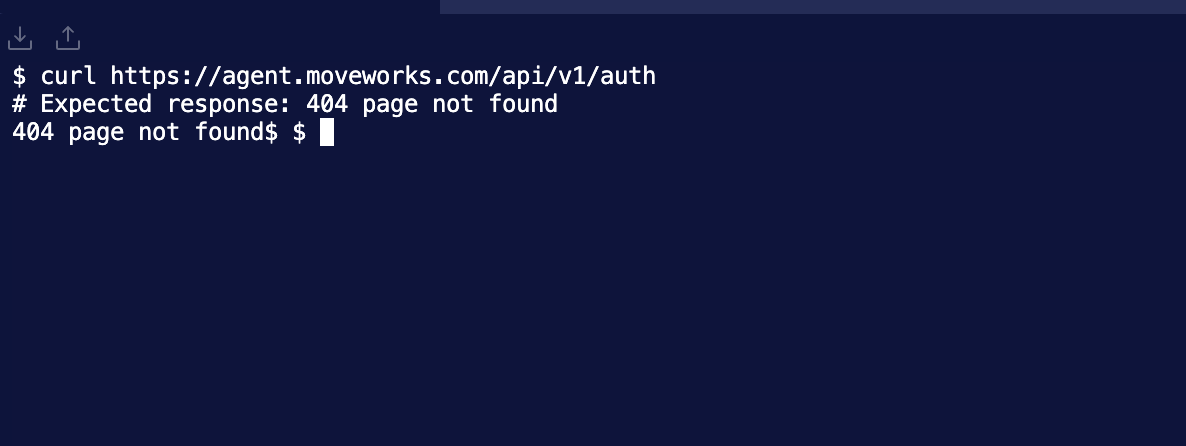
Verify connectivity from your host before proceeding:
Step 1: Generate the Agent Secret
Before running the installation script, generate the agent secret in Moveworks Setup. The secret authenticates the agent container to the Moveworks platform.
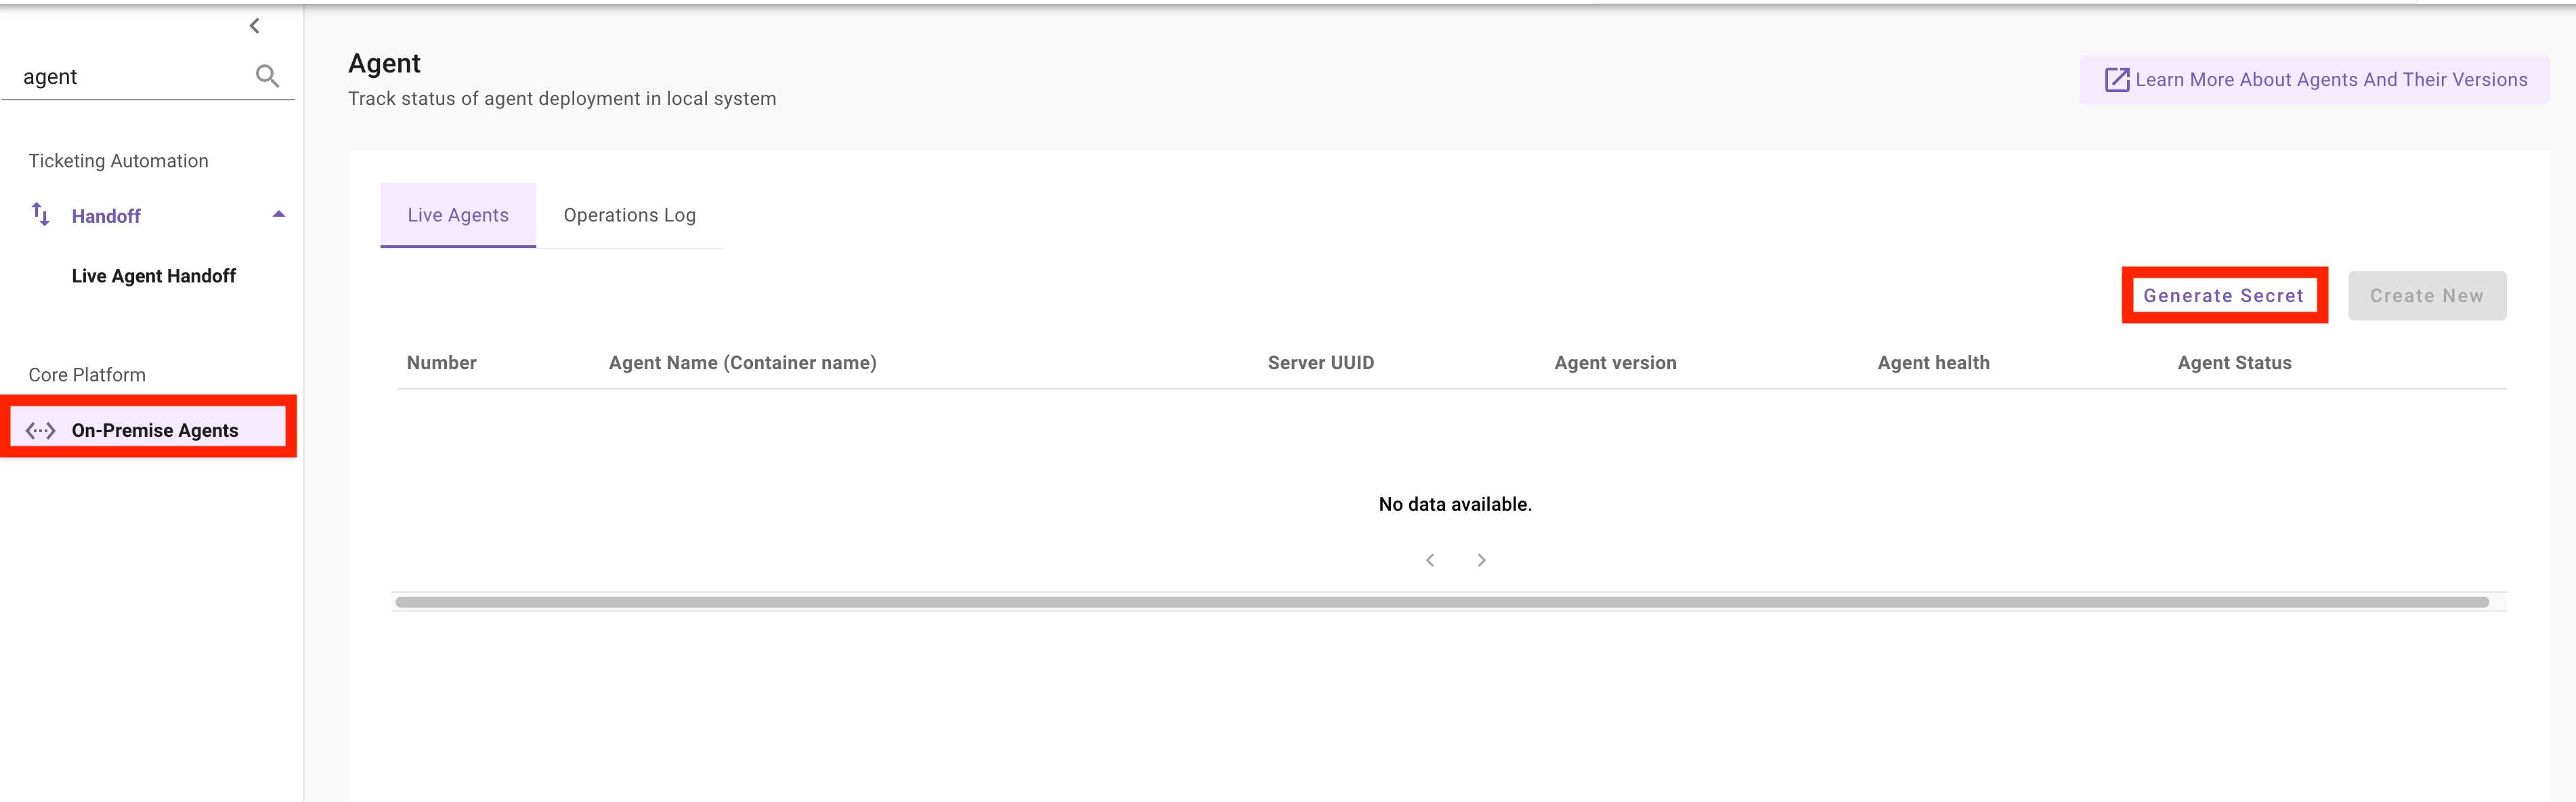
- Navigate to Moveworks Setup and search for Agent in the left navigation, or go to Core Platform > On-Premise Agents
- Click Generate Secret in the top right corner
- Copy the Org Access Secret from the popup and save it securely
The Org Access Secret is displayed only once. Save it before closing the popup. If you lose it, generate a new one — the previous secret will be invalidated.
Step 2: Install the Agent
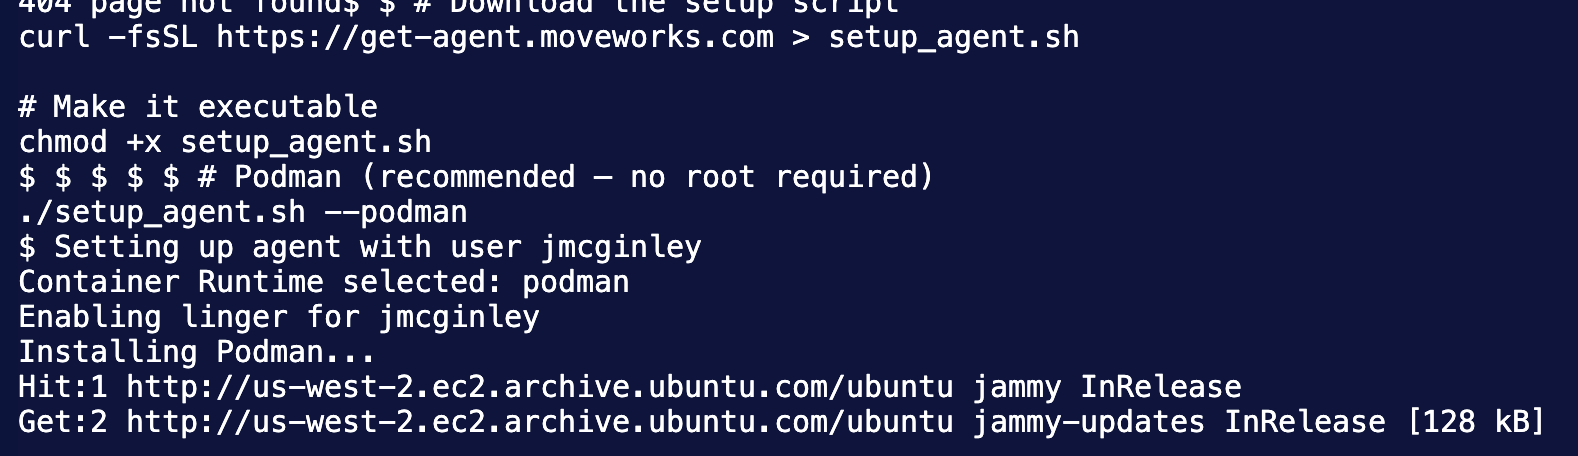
On your Linux host, run the following commands:
Run the installer for your container runtime:
Podman is recommended because it runs rootless, without requiring sudo. If you’re unsure which runtime your host uses, check with your system administrator.
The script will:
- Install Podman or Docker automatically if not already present
- Pull the latest Moveworks Agent container image from the public ECR registry
- Walk you through configuration prompts (covered in Step 3)
If your host blocks access to public.ecr.aws, see Fetching the Agent Image Without ECR.
Step 3: Configure the Agent
The setup script runs an interactive wizard that generates your agent_config.yml. Answer the prompts as follows for a ServiceNow basic auth setup:
If you are re-running the script, you will see an extra prompt: “Configuration file found. Do you want to set a new configuration? [y/n]” — enter y to reconfigure.
The auth_url and config_url above are for the US Commercial region. Use the correct base for your region:
When the wizard completes, the script writes your configuration to ~/moveworks/conf/agent_config.yml (where ~ is the home directory of the user who ran the script). You can inspect it with:
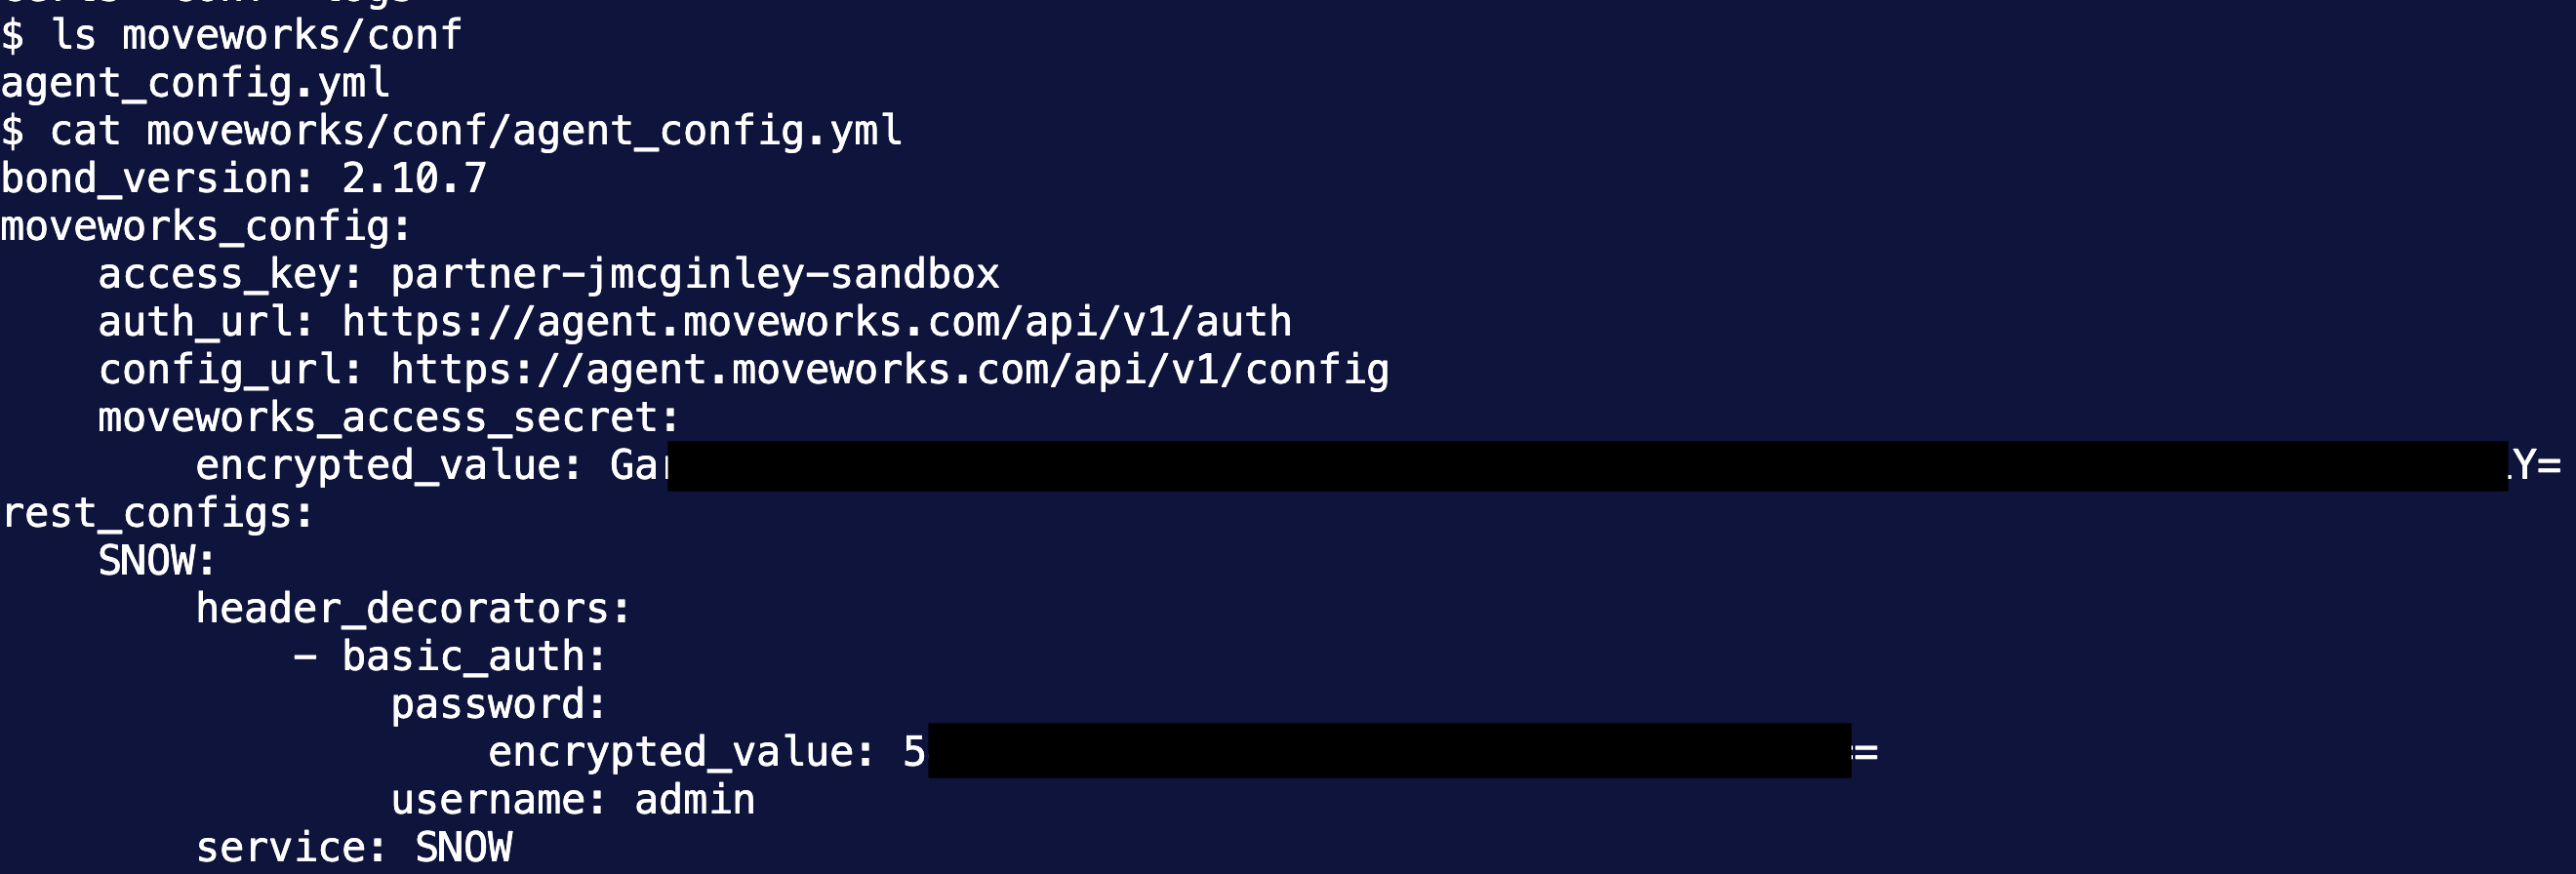
The encrypted_value fields are populated automatically — the script encrypts the credentials you entered. If you ever need to edit the config manually, use value: for any new credential and the agent will encrypt it on next start.
Step 4: Start the Agent
After the configuration wizard completes, start the agent containers:
Verify the containers are running:
You should see one or more containers named moveworks_agent_1 (and moveworks_agent_2, etc. if you started multiple) with status Up.

Step 5: Verify the Agent in Moveworks Setup
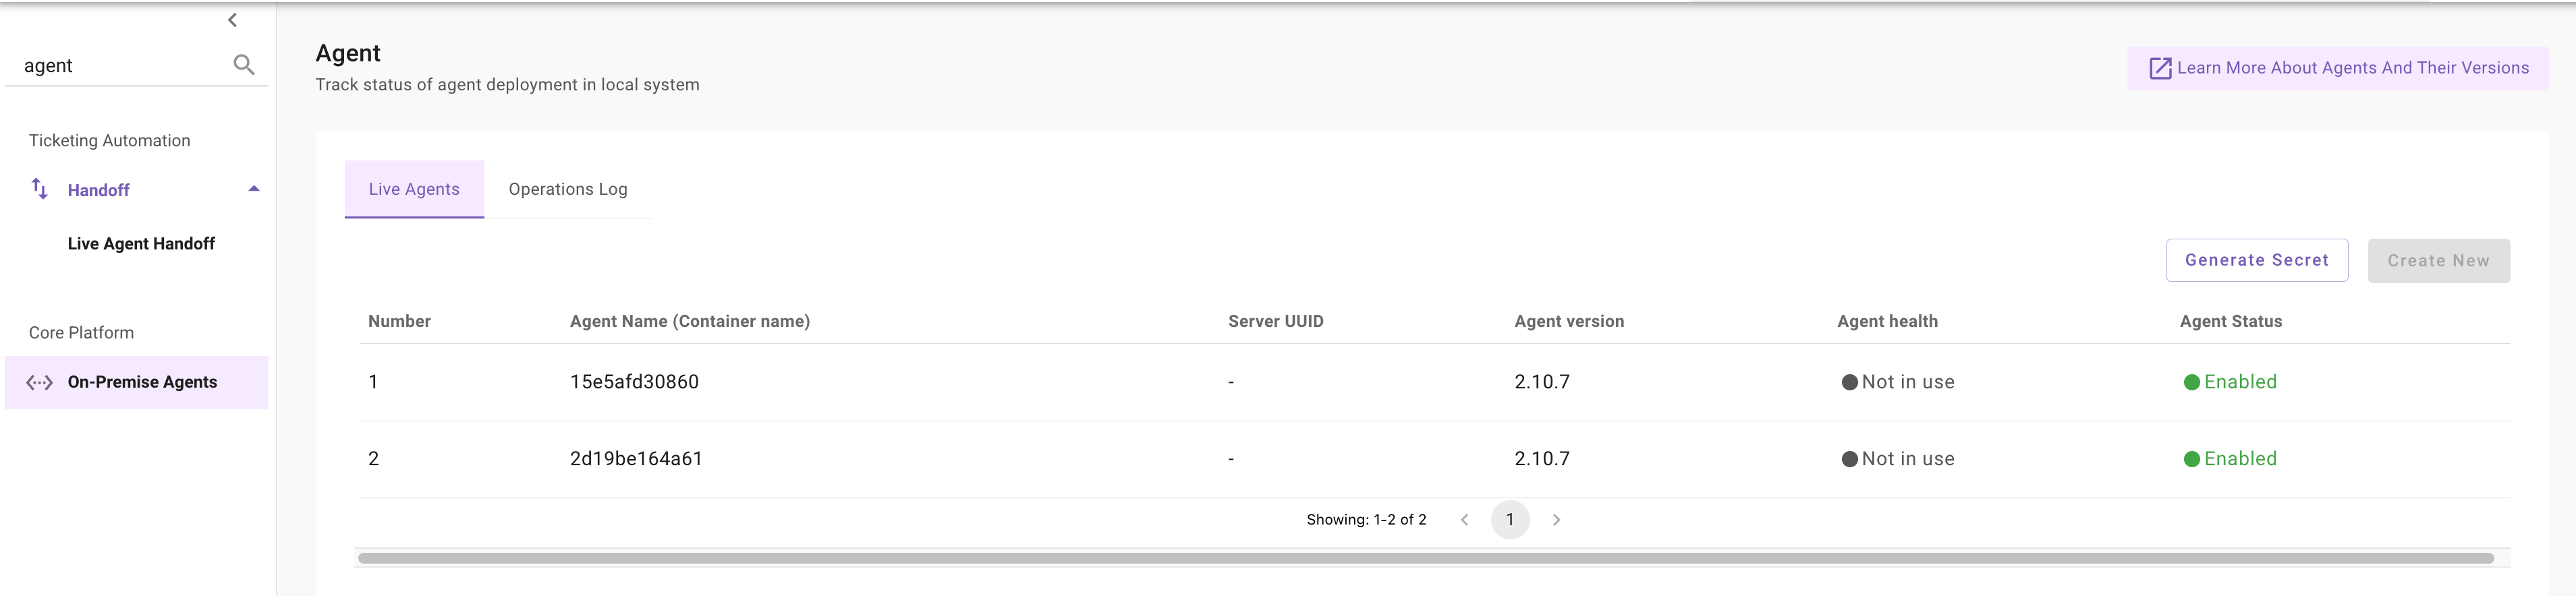
- Navigate back to Core Platform > On-Premise Agents in Moveworks Setup
- Confirm your agents appear in the Live Agents tab with Agent Status: Enabled
It may take up to 60 seconds for the agents to appear after starting. The Agent health column will show Not in use when idle — this is normal and does not indicate a problem. It becomes active when a request is being proxied.
Step 6: Create the Connector
With the agent running, create a connector in Moveworks Setup to point at your ServiceNow instance.
- Navigate to Moveworks Setup > Connectors
- Select Custom Connectors (for Agent Studio use cases) or System Connectors (for built-in ServiceNow integrations)
- Click Create New
- Fill in the connector form:
- Connector Name: a unique name for this connector (e.g.
now_agent) - Base URL: your ServiceNow instance URL (e.g.
https://your-instance.service-now.com) - Authentication Type: select
On-Premise Auth - Service Name: enter
SNOW— this must exactly match the service name you configured in Step 3
- Connector Name: a unique name for this connector (e.g.
- Save the connector
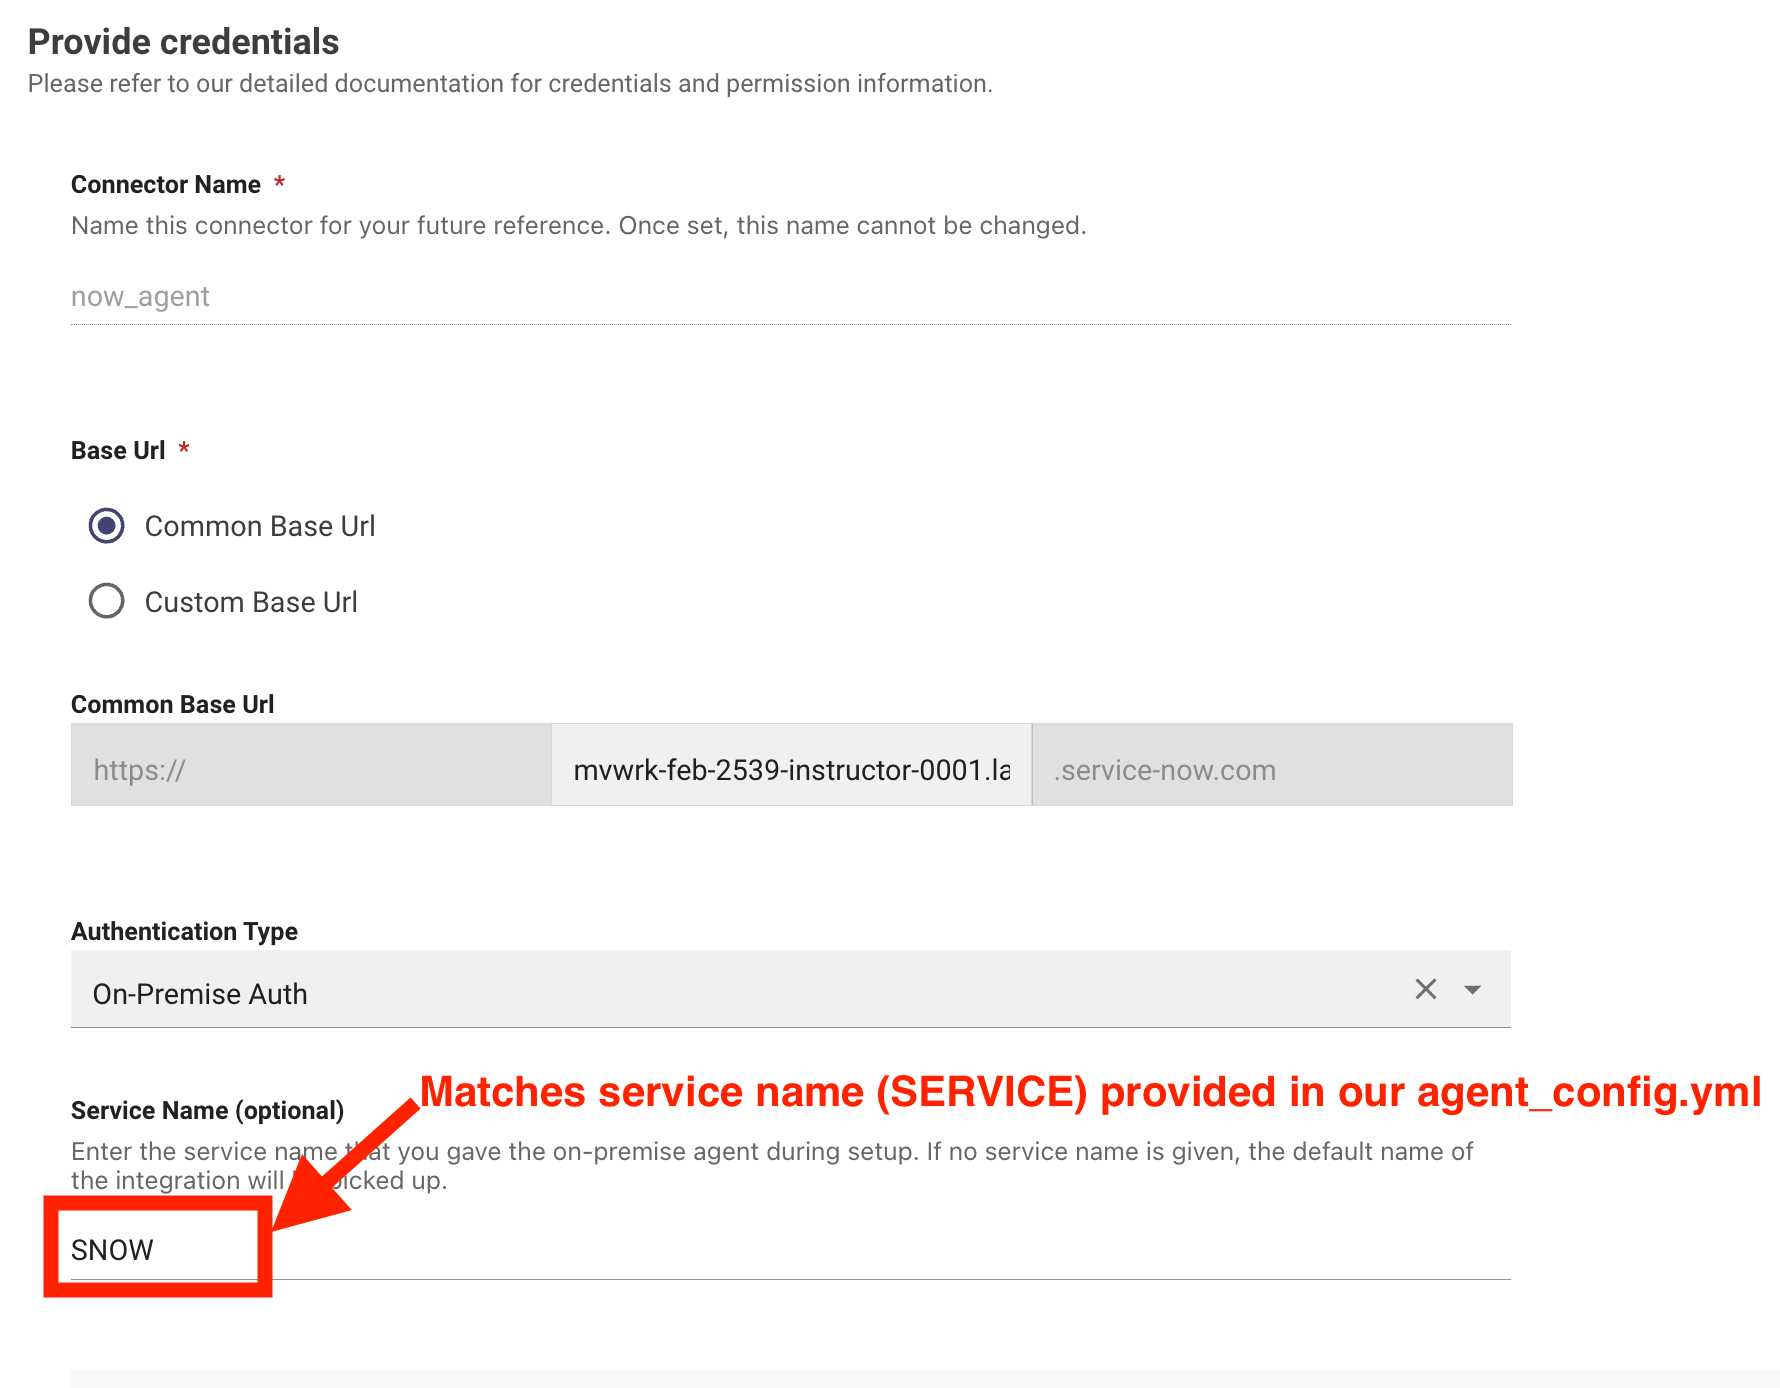
The Service Name field must exactly match what you entered during Step 3. If you used SNOW in the agent config, enter SNOW here — case-sensitive.
Step 7: Verify in API Playground
Use the API Playground to confirm the connector is routing requests through the agent successfully.
- Navigate to Moveworks Setup > API Playground
- In the API Collection panel on the left, find Service Now API: Users and select GET /api/now/table/sys_user
- In the Connector dropdown, select the connector you just created (e.g.
now_agent) - Click Test
- Confirm you receive a Status Code: 200 response with ServiceNow user data in the JSON body
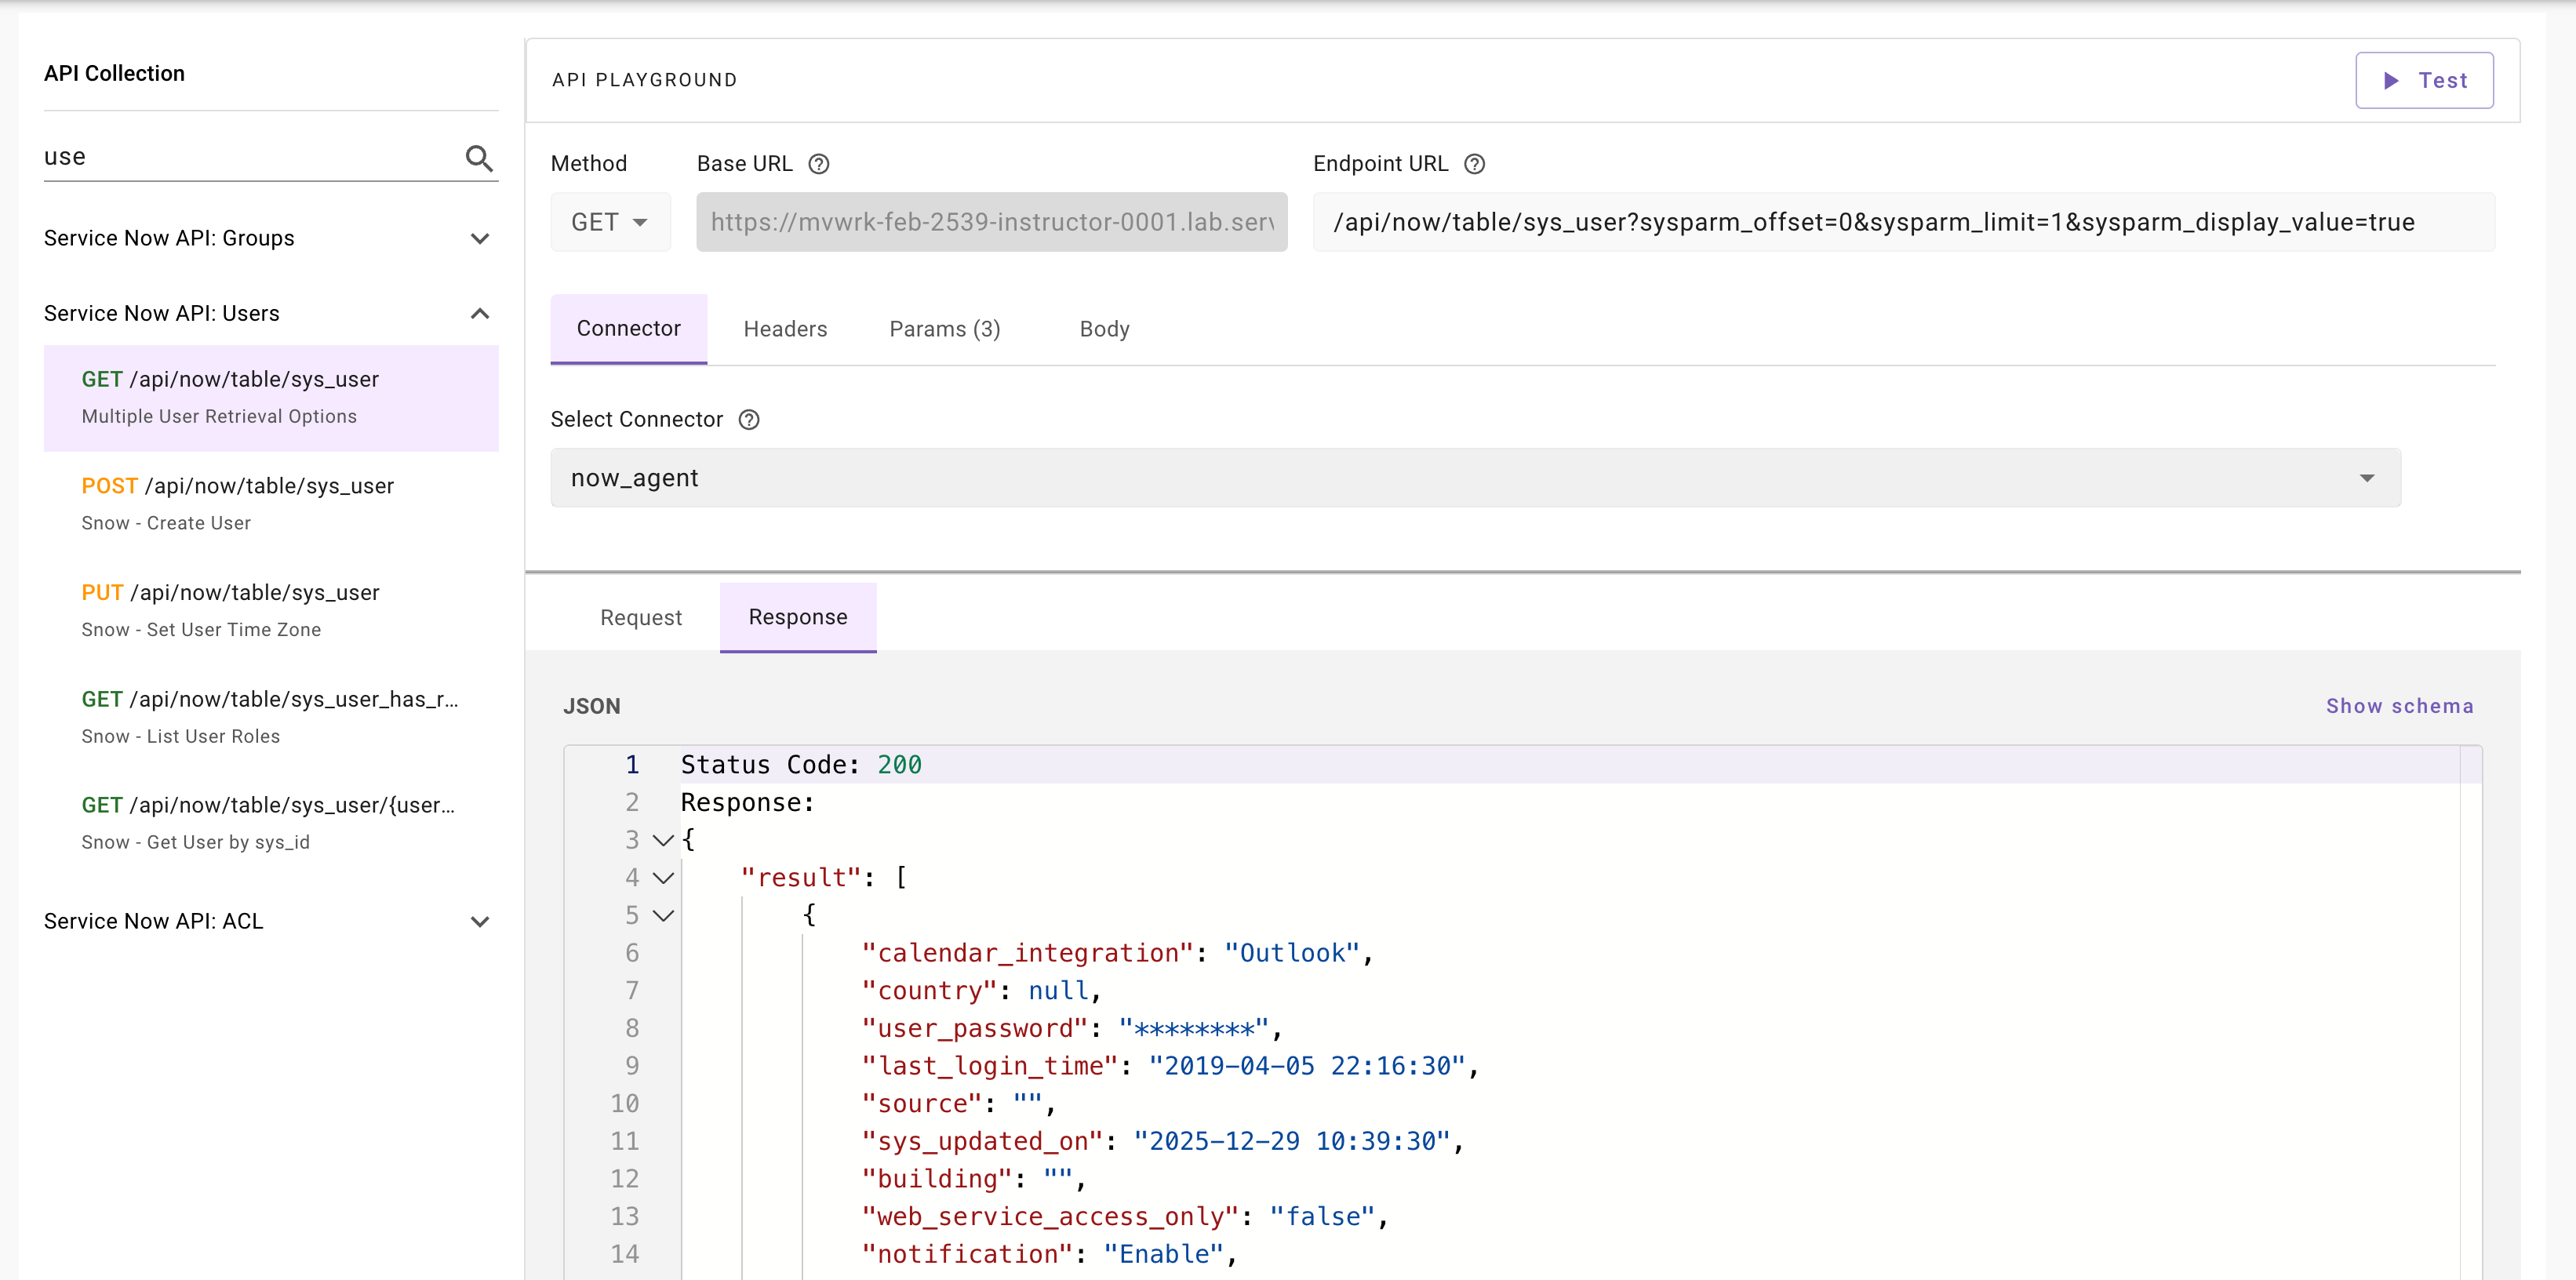
A 200 response confirms the full path is working: Moveworks platform → agent container → ServiceNow instance.
Common Commands
If using Docker instead of Podman, prefix setup_agent.sh commands with sudo and use sudo docker ps to check containers.
Next Steps
- Configuration File Reference: full YAML schema with all supported fields
- Configuration Examples: sample configs for LDAP, Jira, Azure Key Vault, and more
- Operations and Health: monitoring, upgrades, and troubleshooting
- Secrets Management: storing credentials in AWS Secrets Manager or Azure Key Vault