Configure Triage 2.0
Triage 2.0 classifies tickets by building a field-specific semantic index and using it to predict values like assignment_group, category, or cmdb_ci. Complete all steps below in order — each step depends on the previous one.
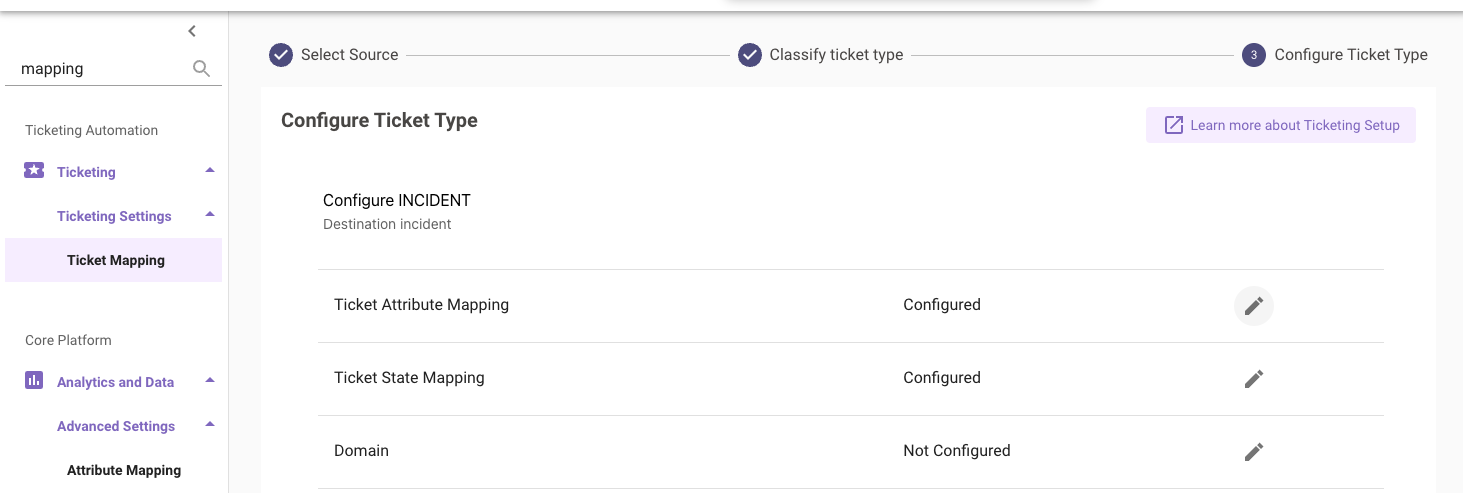
Step 1: Configure Ticket Attribute Mapping
Before Triage can read or write ticket fields, those fields must be mapped in your Ticketing Configuration.
Navigate to Ticketing > Ticketing Configuration > [Your Config] > Table Mappings > [Ticket Type]
Query Ticket Payload
For each ticket type you intend to triage, add the triage field(s) to the Query Ticket Payload. Each triage field requires two entries:
For ServiceNow assignment_group and cmdb_ci only: also add a third entry for the sys_id variant (e.g. custom_data.assignment_group_sys_id). This is not required for any other field.
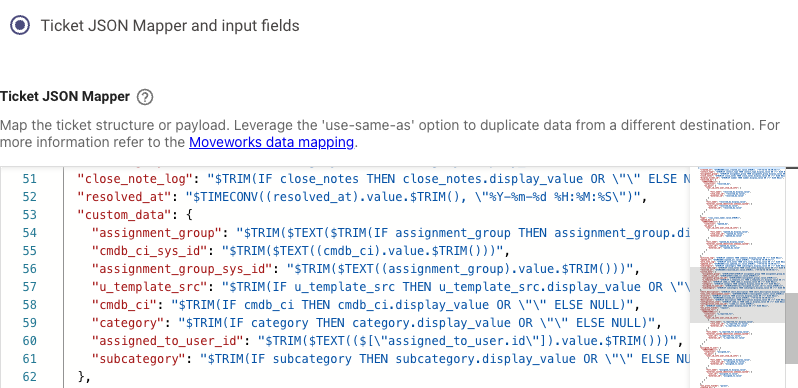
Also add each triage field to the Input Fields in Mapper section of the Query configuration. This ensures the field values are available to Triage at runtime.

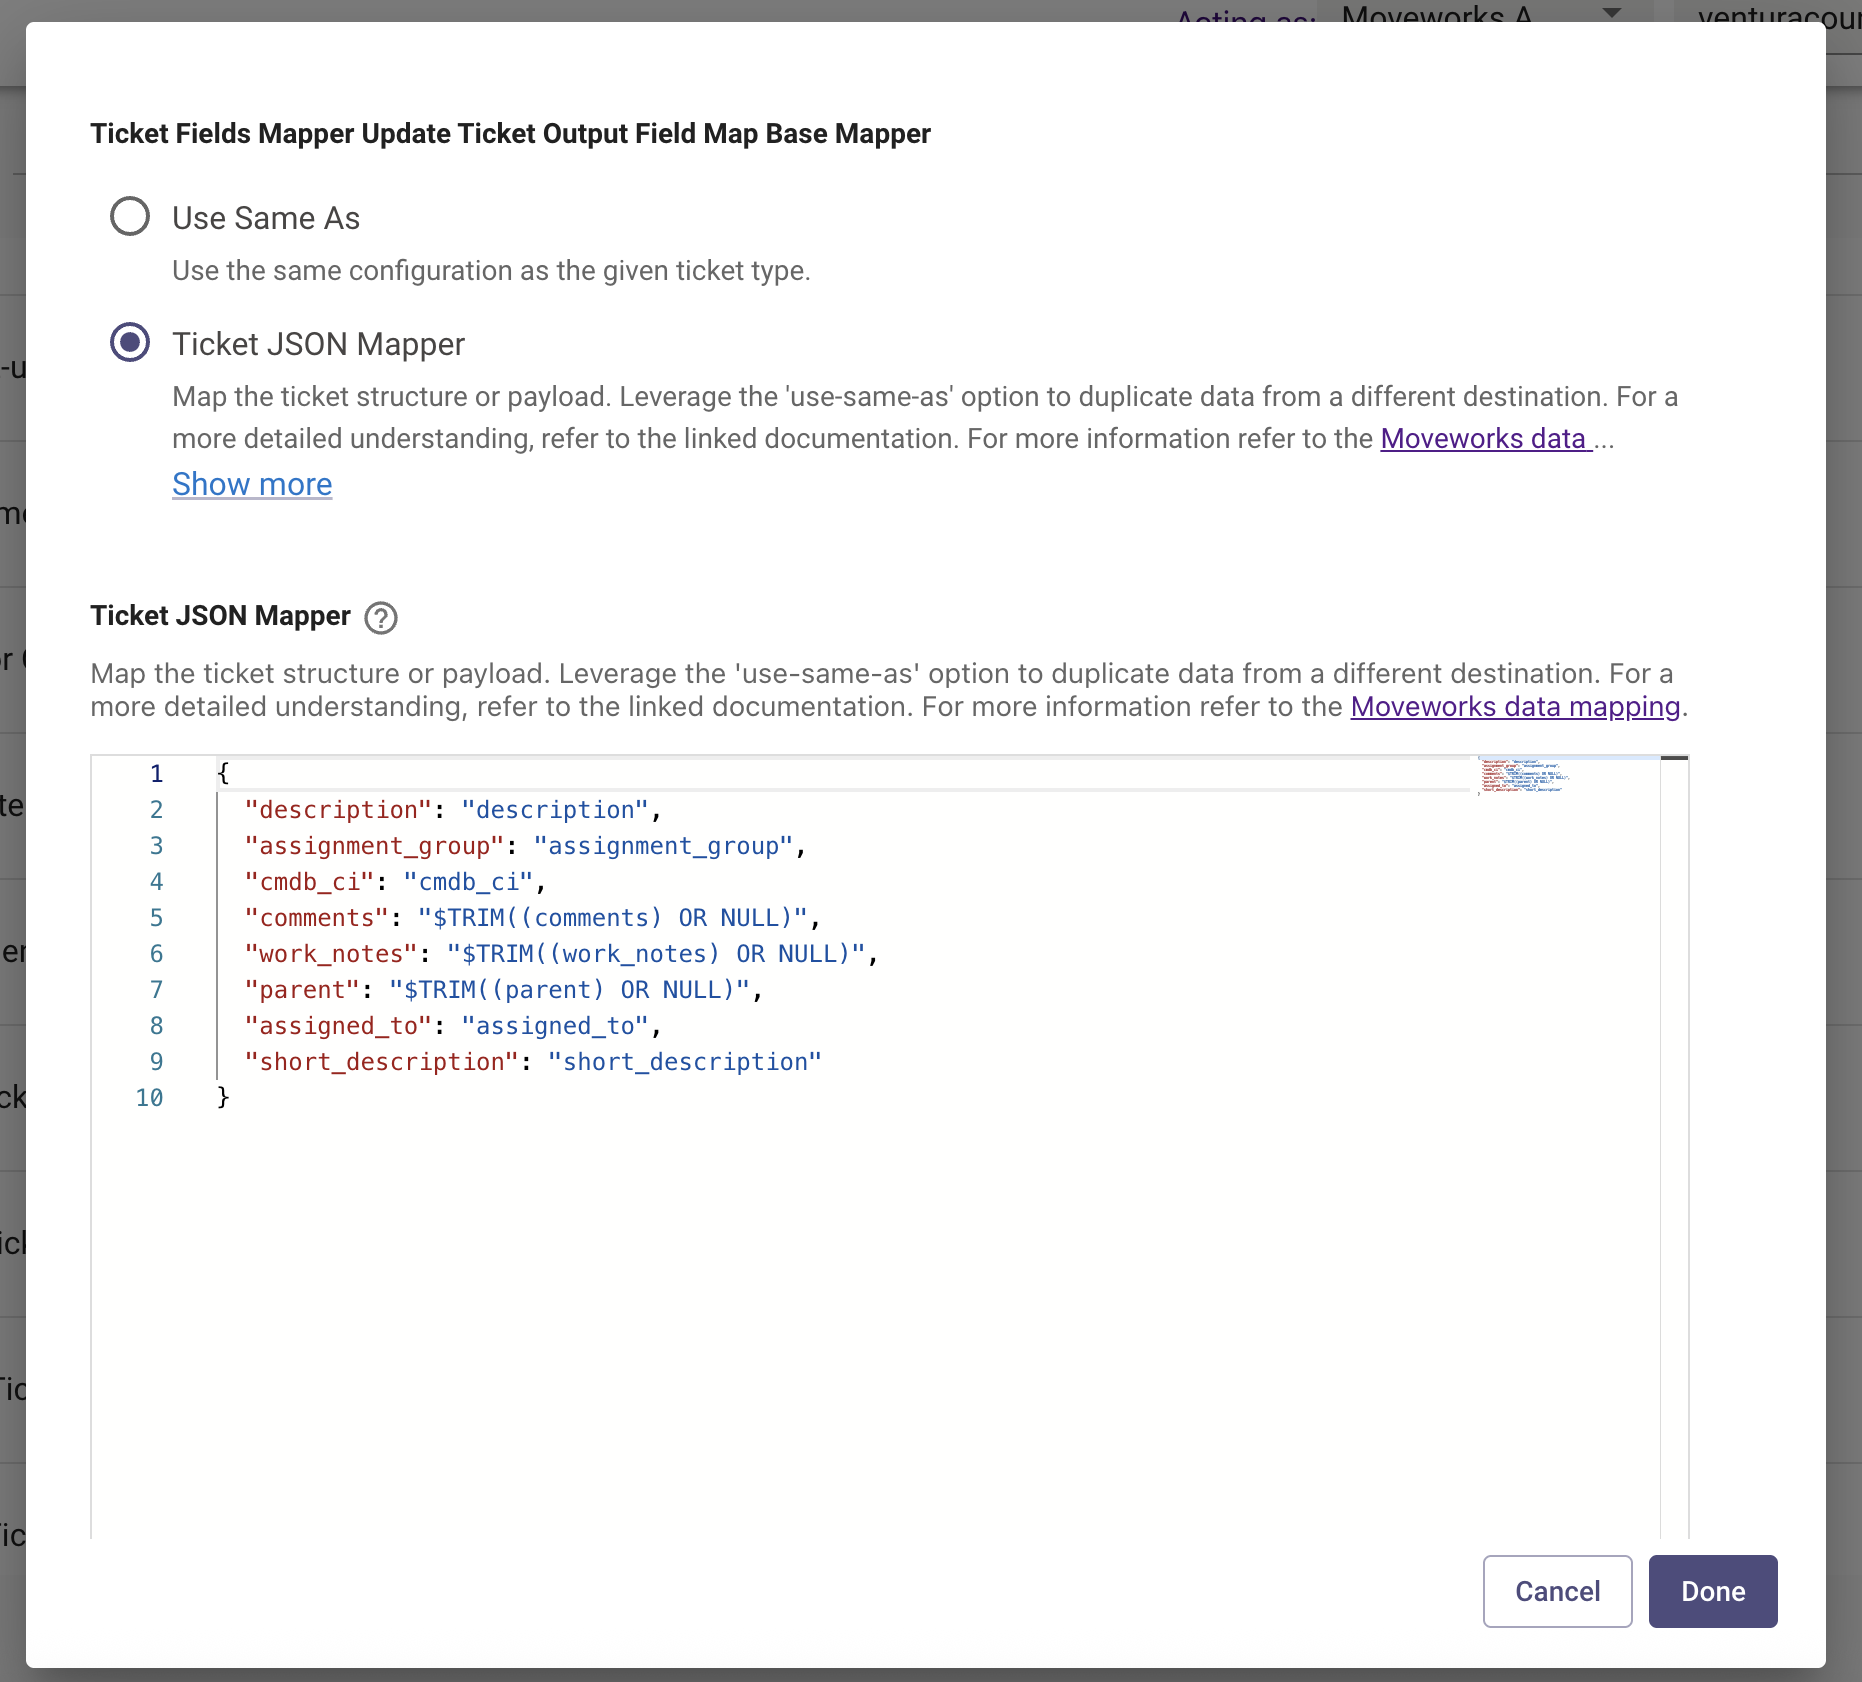
Write Ticket Payload
Triage must write its prediction back to the ticket. How you configure this depends on whether Triage During Ticket Creation (TDTC) is enabled:
We recommend keeping TDTC off. When TDTC is enabled, the ticket is triaged before it is fully created — meaning the Triage Filter has not yet run. This can cause tickets to be triaged that should not have been, because eligibility has not been confirmed yet.
Create a separate Field Configuration for the same field across different ticket types. For example, triaging assignment_group on INCIDENT and on REQUEST_ITEM requires two separate configurations (e.g. assignment_group_inc, assignment_group_ritm).
Step 2: Ticket Backpolling
Triage 2.0 builds its index from historical tickets stored in Moveworks’ ticket tables. Backpolling populates those tables from your ITSM.
- Navigate to
Core Platform > Ingestion > Ticket Backpolling - Set Product Area to
Employee Experience Insight - Select your ITSM Integration
- Set a Start Date and End Date covering the historical range you want to train on (e.g. 180 days back)
- Click
Start Backpolling
If you have already run backpolling for EXI or Knowledge Studio, you do not need to re-run it — unless you have added new custom_data fields or made changes to your ticket mapping since the last run. If so, re-run backpolling to ensure the new fields are captured in the ticket tables.
Verifying completion: Check the Backpolling Logs table at the bottom of the page. The Employee Experience Insight row must show a status of Completed with matching Records Polled and Records Processed counts before you proceed.
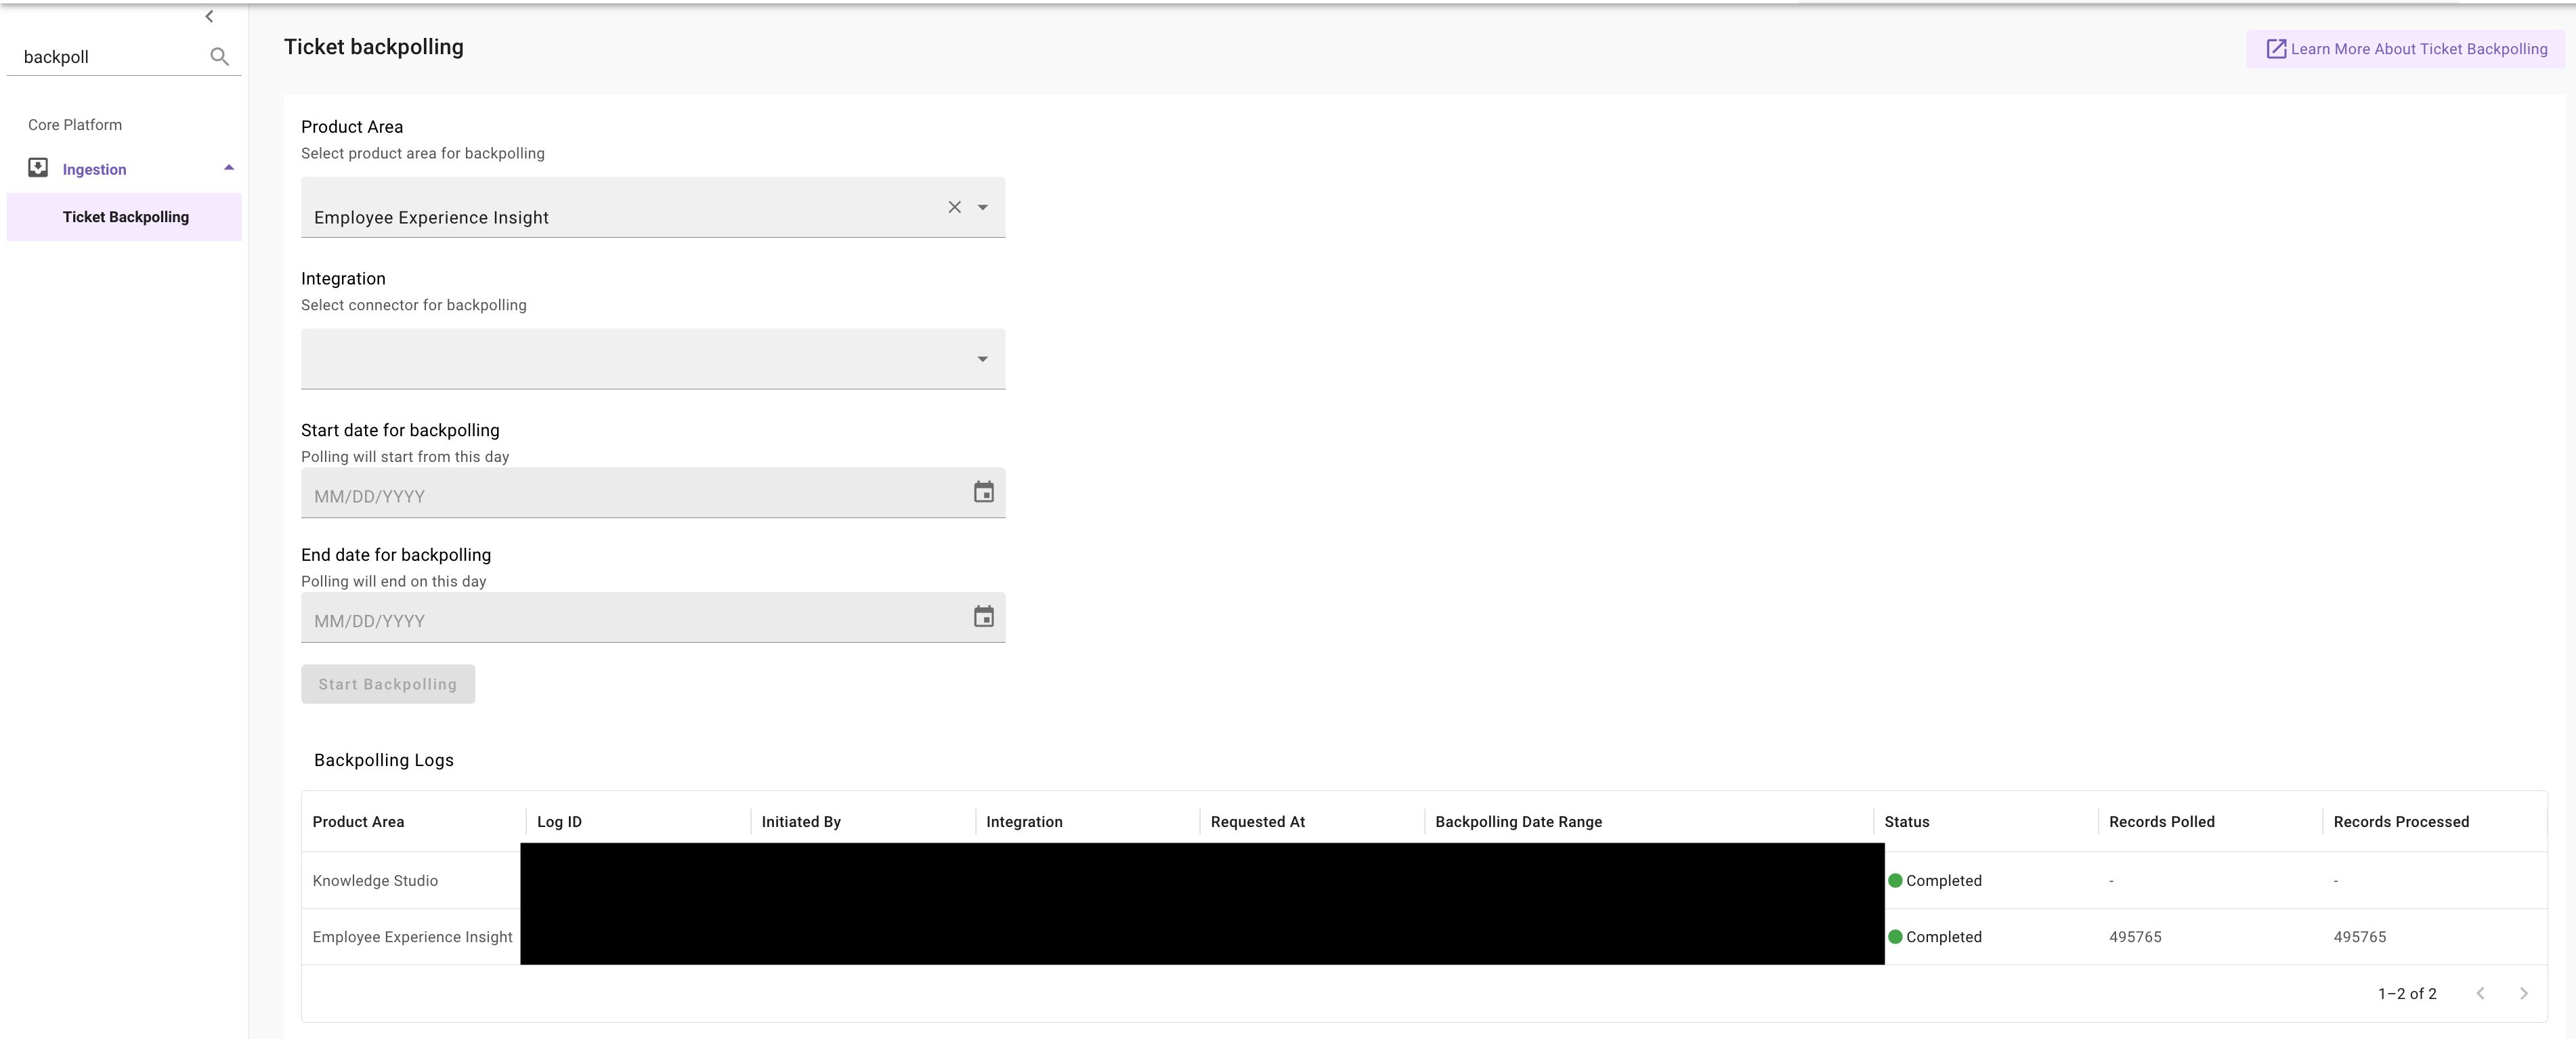
This process may take several days depending on the volume of historical tickets. Do not proceed until the status shows Completed.
After backpolling completes, wait an additional 24 hours for Moveworks to finish backend pre-processing before moving to Step 3.
Step 3: Field Configurations
Field Configurations define what Triage predicts, for which ticket type, and how it behaves.
- Navigate to
Triage > Field Configurations - Click
Create - Fill in the following fields:
Field Settings
- Field Name — The Moveworks field name to predict, e.g.
assignment_group,category,cmdb_ci - Ticket Type — The ticket type to triage, e.g.
INCIDENT,hr_case - Routes — Controls when triage fires:
TICKET— Triage runs on existing tickets via polling. Use this for most implementations.BOT— Triage During Ticket Creation. Runs before ticket creation (bot-created tickets only). Requires TDTC to be on and the field mapped in the Create Ticket Payload.
- Select Connector — Your ITSM connector, e.g.
snow
Dry Run vs. Live Mode
- Send As Recommendation — Sends a work note with the prediction rather than writing the field value. Requires Enable Triage =
true. - Start Date — Required for the analytics dashboard to show results. Format:
YYYY-MM-DD. Without this, the dashboard will show no data.
Predicted Value Filter
Controls which values Triage is allowed to predict:
- Block list — Values in this list will not be predicted. If the model’s top prediction is on the blocklist, it falls back to the default value.
- Allow list — Only values in this list are eligible to be predicted.

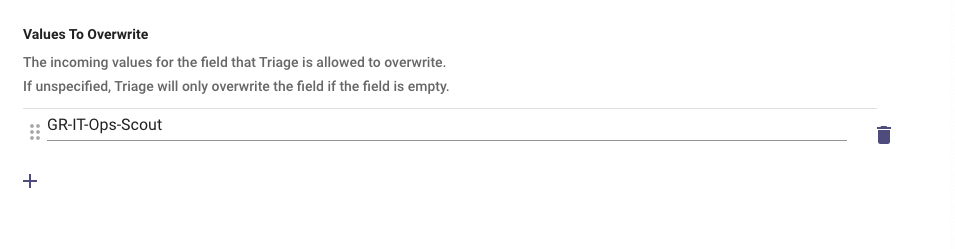
Values to Overwrite
Controls which tickets are eligible for triage based on the field’s current value:
Other Fields
- Mapped Field — Used for analytics categorization. Choose from
assignment_group,category, orcall_type. If unsure, usecategory. - Required Field — For dependent models where a prediction must succeed before downstream models run (e.g. must predict
categorybeforesubcategory). If checked, Triage will early exit if no prediction is made for this field. - Default Value — Fallback value if no prediction passes the confidence threshold. Use the
sys_idfor sys_id-backed fields.
- Click
Submitusing the title format:triage.[field].[ticket_type].['Route']- Example:
triage.assignment_group.INCIDENT.['TICKET']
- Example:
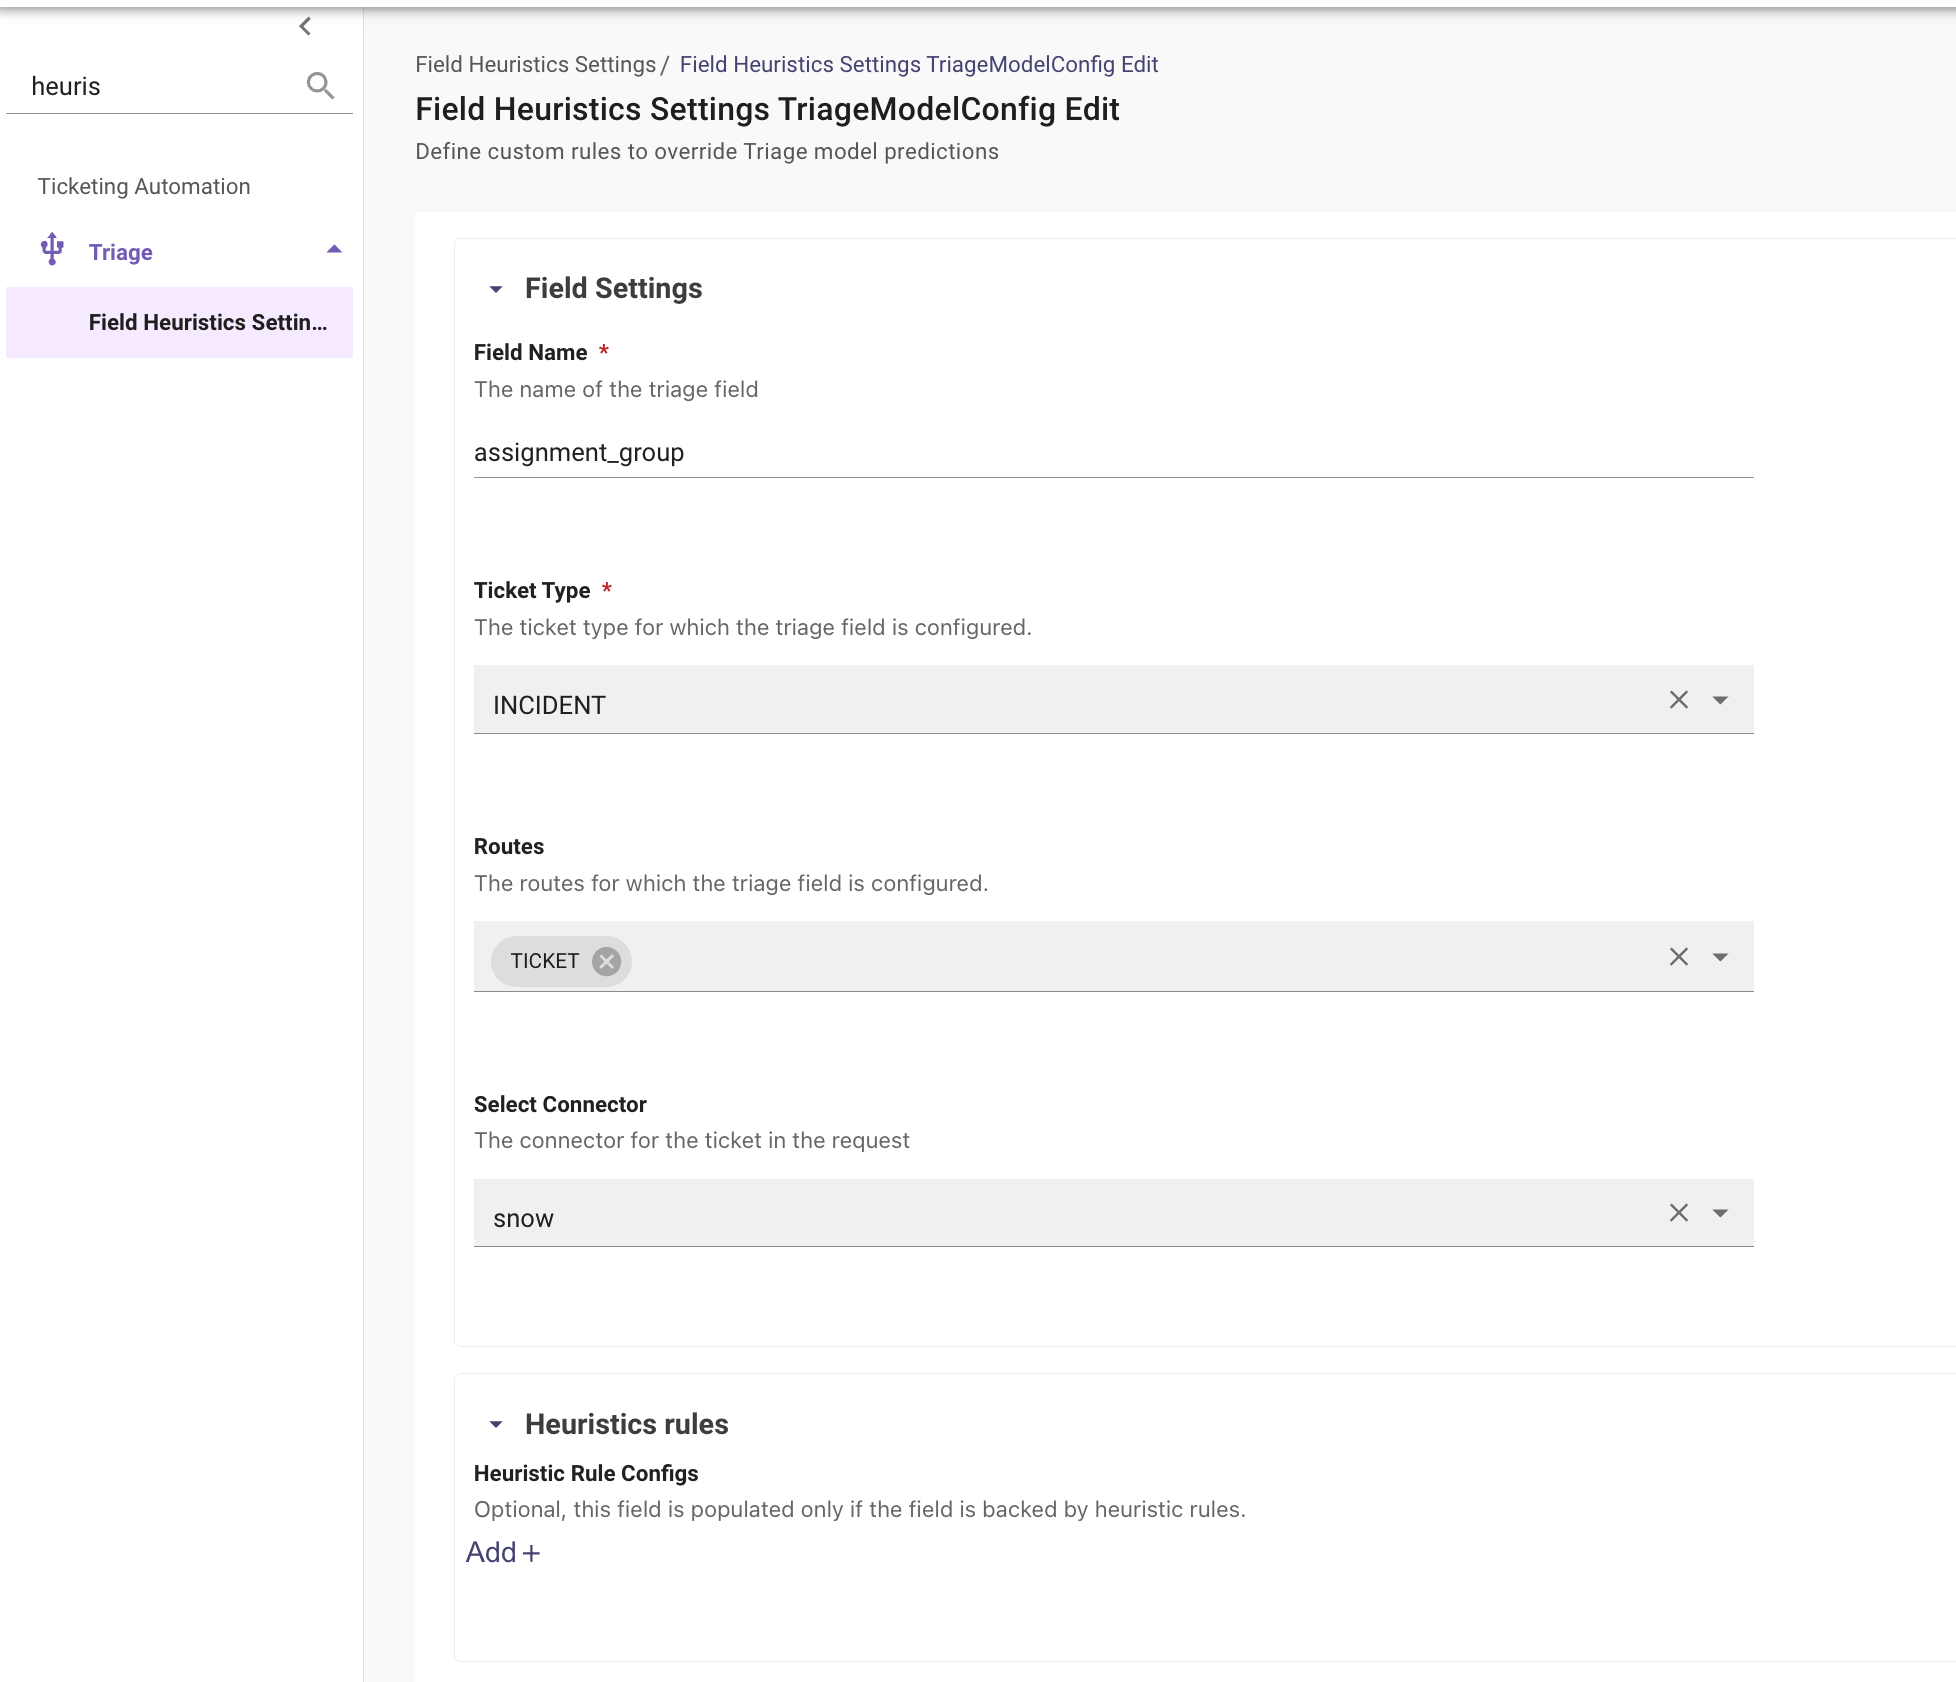
Step 4: Field Heuristic Settings
Heuristic rules let you override model predictions with deterministic logic — for example, always routing tickets mentioning “VPN” to the Network team regardless of what the model predicts.
- Navigate to
Triage > Field Heuristics Settings - Click
Create
You must create a Field Heuristics Settings configuration for every field/ticket type combination from Step 3, even if you have no heuristic rules. Without this configuration, the Triage service may return an empty {} response and fail silently.
- Under Field Settings, enter the same Field Name, Ticket Type, Routes, and Connector as the corresponding Field Configuration from Step 3.
- Under Heuristic Rule Configs, add any override rules. Leave this section empty if you have none.
- Click
Submitusing the same title format:triage.[field].[ticket_type].['Route']
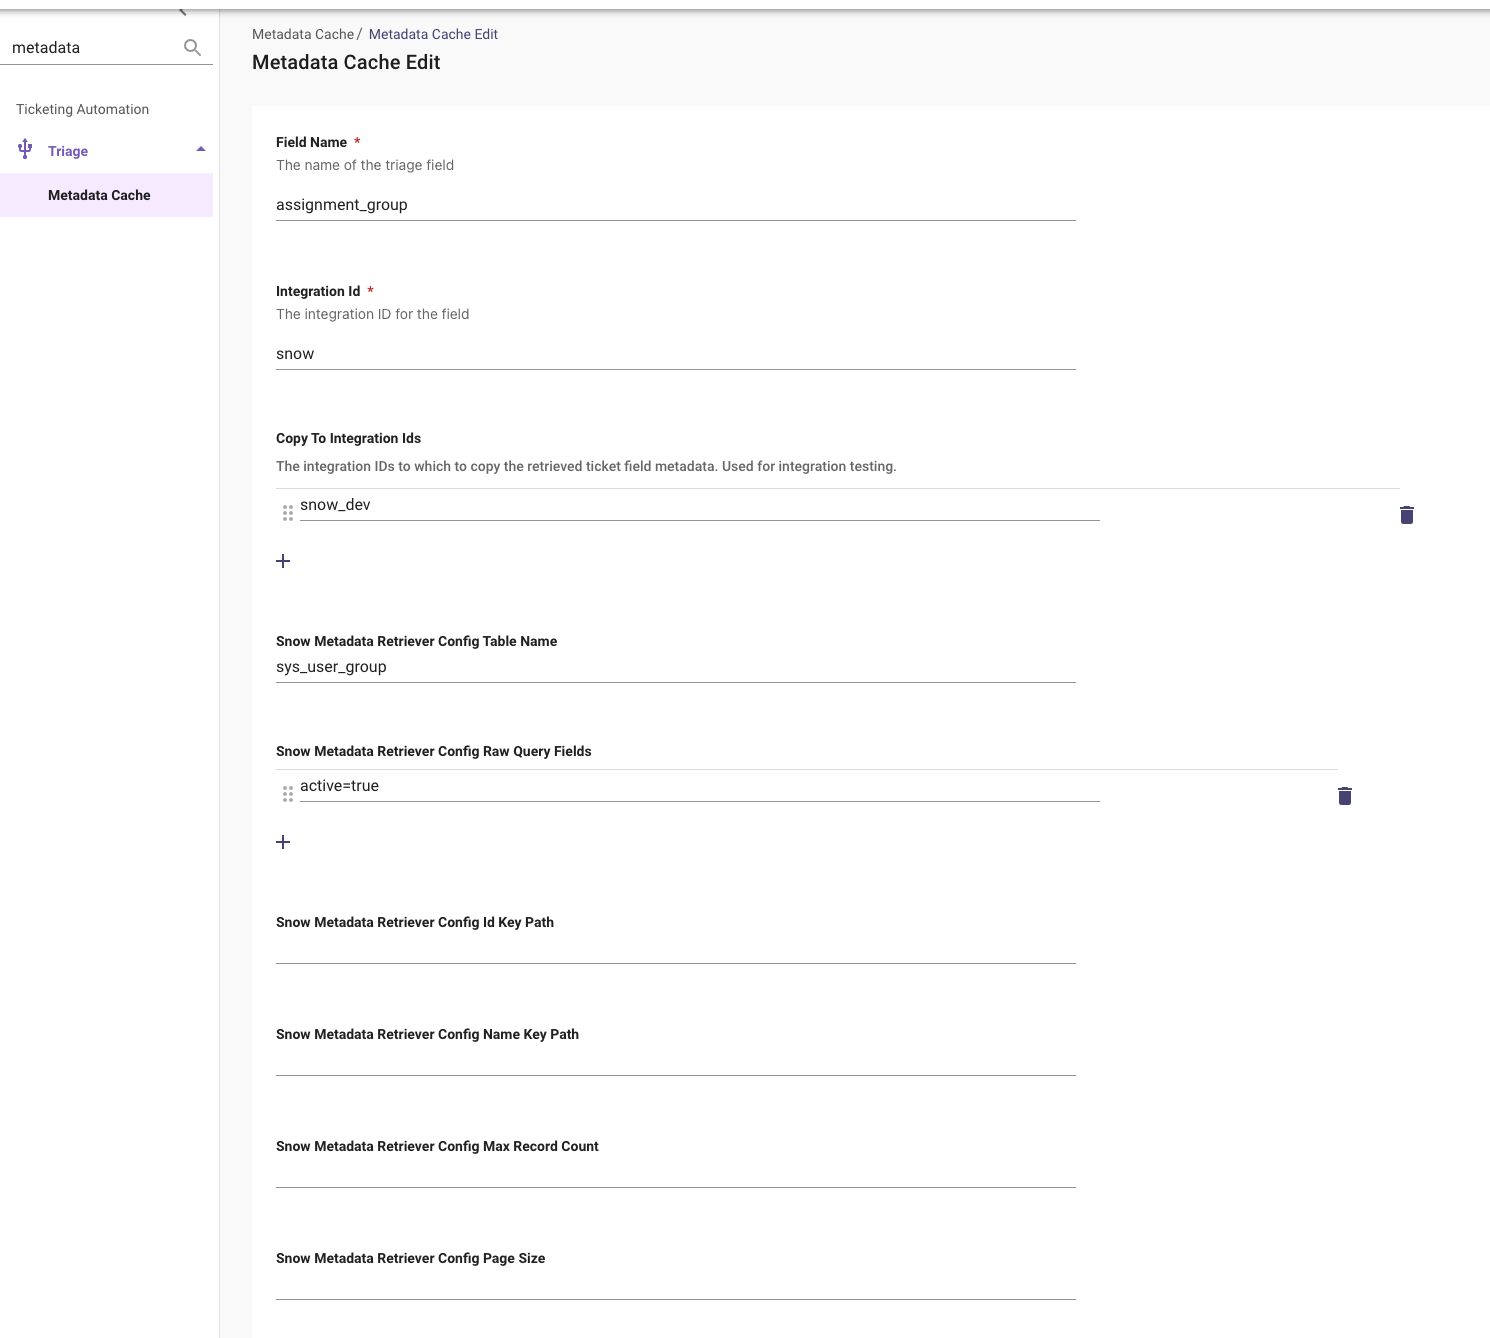
Step 5: Metadata Cache
Metadata Cache is only required when triaging assignment_group or cmdb_ci on ServiceNow. Skip this step if neither field applies.
The Metadata Cache maintains an up-to-date list of valid values (e.g. active assignment groups) that Triage uses when ranking predictions.
- Navigate to
Triage > Metadata Cache - Click
Create - Fill in the following:
- Click
Submit
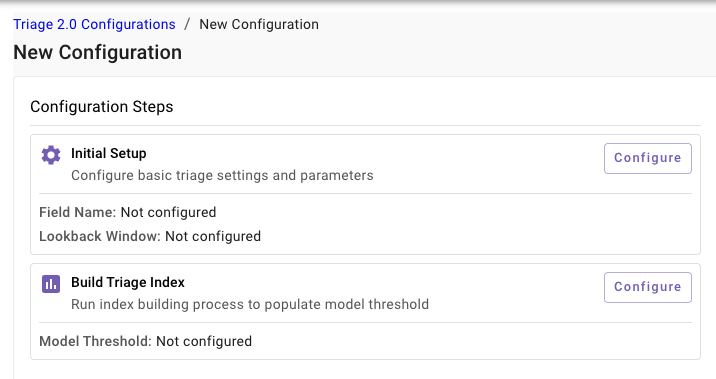
Step 6: Triage 2.0 Configuration & Build Index
Initial Setup
- Navigate to
Triage > Triage 2.0
- Click
Createand fill in:- Field Name — e.g.
assignment_group,category - Select Additional Features — Optional signal fields to improve prediction ranking (e.g.
requested_for.location) - SQL Parameters — Set at minimum:
- Ticket type:
itsm_ticket_type = 'INCIDENT' - Contact type:
contact_type IN ('Assistant', 'Portal', 'Email')— filters out walk-ups, phone calls, and automated alerts - Add DSL-based filters for any additional scoping, e.g.
json_extract_scalar(ticket_custom_data, '$.u_domain') in ('...')
- Ticket type:
- Lookback Window (Days) — How far back to pull training data (e.g.
180)
- Field Name — e.g.
Do not filter on the field you are triaging in the SQL Parameters. For example, if you are triaging assignment_group, do not add a condition that checks assignment_group. Doing so will exclude tickets where the field already has a value — reducing the data Triage can act on and limiting model coverage.
- Click
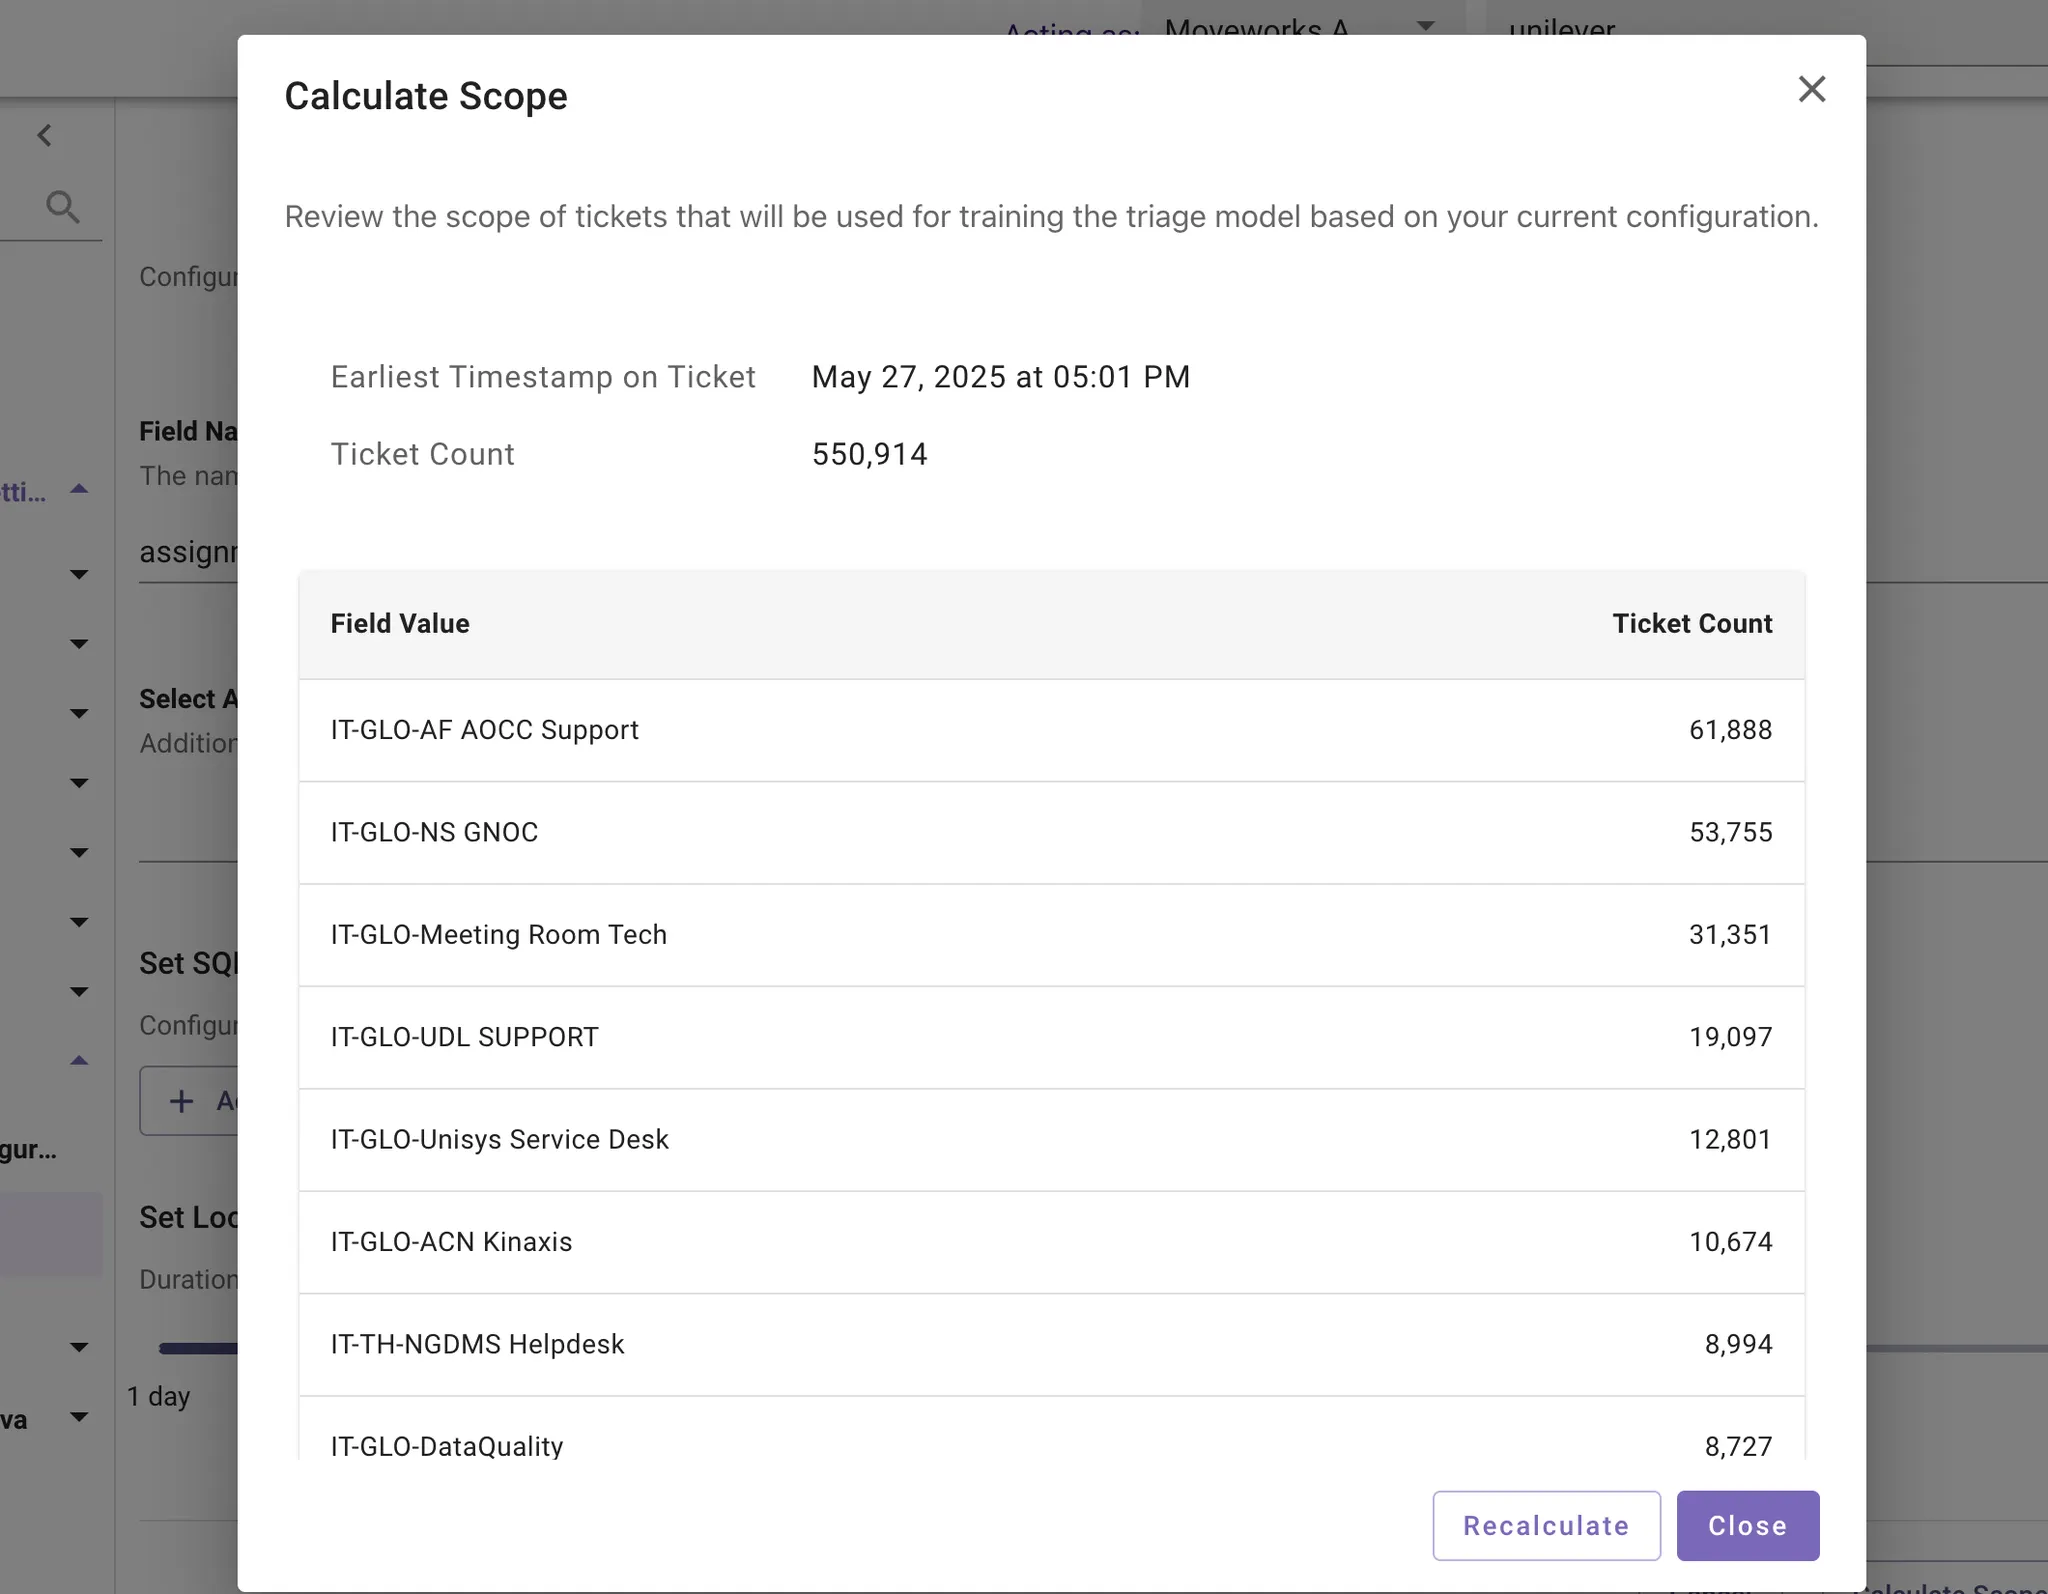
Calculate Scope— this runs a query against your backpolled ticket data and returns an estimated training set size.
Always run Calculate Scope before proceeding. Sanity check the result:
- 0 tickets — backpolling has not completed, or the 24-hour post-backpolling window has not elapsed
- > 100,000 tickets — consider reducing the lookback window or tightening your filters
- Earliest timestamp looks wrong — verify your backpolling date range
- Click
Save Configuration
Build Index
There are two “Enable Triage” toggles in the product — one in Field Configurations (Step 3, model-specific) and one here in Triage 2.0 Configurations (product-level switch). Both must be enabled for Triage to run. Don’t skip Step 8.
- Click
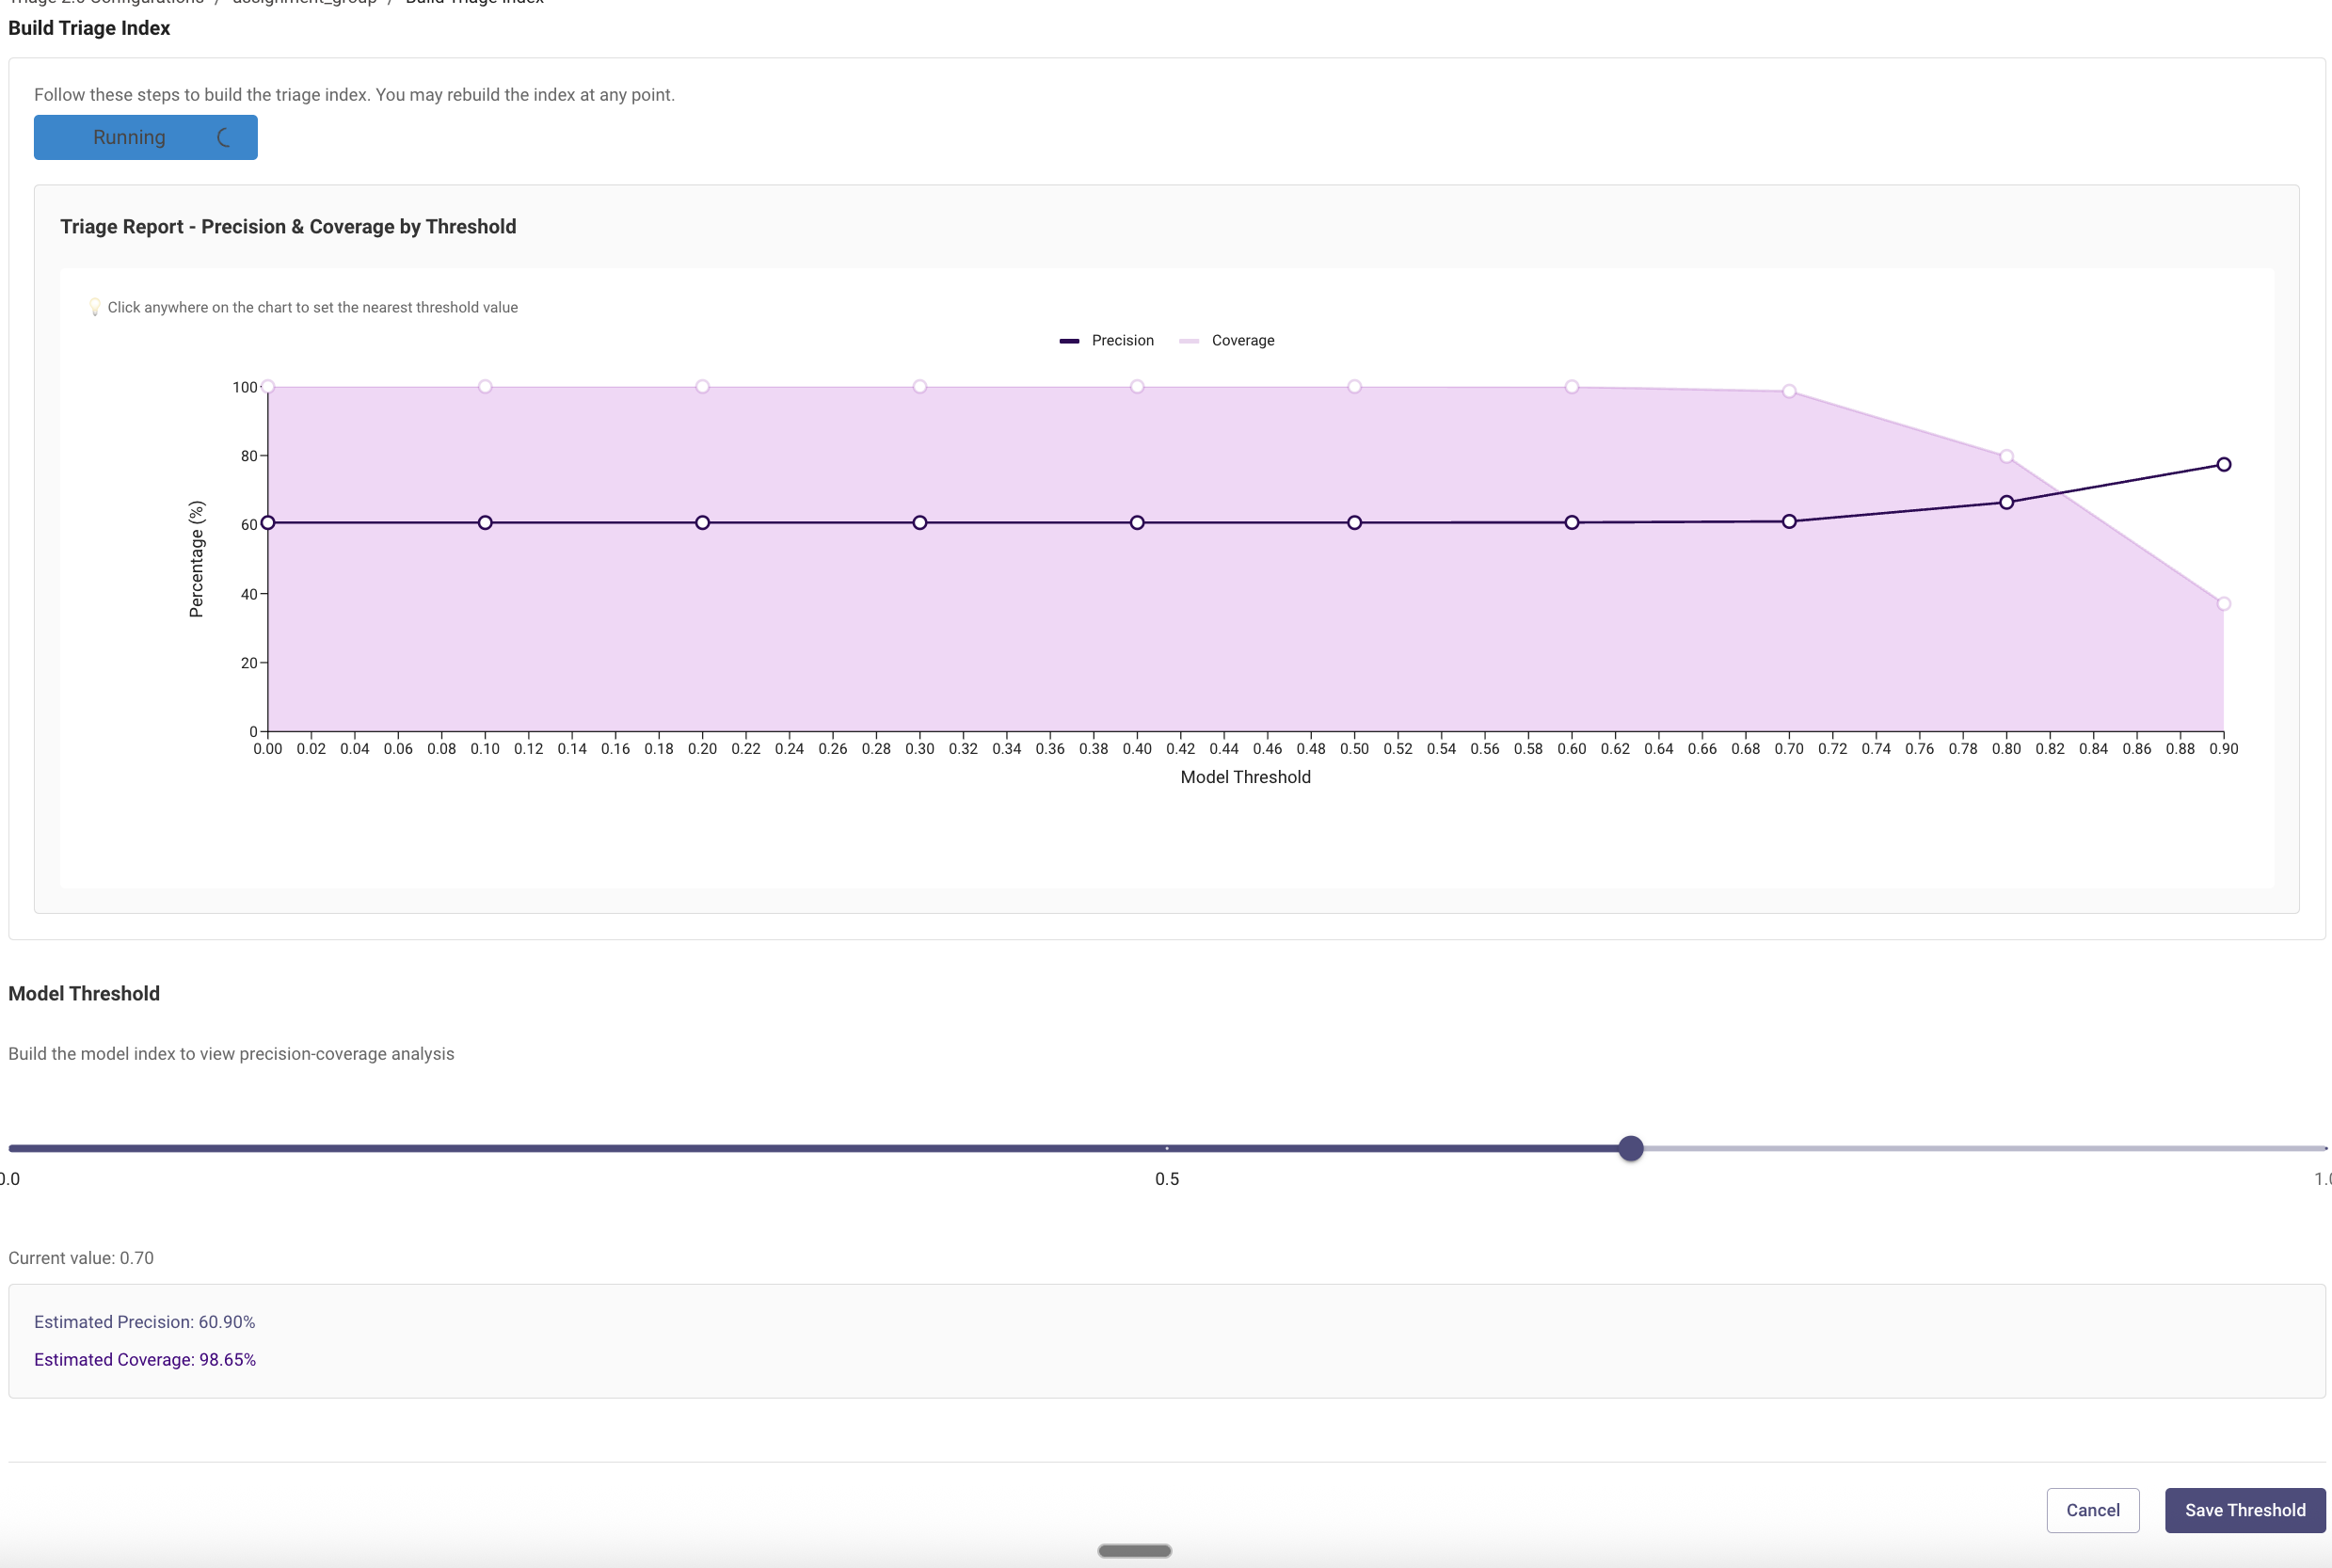
Not Startedto begin building the index. The status will update to success or failure once complete. - Click
Fetch Reportto generate the Precision & Coverage graph. - Select a model threshold based on your target:
- High precision (> 90%) — fewer predictions but higher accuracy; recommended for conservative rollouts
- High coverage — more predictions; maximizes Triage impact
- Click
Save Threshold
The model threshold must be set to one decimal place (e.g. 0.1, 0.2, 0.9). Values with more than one decimal place (e.g. 0.12, 0.85) are not valid.
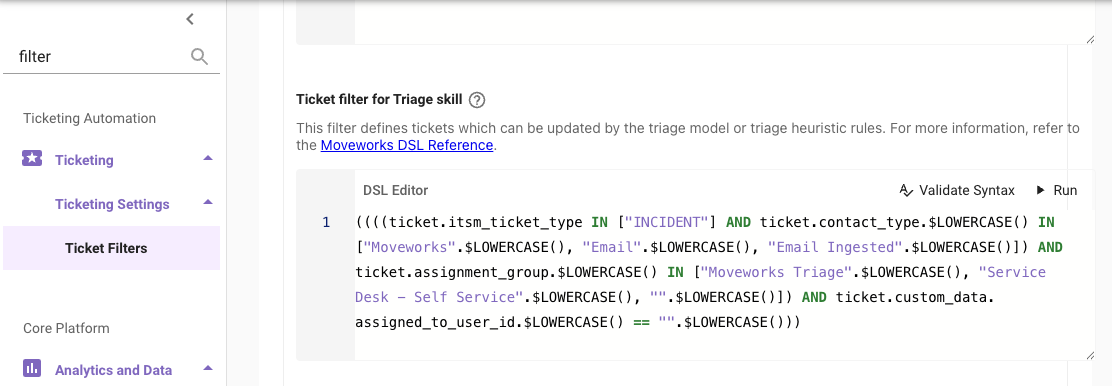
Step 7: Configure Triage Filter
The Triage Filter controls which tickets are eligible for triage at runtime. When a ticket arrives, Moveworks evaluates in this order:
-
Triage Filter — is this ticket in scope?
-
Values to Overwrite (Step 3) — is the field’s current value eligible to be overwritten?
-
Allowlist / Blocklist (Step 3) — is the predicted value permitted?
-
Navigate to
Ticketing > Ticketing Settings > Ticket Filters > Skill-specific ticket filters > Ticket filter for Triage skill -
Configure your filter rules to define which tickets Triage should act on
-
Validate your syntax using the
Validate Syntaxbutton and test against tickets that should be in scope
Step 8: Enable Triage 2.0
Two toggles must both be on for Triage to go live:
- Field Configurations → Enable Triage — enable this for each model configured in Step 3
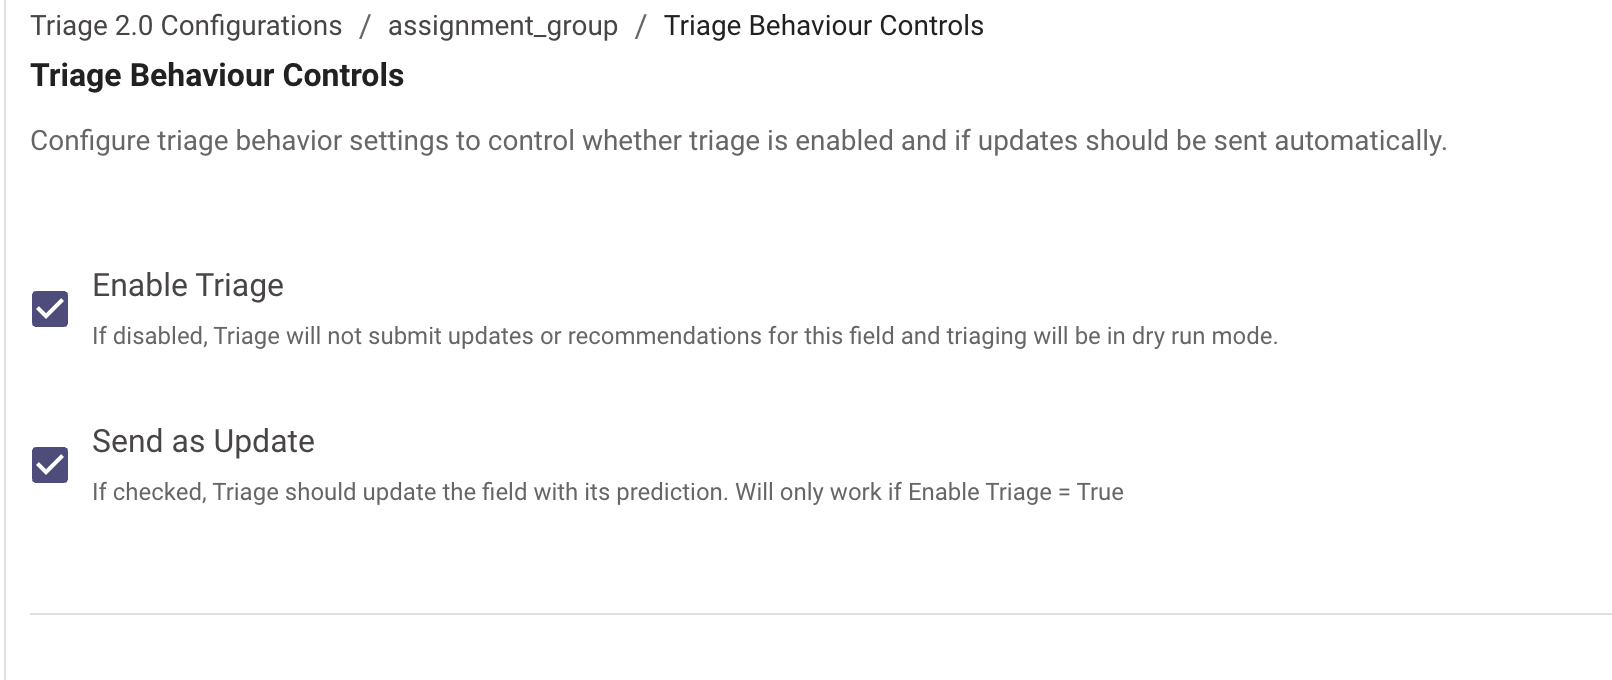
- Triage 2.0 product-level switch — navigate to
Triage > Triage 2.0and enable the product-level toggle
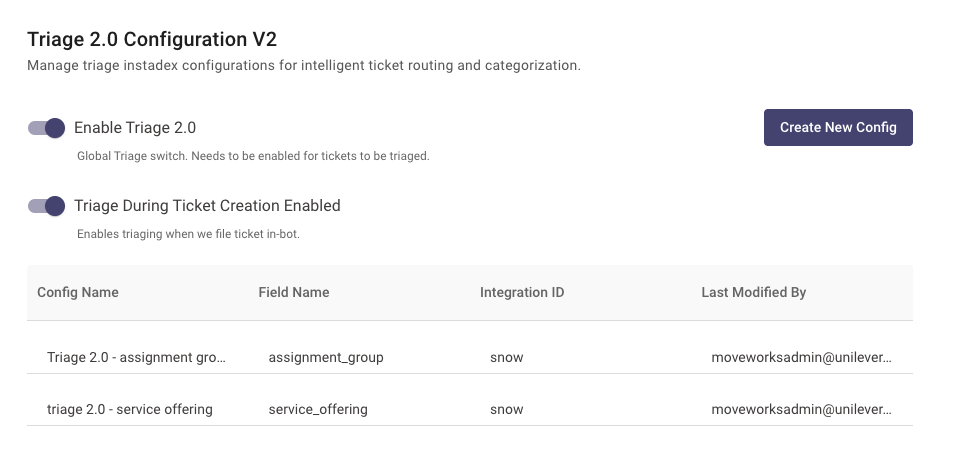
Once both are enabled, Triage 2.0 is live. Monitor predictions via the Triage analytics dashboard.