Lab #5: Ticketing (Core)
Lab #5: Ticketing (Core)
Overview
- Learning Objectives: How to configure, modify, validate, and test ServiceNow IT Ticketing within Moveworks
- Estimated Time: 45 minutes
- Prerequisites:
Key Concepts
Moveworks manages the full lifecycle of a ticket, from creation to resolution. The core ticketing configuration involves:
- Table Mappings: The configuration that tells Moveworks which tables to interact with (e.g.,
incidentfor breaks/fixes orsc_req_itemfor requests). - Routing Conditions: Logic that directs a user’s request to a specific workflow (e.g., routing a “Concierge” intent to a standard ticket generation flow).
- Table Actions: The specific capabilities enabled for the Moveworks AI Assistant, such as the ability to “Query” (look up), “Update” (add comments), or “Resolve” a ticket.
- Service Portal URL: The base web address of your ITSM portal. Moveworks appends ticket IDs to this URL to provide users with direct “View in Portal” links.
Relevant Documentation:
- Moveworks Help: Concierge & Ticketing Capabilities Overview
- Moveworks Help: Configuring Ticketing for ServiceNow
- Moveworks Help: Ticket Data Object
- Moveworks Help: Handoff Overview
🛠️ 1: Walkthrough
Save after every change. Moveworks Setup does not auto-save. Any time you add or modify a field on a page, you must explicitly click Save before navigating away — otherwise your changes will be lost. This is the most common mistake in this lab. Save reminders are highlighted throughout the steps below.
1.1: Initial Setup
-
Navigate to
Ticketing > Ticketing Configuration > New ticketing configuration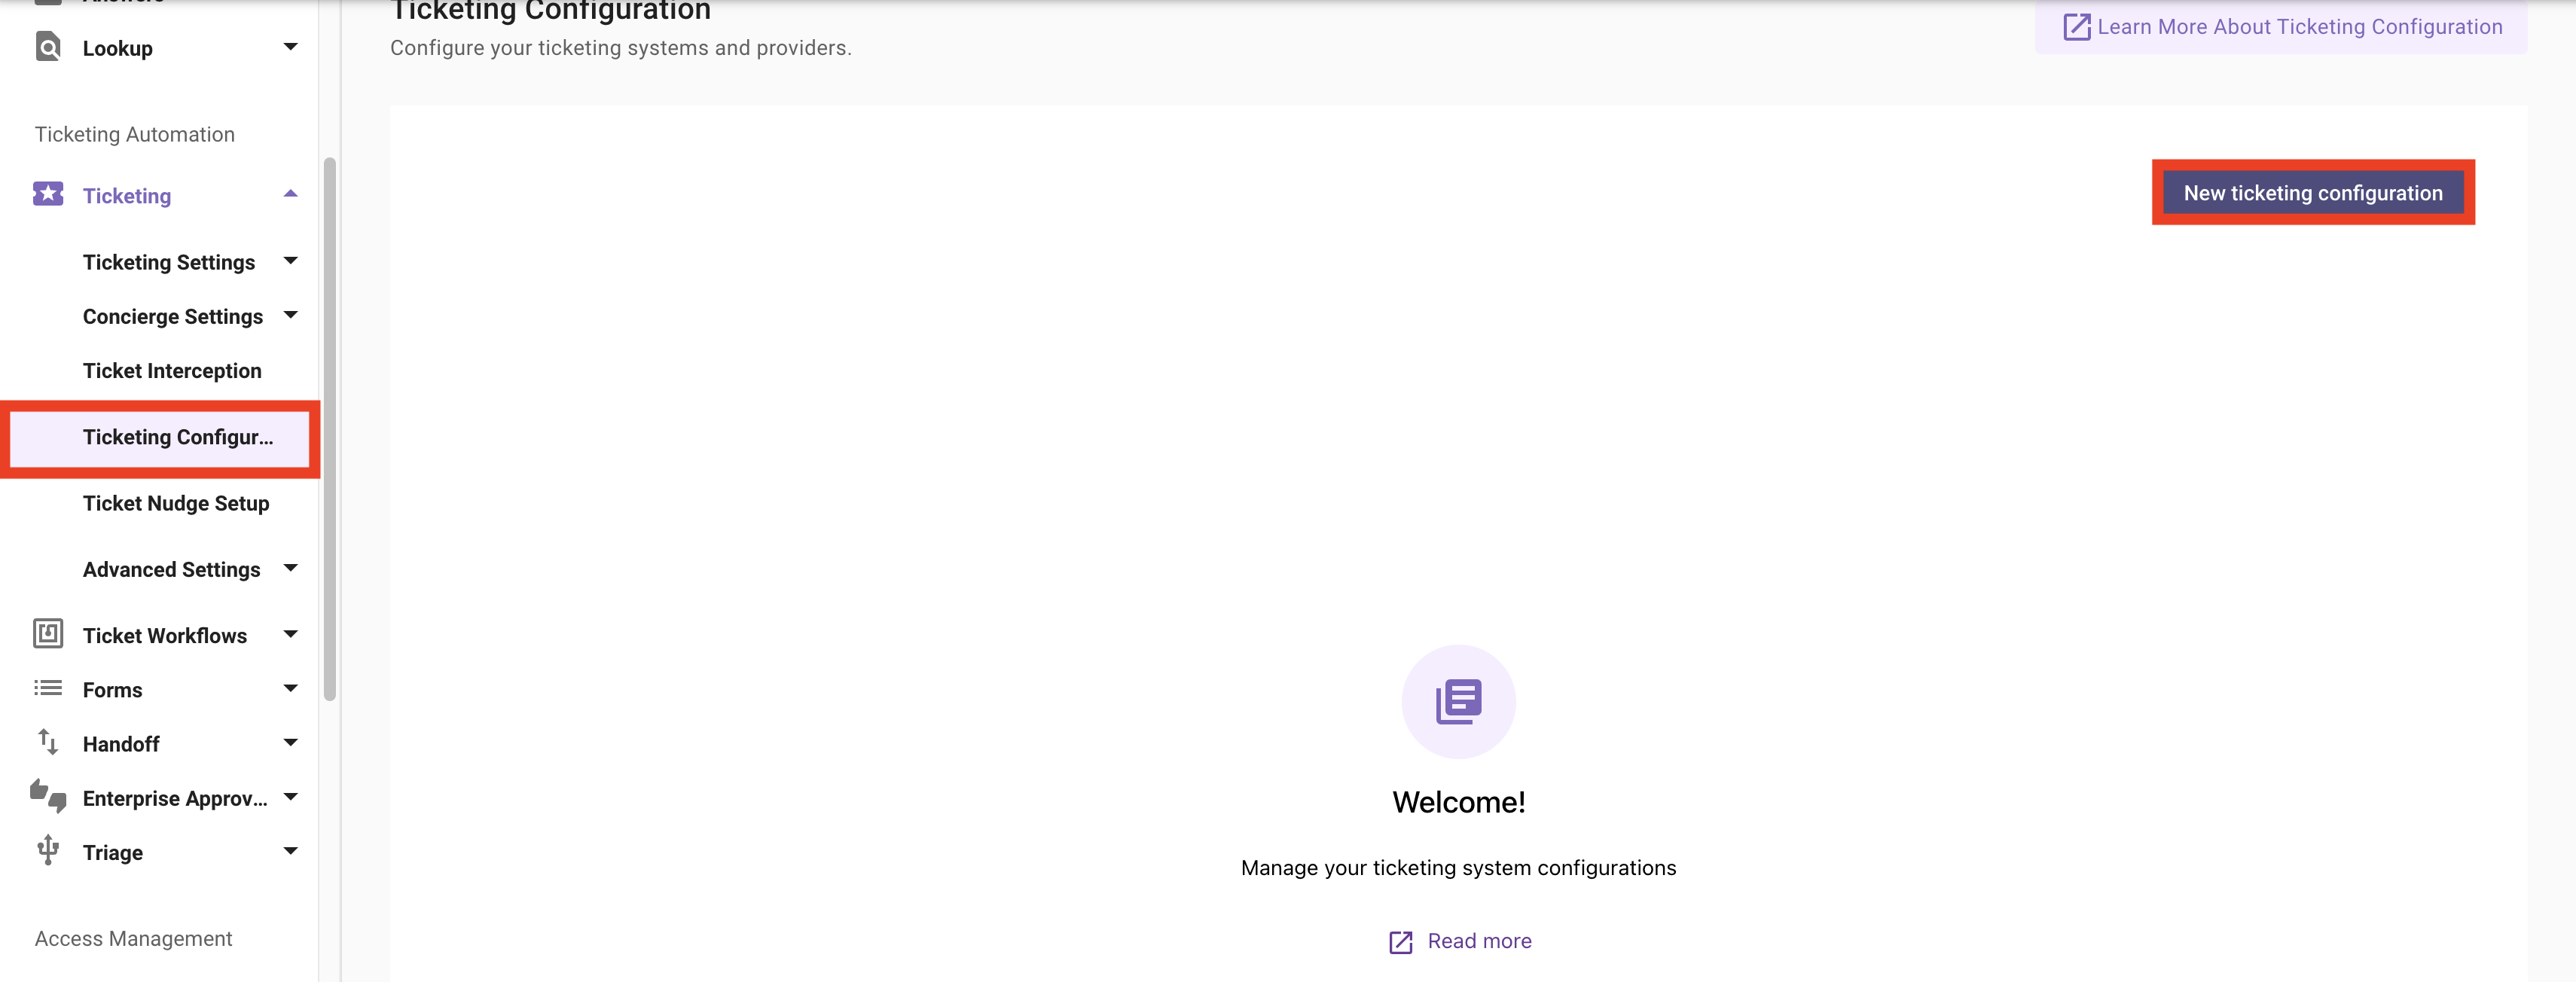
-
Click
Get Started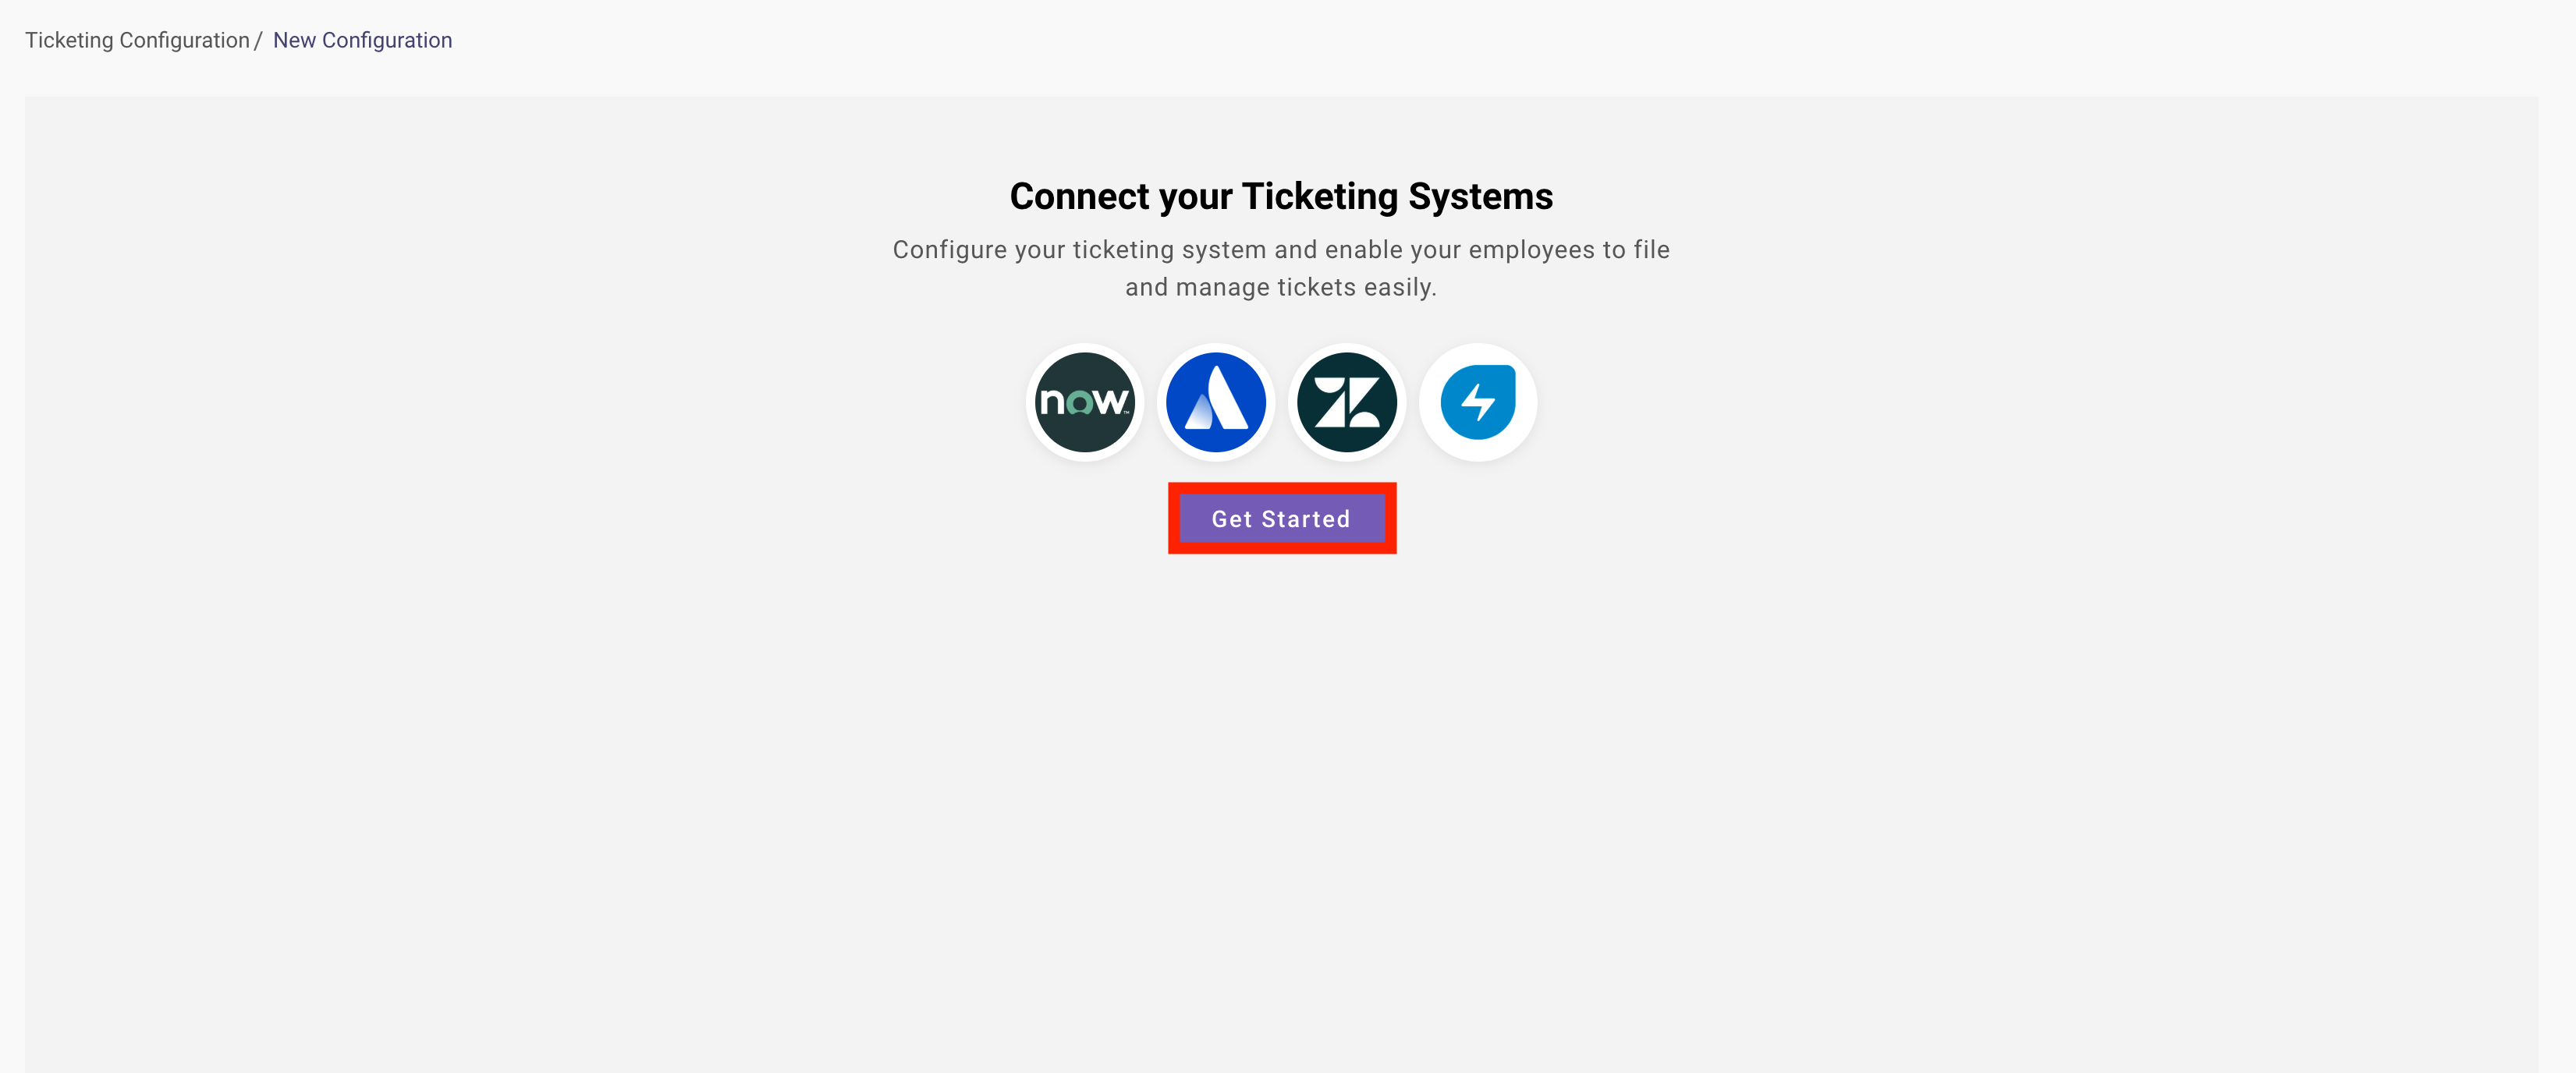
-
Select
ServiceNowas the source system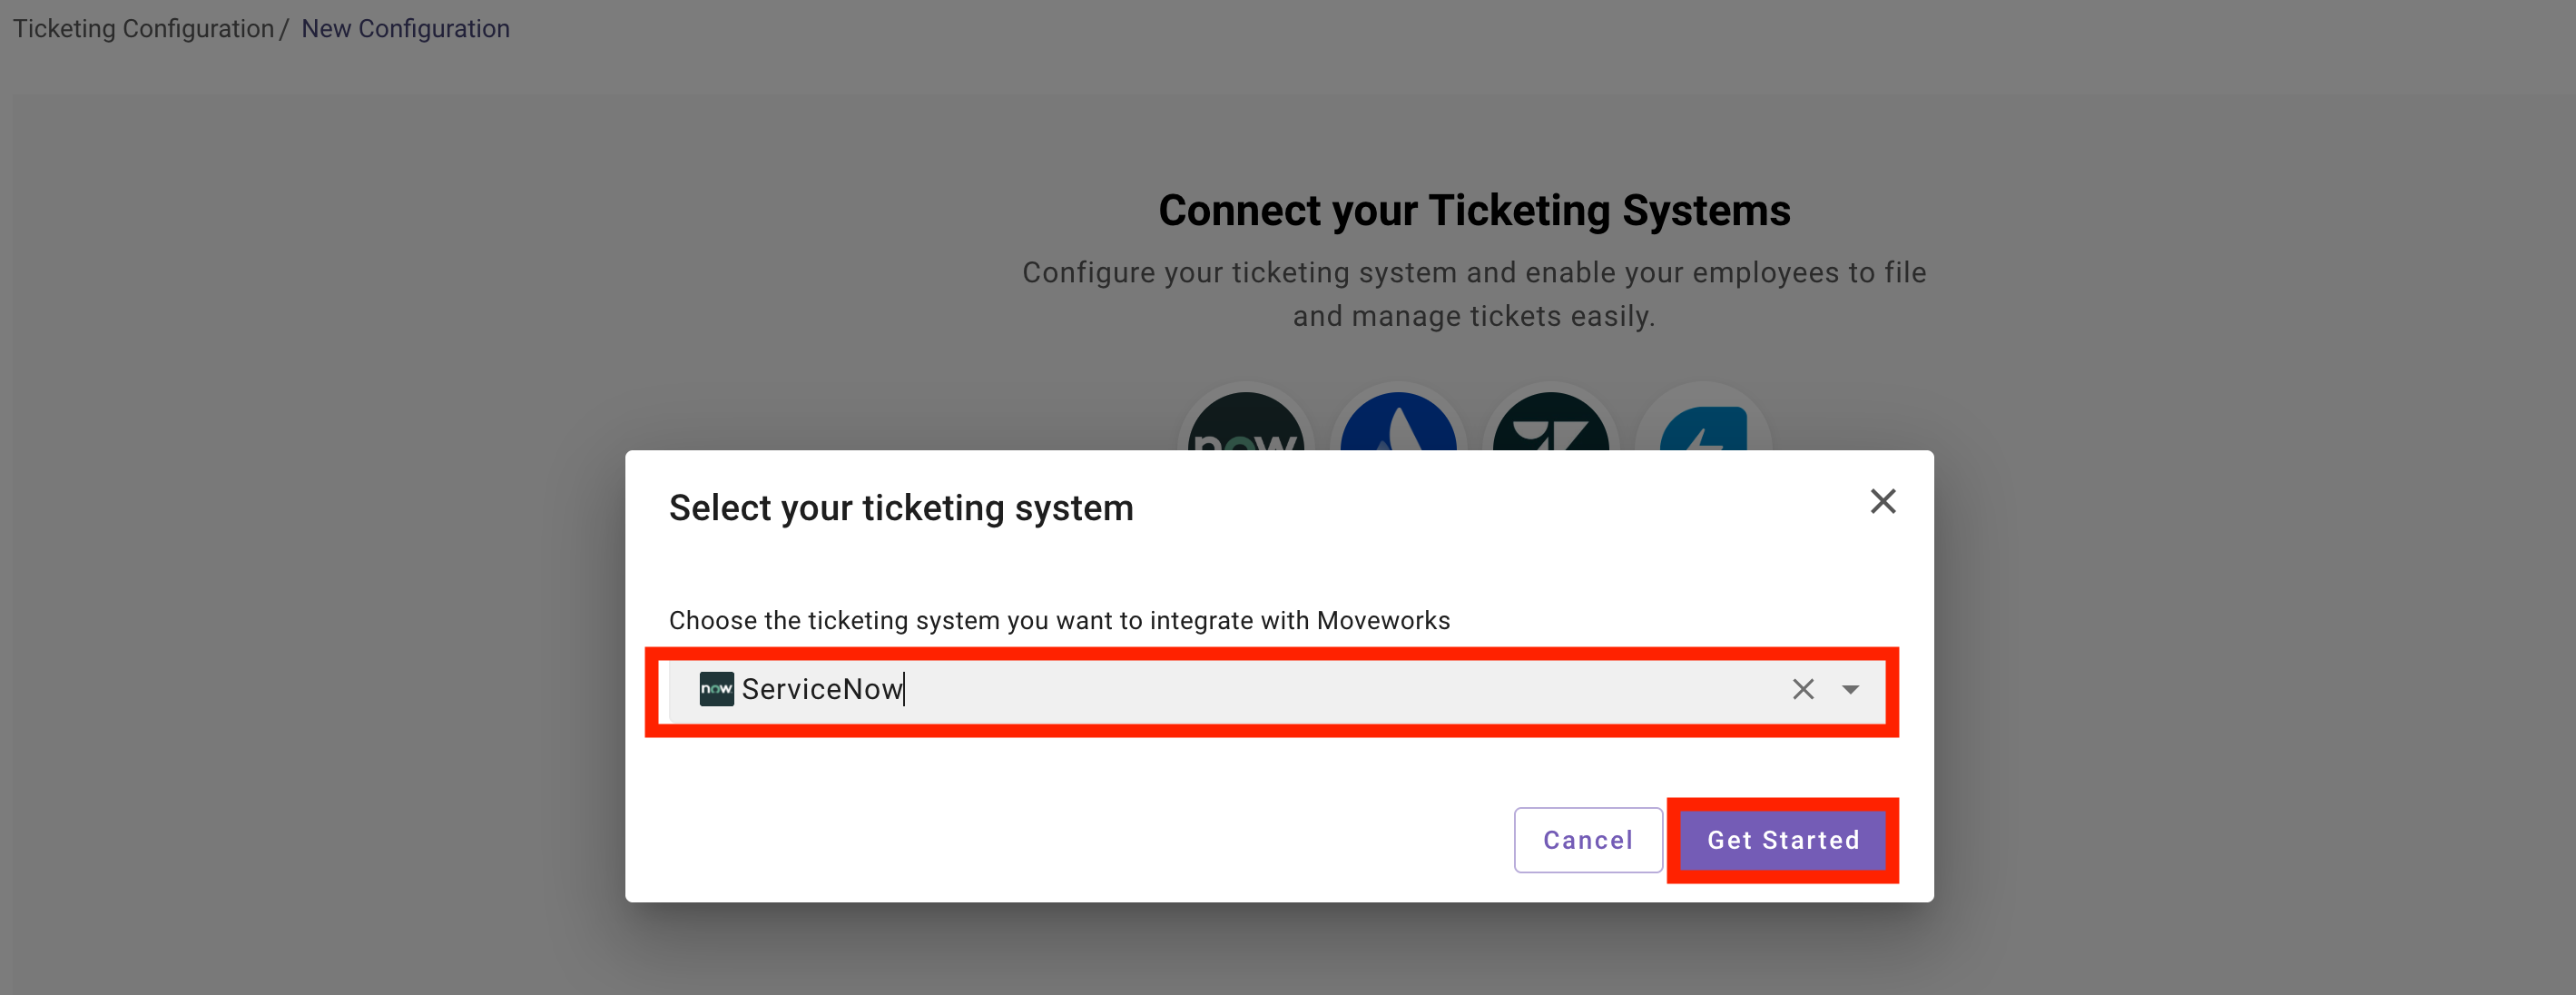
-
Start by selecting the
Connector Selection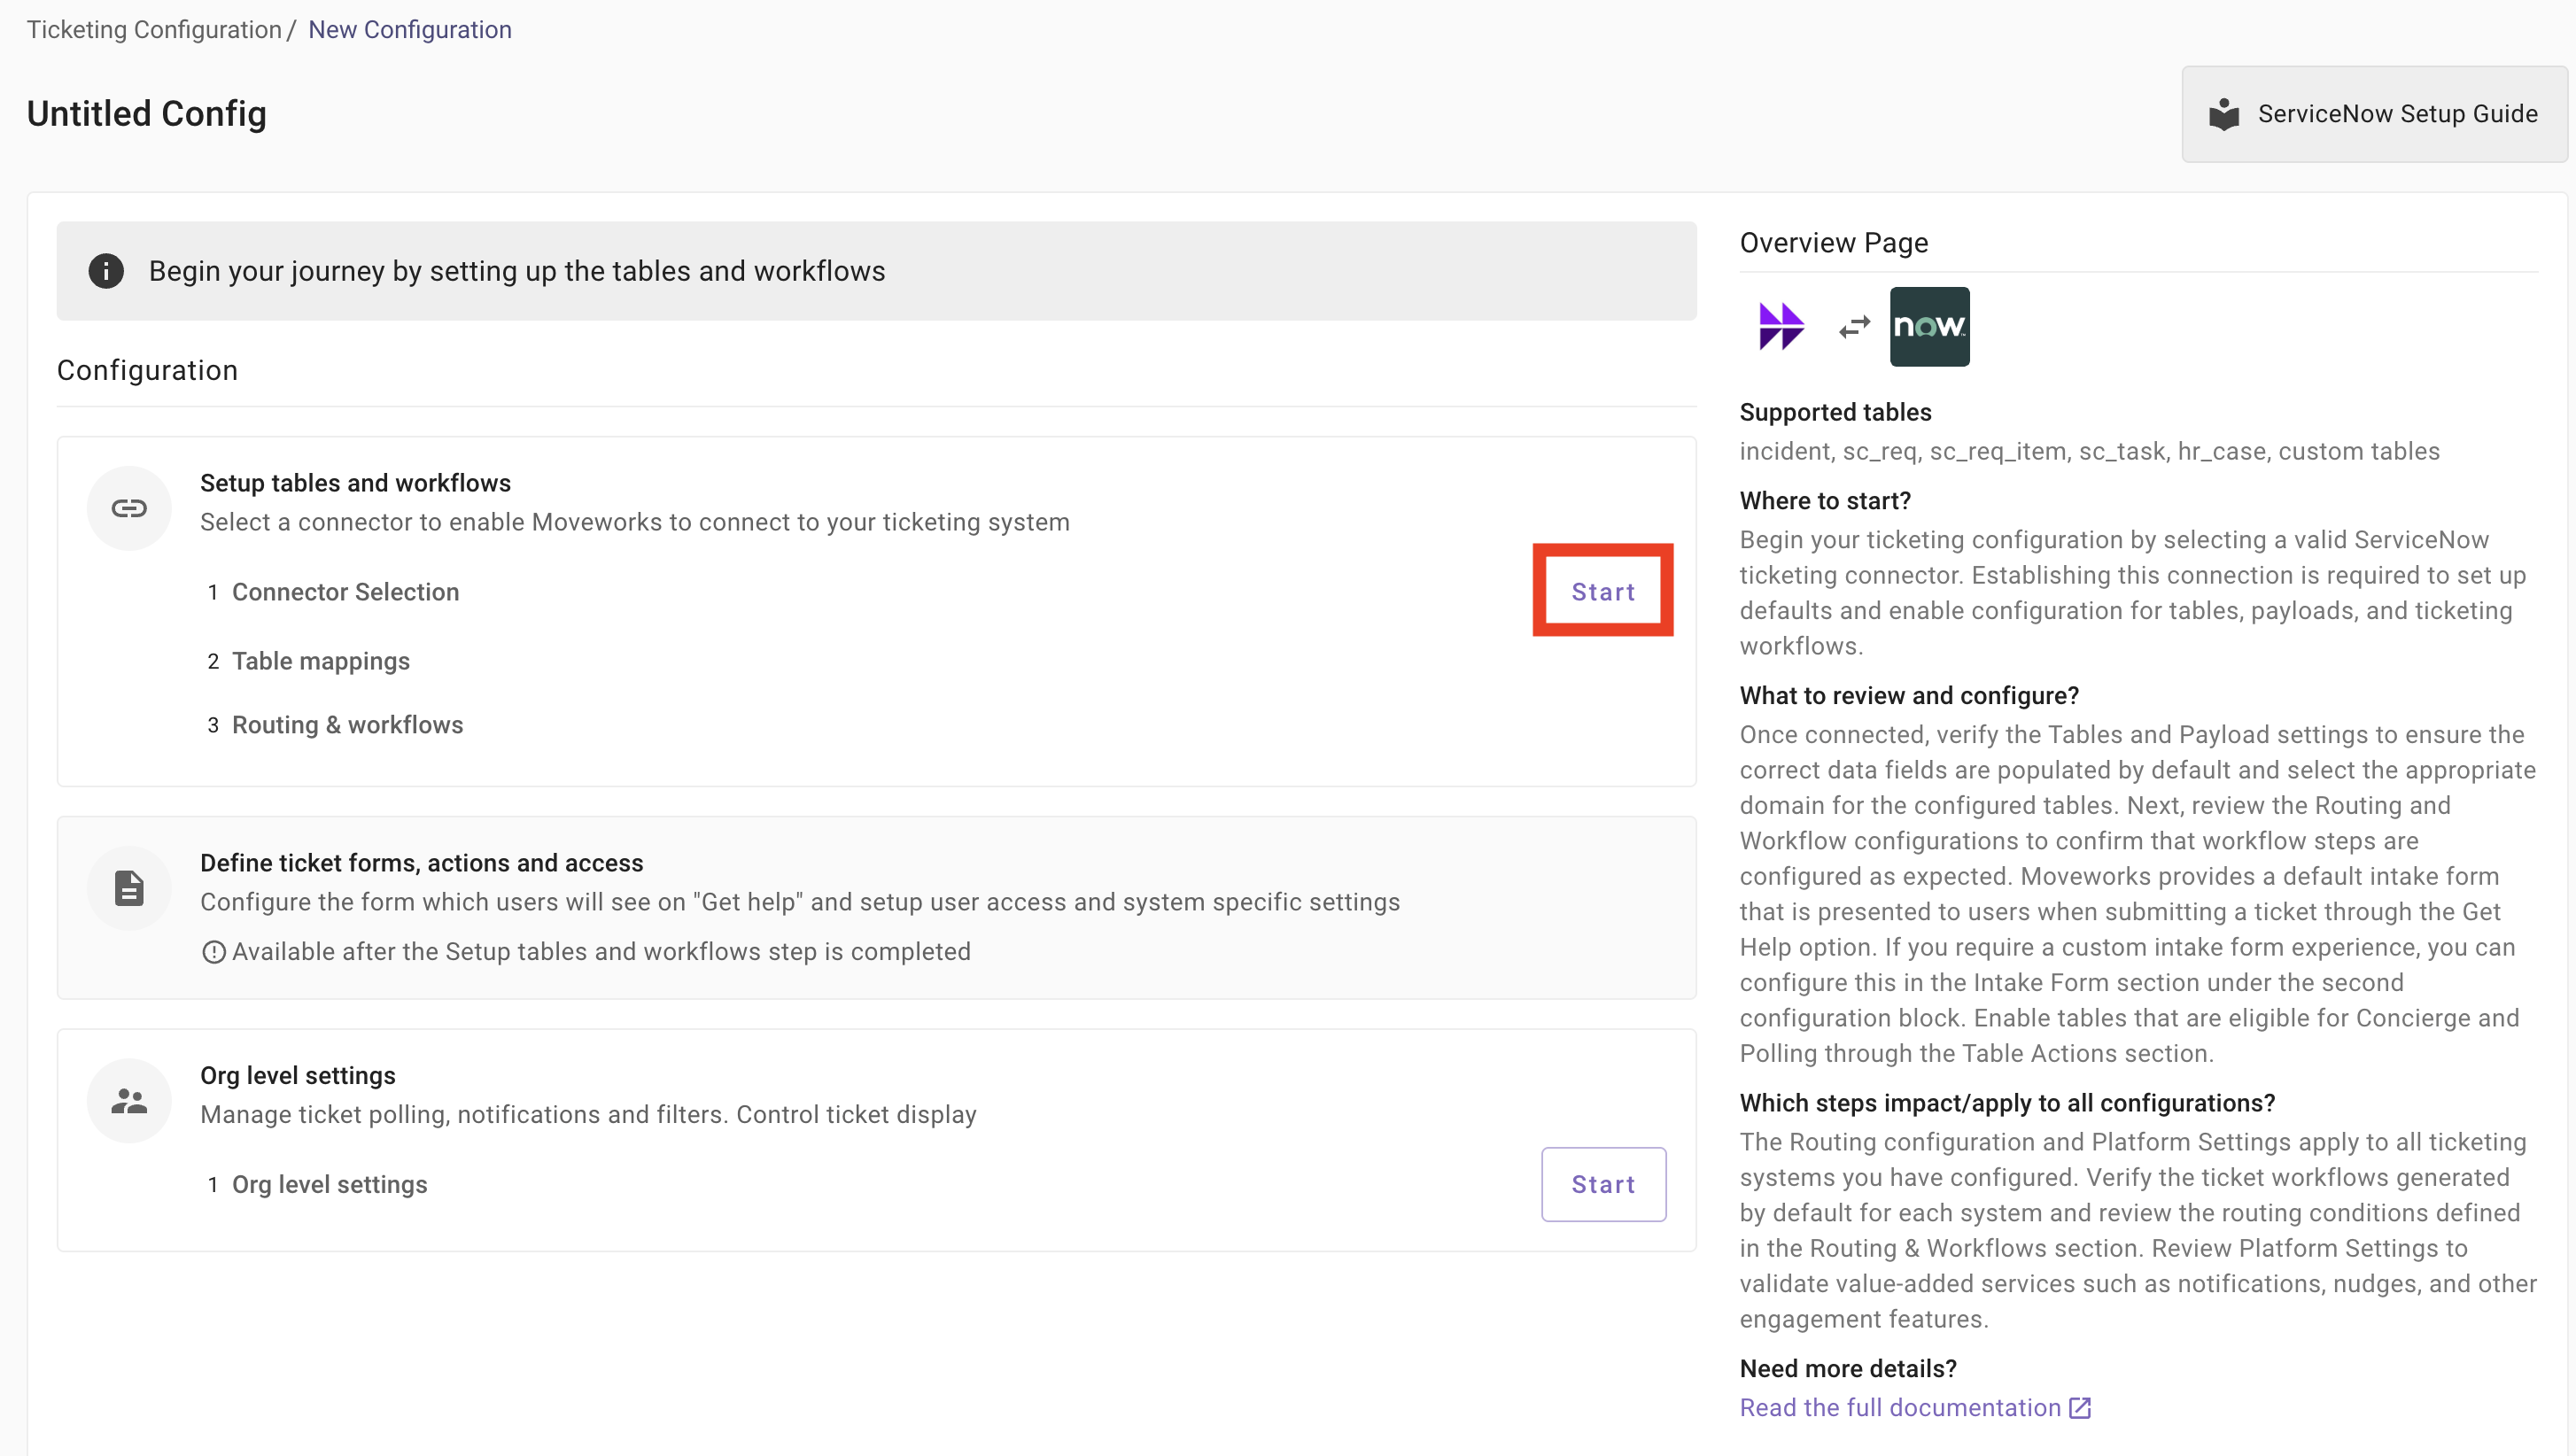
-
Select
snowas theconnector&primary system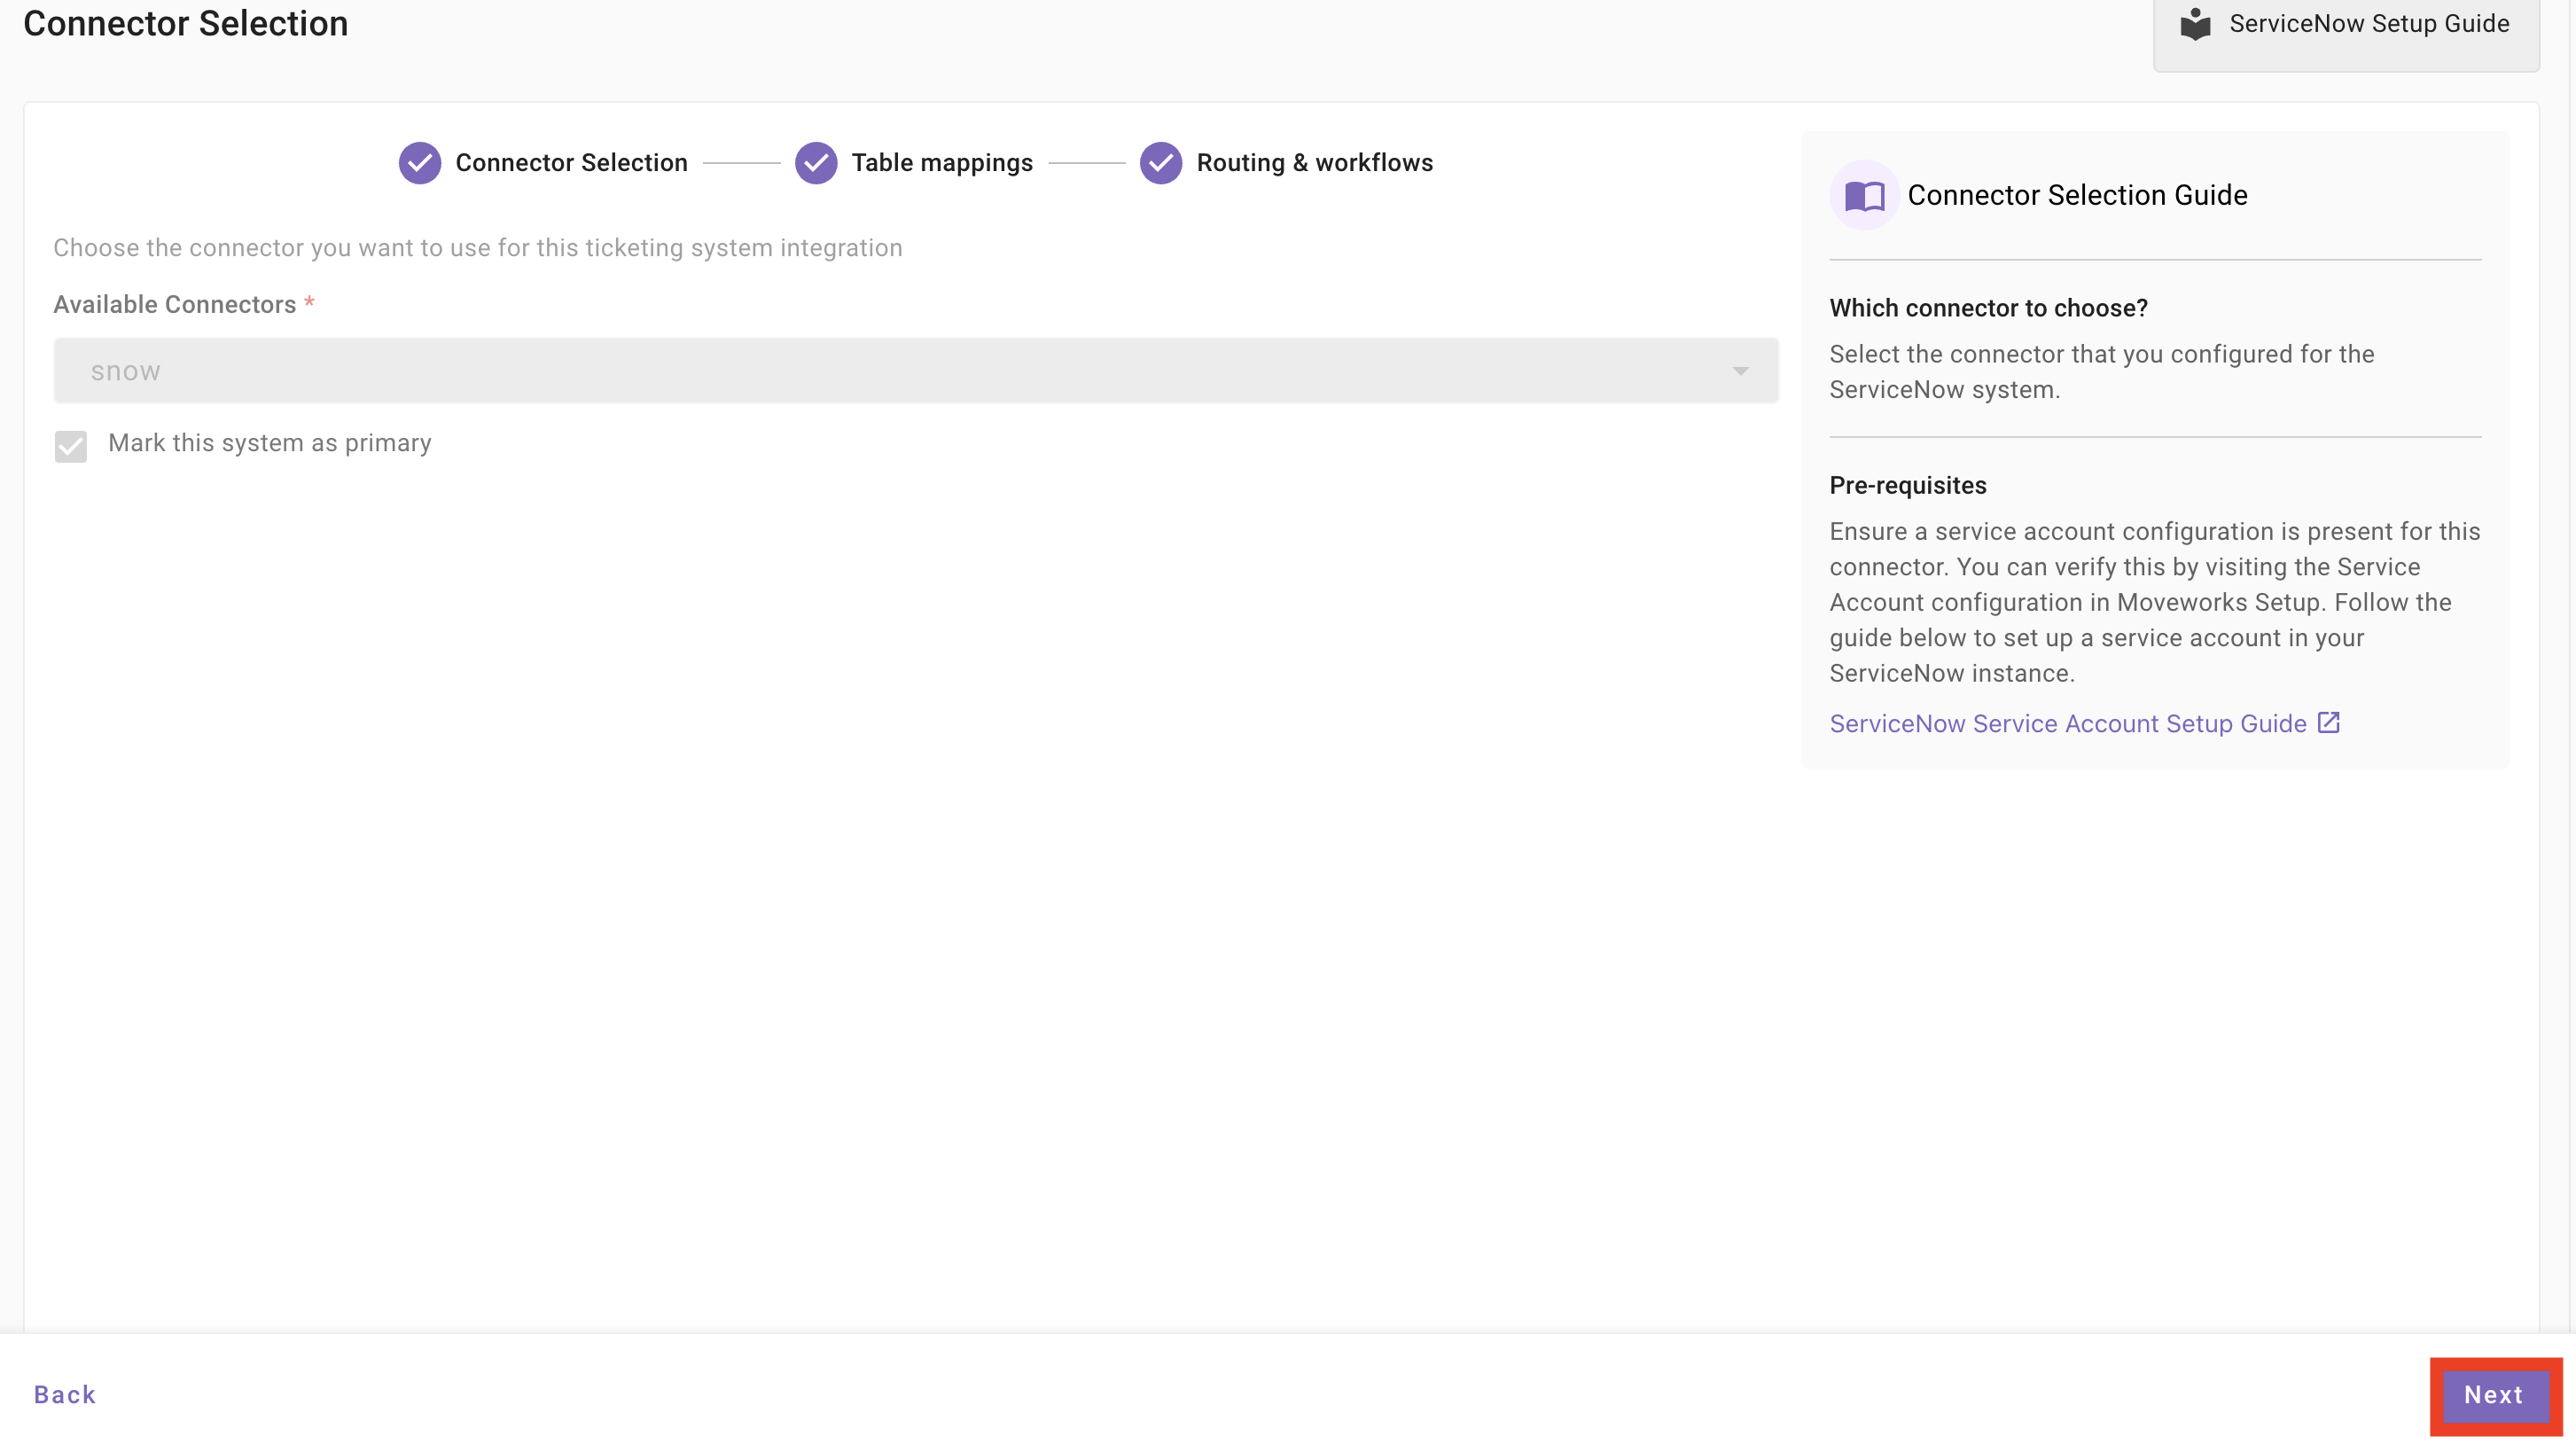
-
Give your configuration a name
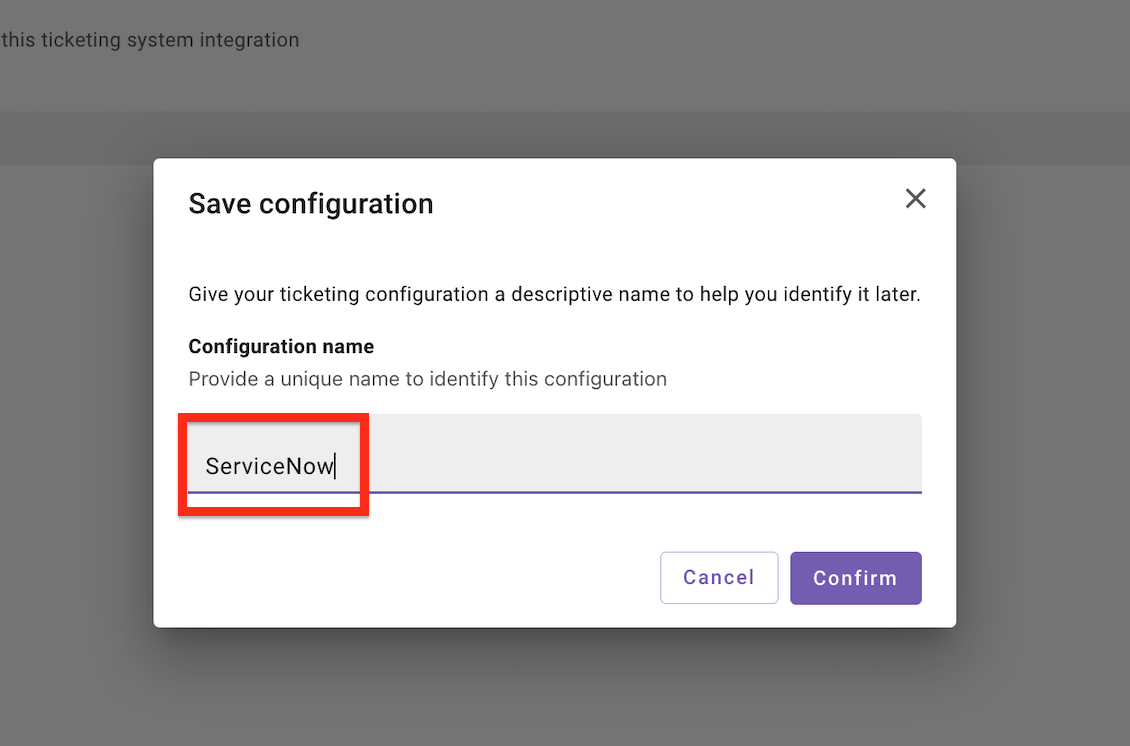 Save your configuration name before continuing.
 -
Click the
Backbutton in bottom left hand side, and click theSetup Defaultsbutton at the top of the page to establish the pre-configured ticketing types.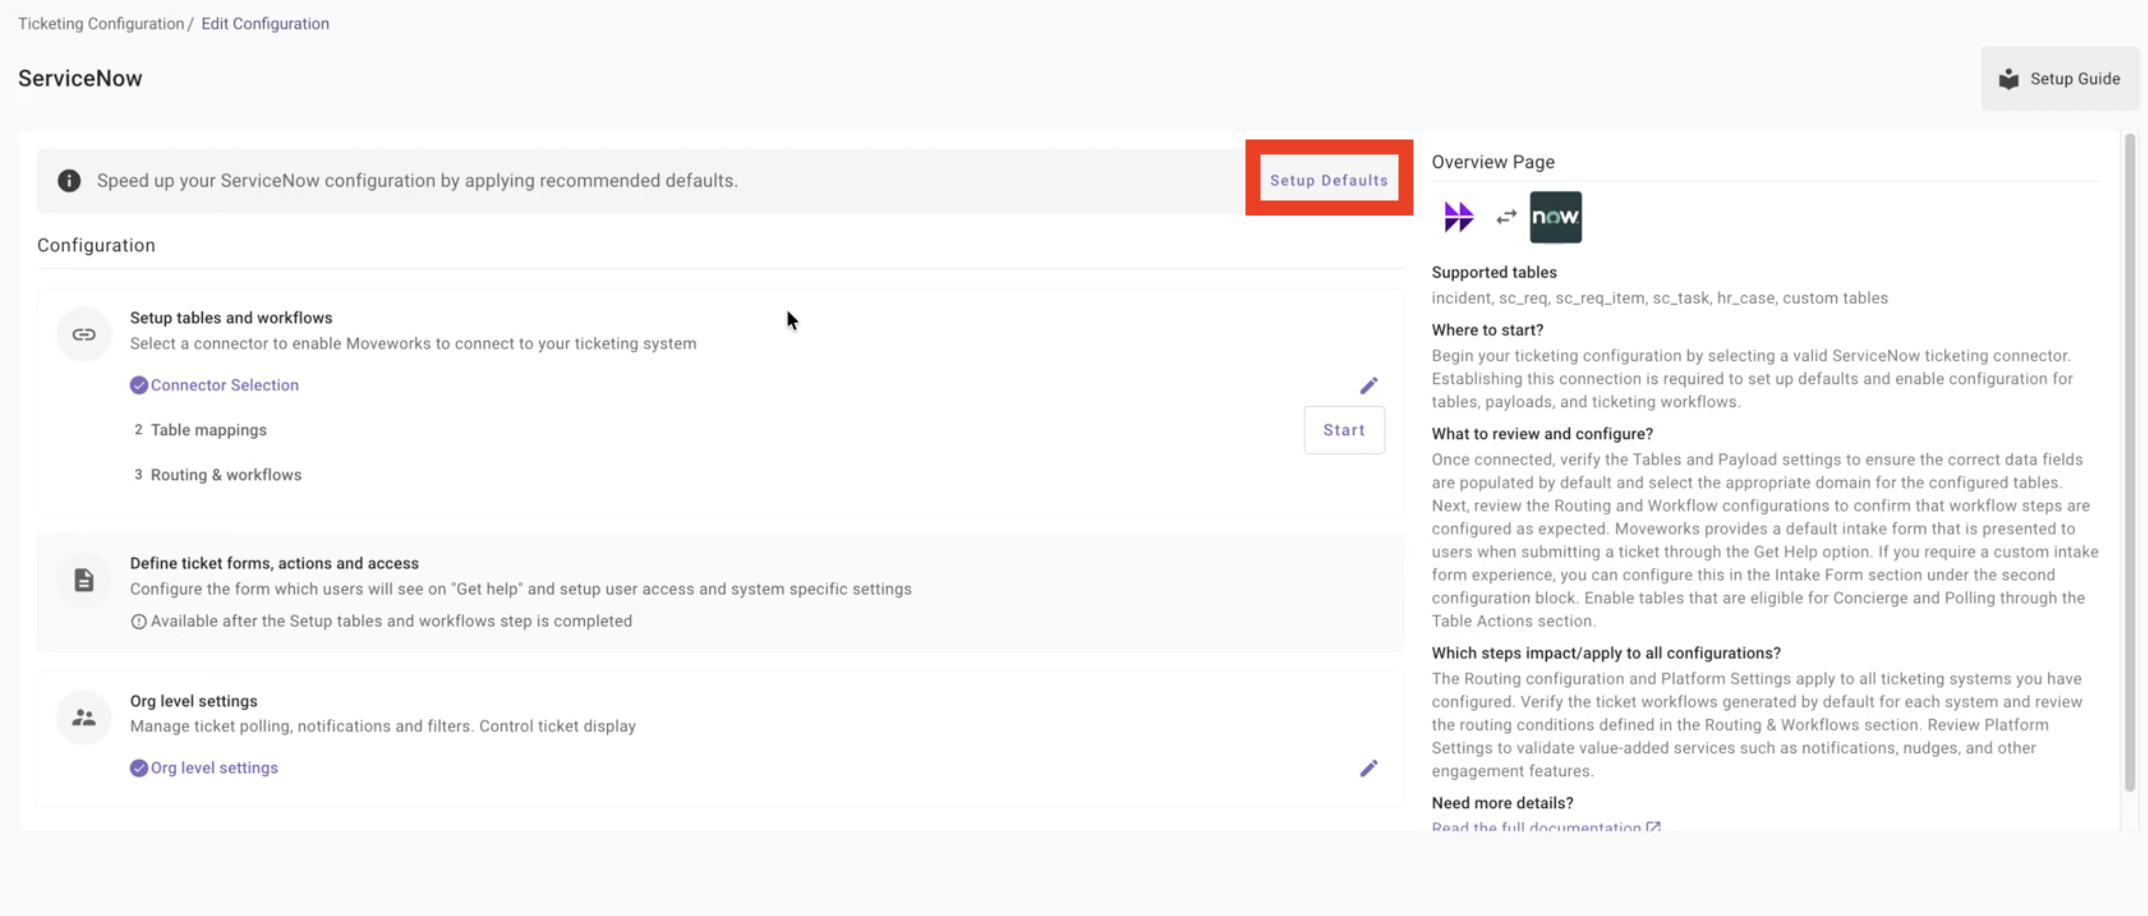
-
Navigate to the newly generated
Table mappingspage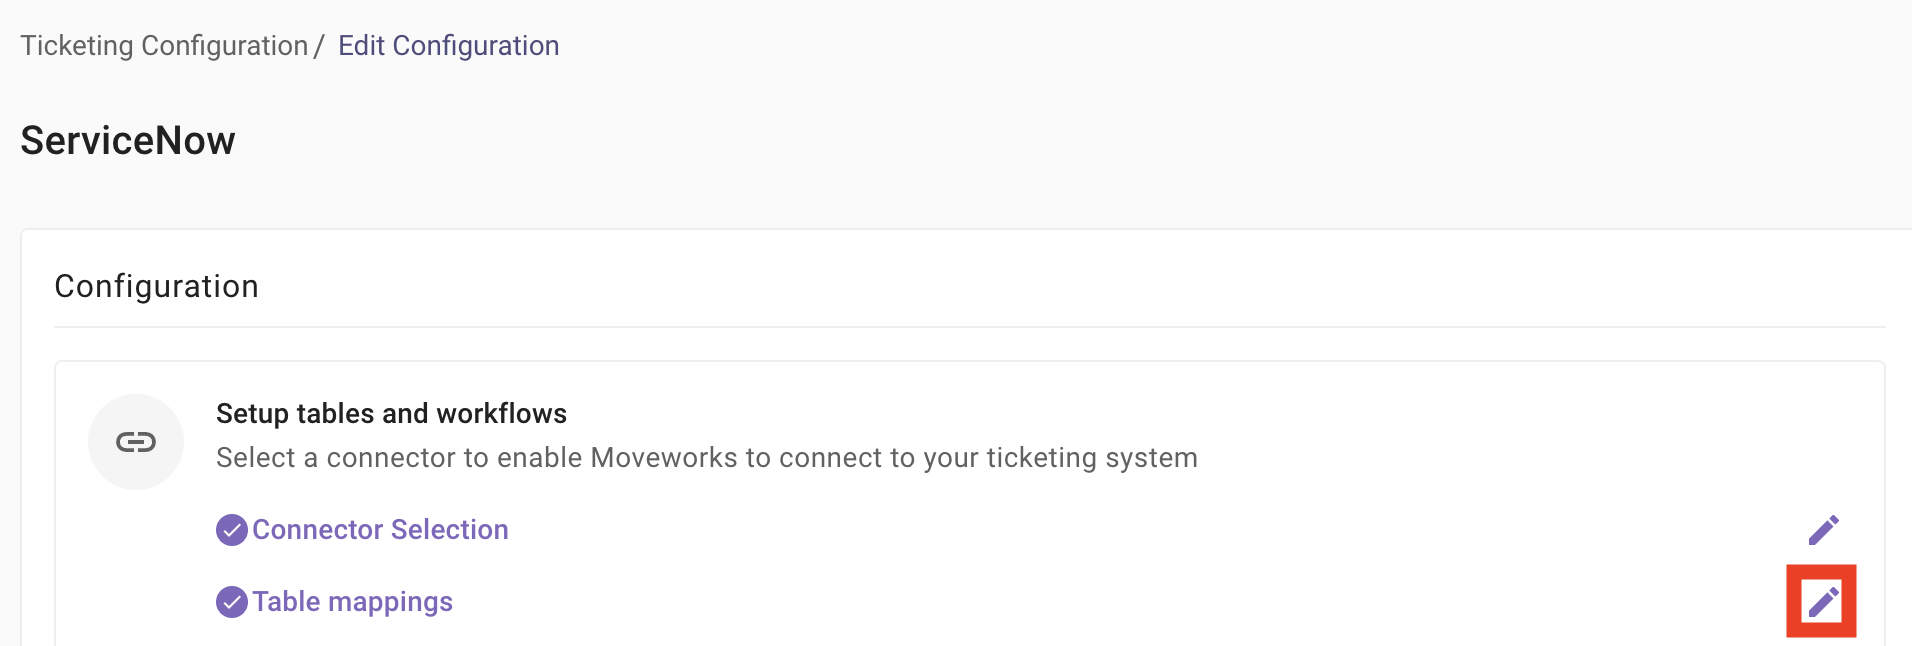
-
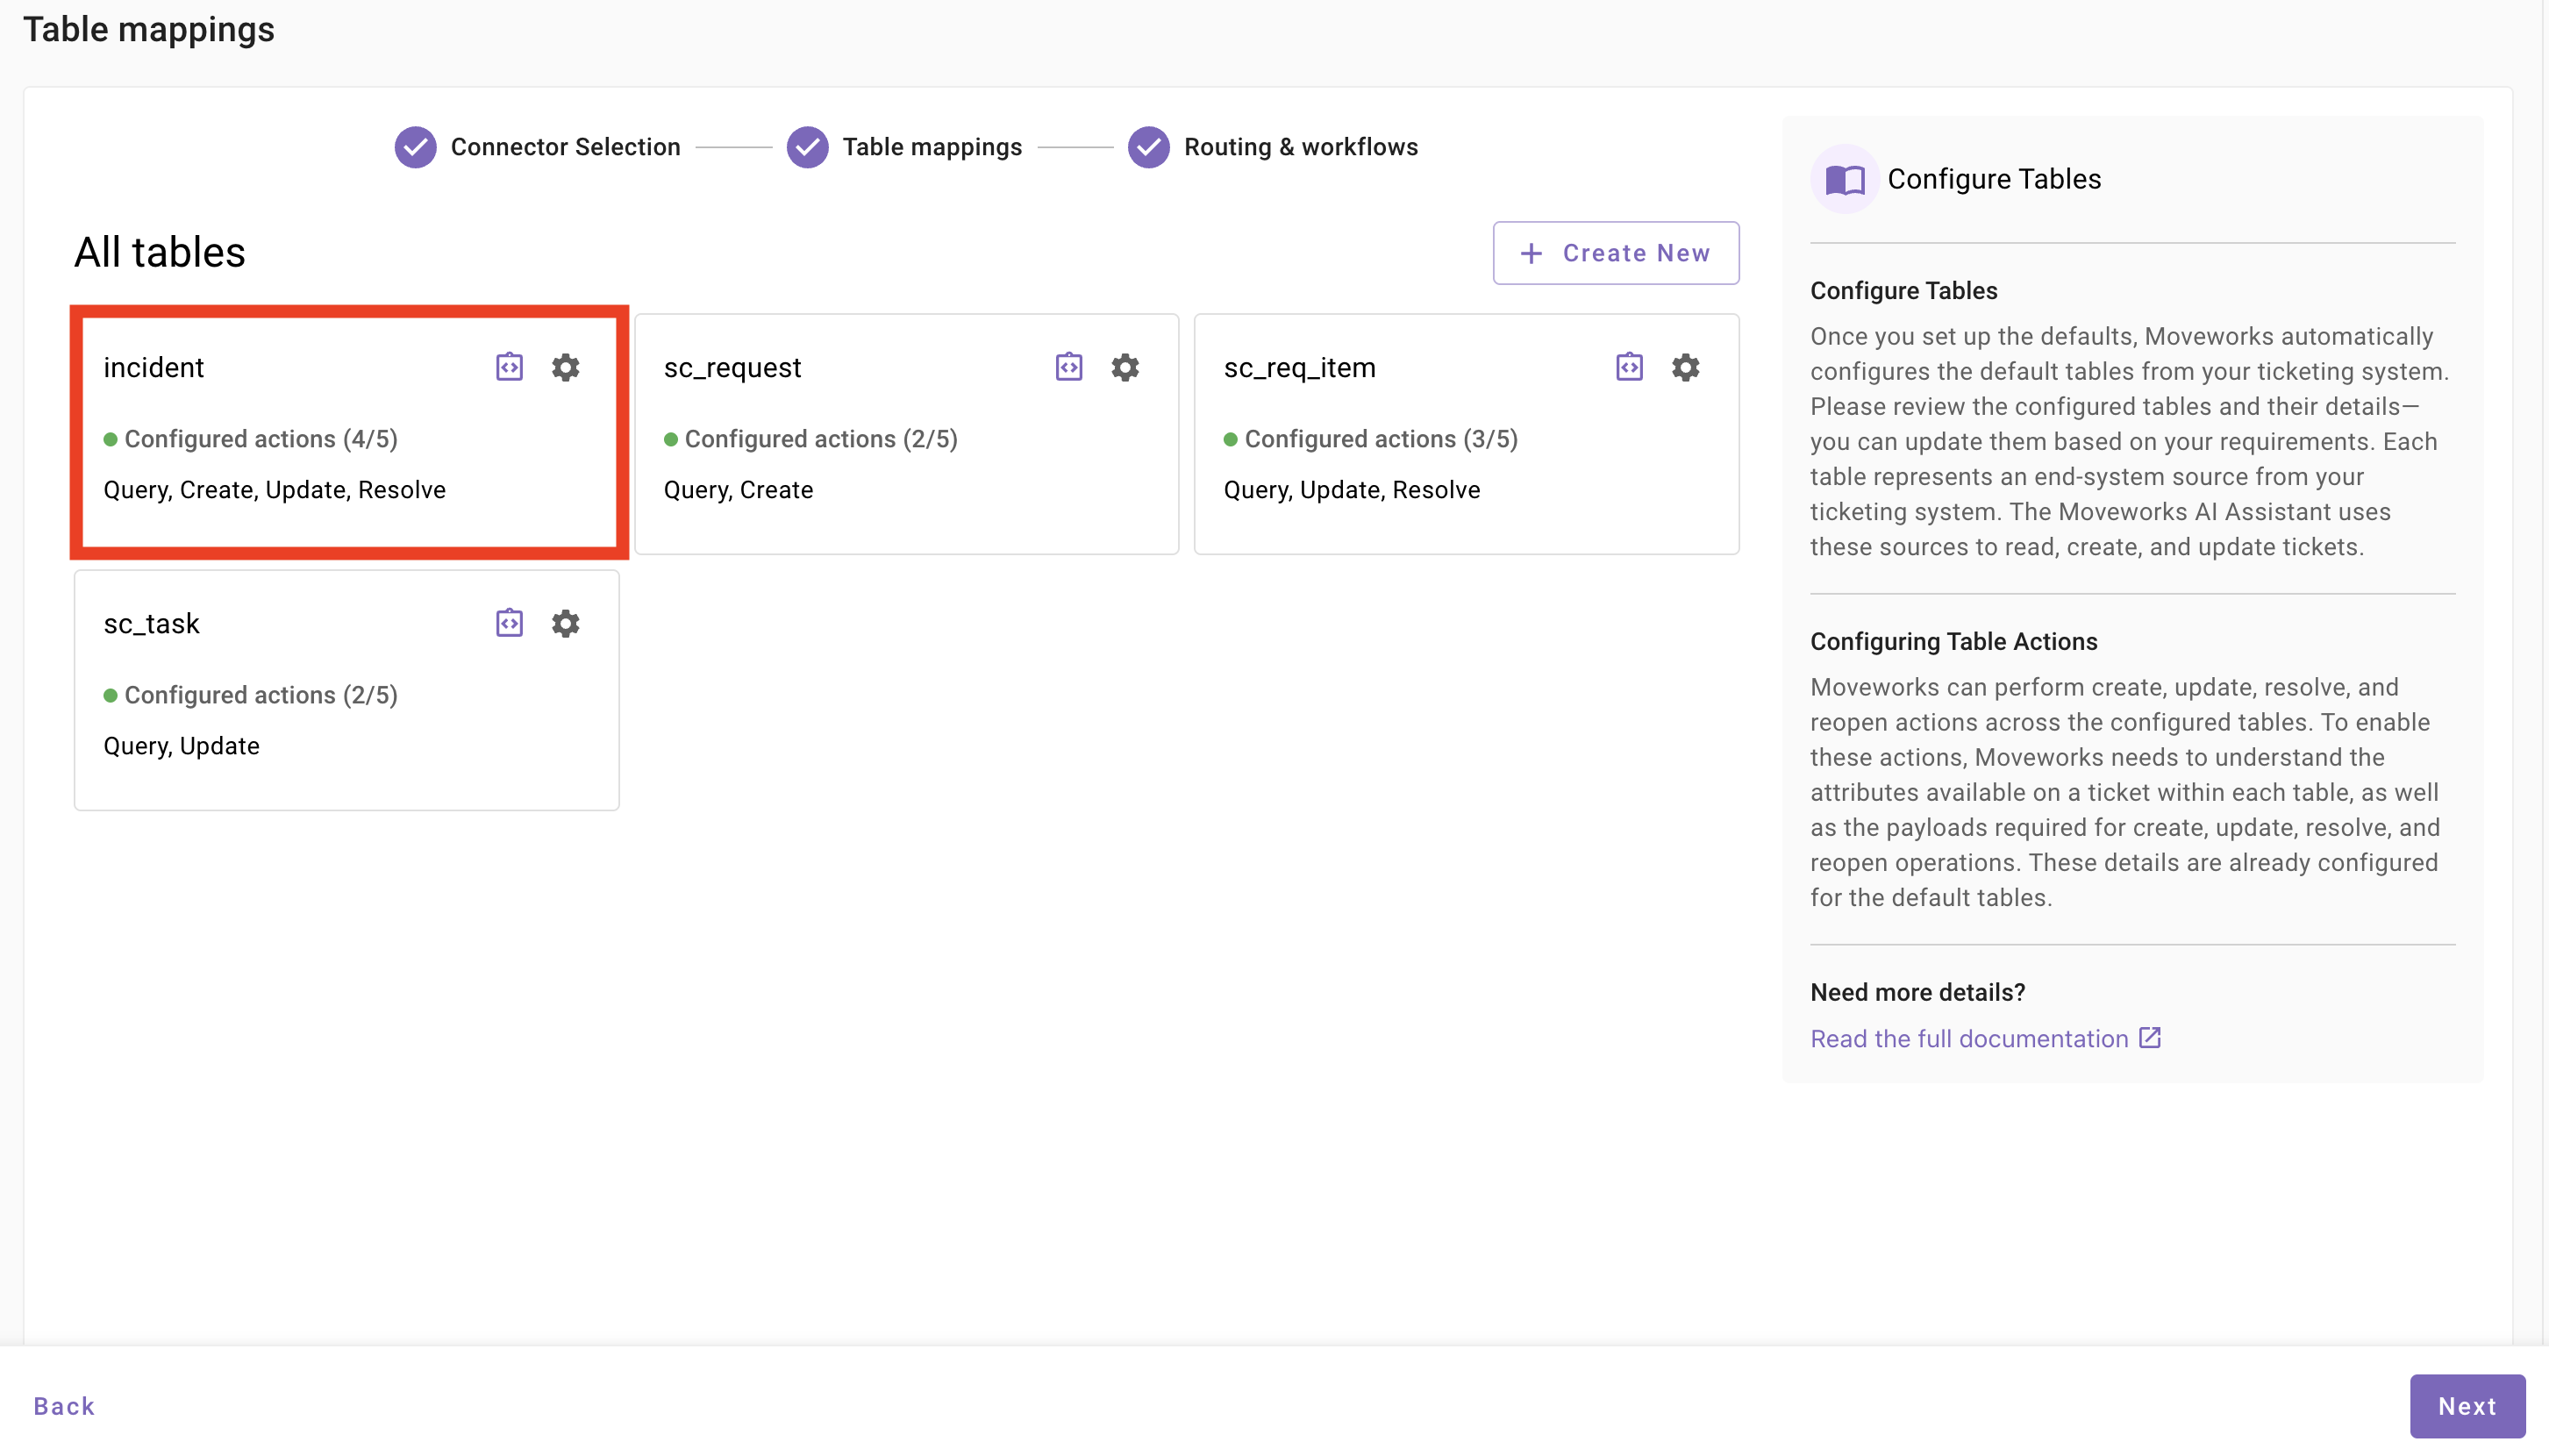
By default, Moveworks will be integrated with the following tables within a ServiceNow instance. Select the
Incidenttable by clicking the UI box:Note: Each ticket destination (table) will include a note at the bottom about what functionality is configured. For Incidents, we can see that the following functionality comes pre-configured:
- Query: Allows requestors to search for their existing tickets
- Create: Enables requestors to initiate new tickets
- Update: Permits requestors to add comments to active tickets
- Resolve: Grants requestors the ability to close their own tickets
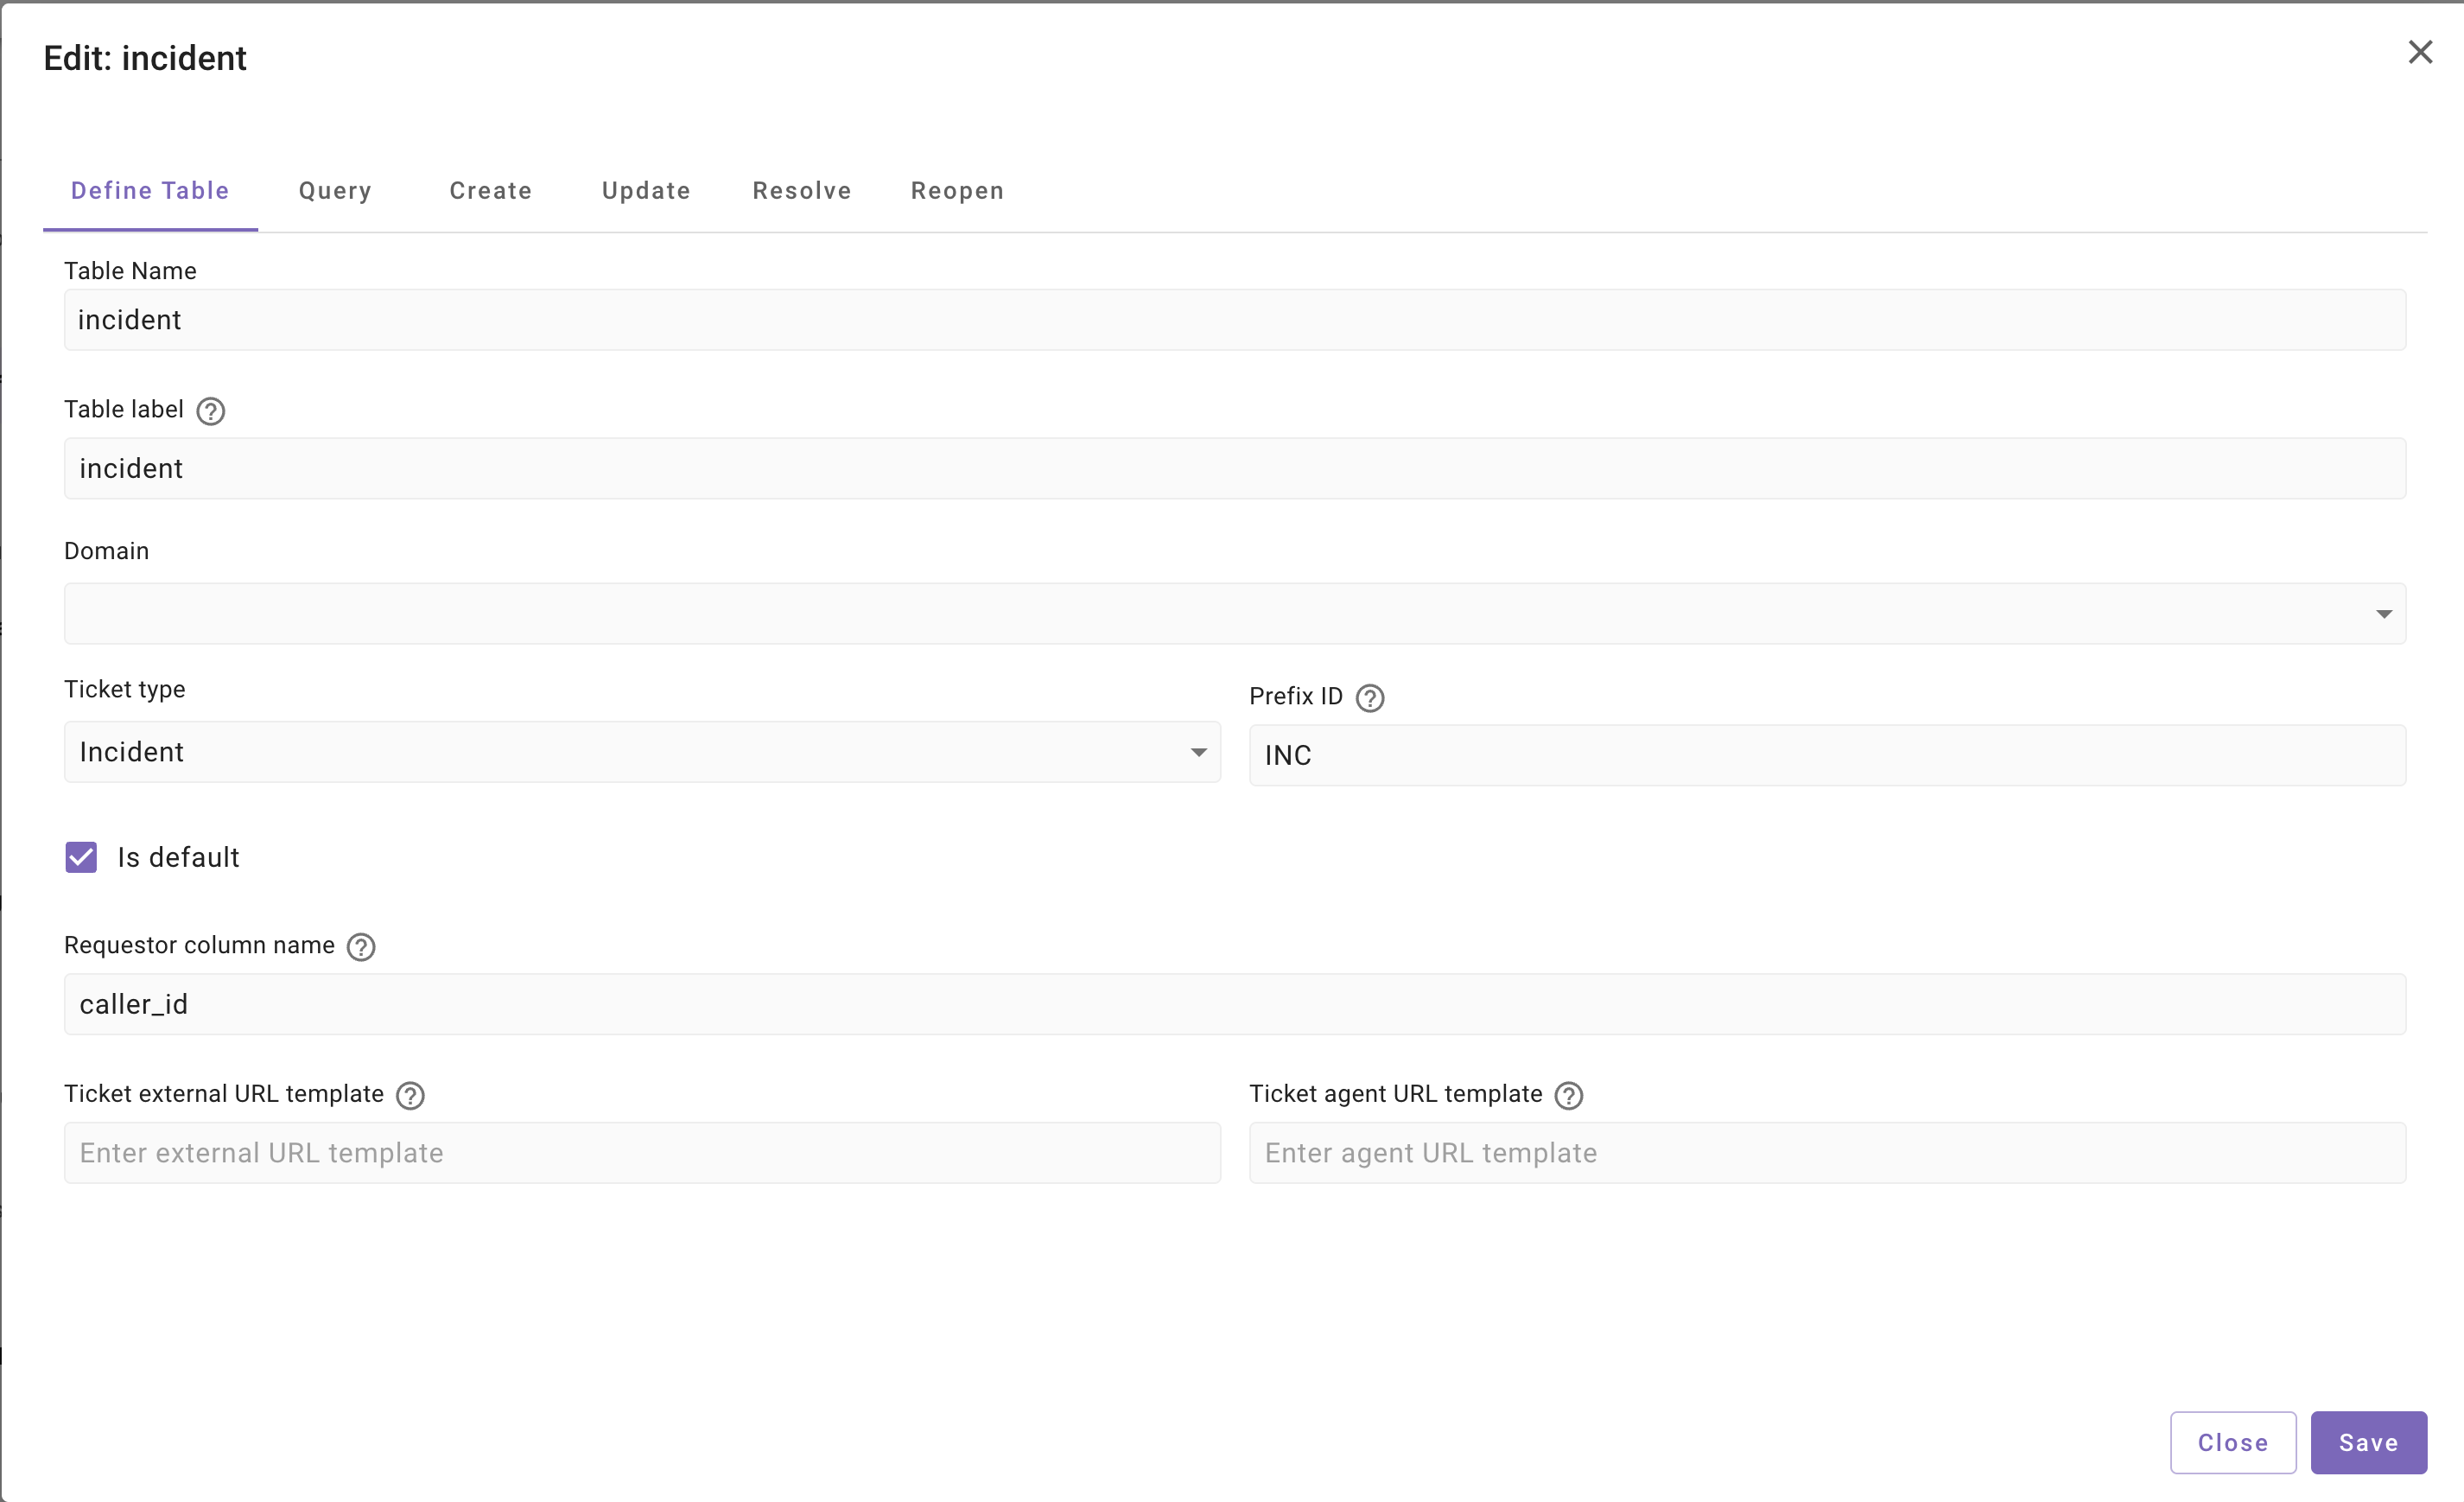
-
After clicking into the Incident section, we will see the table definition.
-
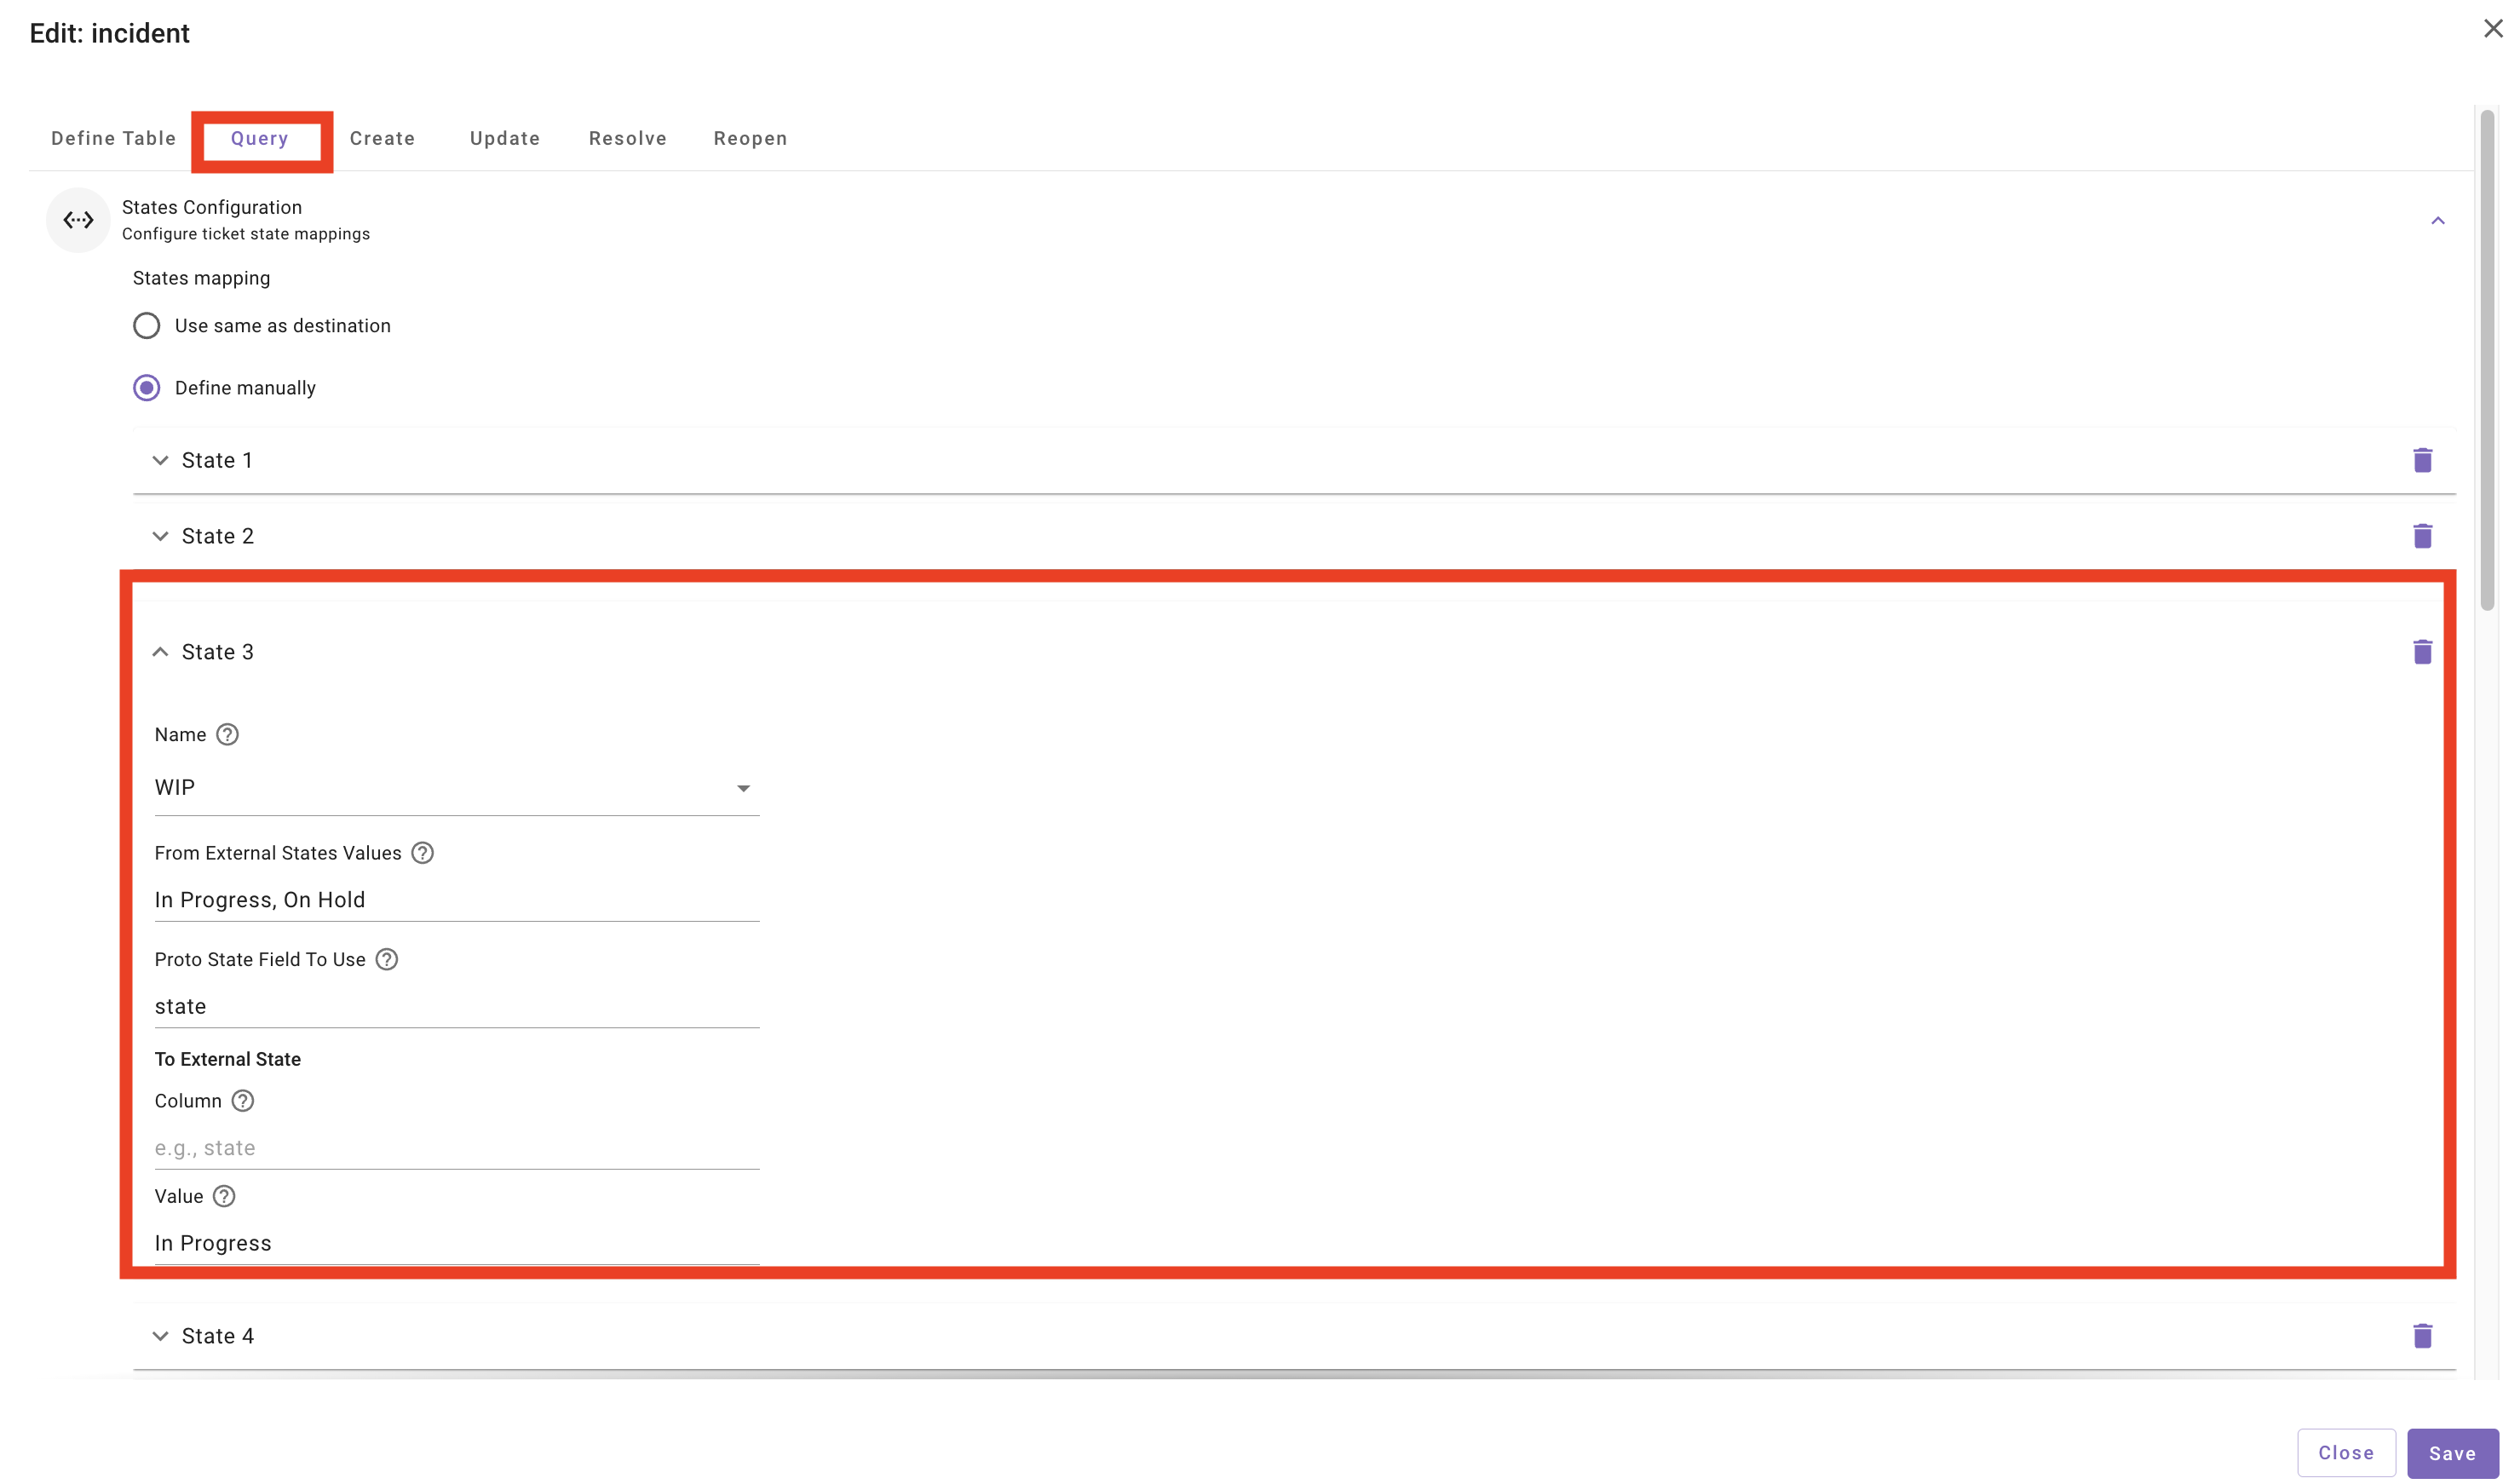
Navigate to the
Querypage and review theStates ConfigurationNote: The default State mappings within Moveworks will map to the defaults in the ServiceNow PDI environment. When integrating with a live environment, always ensure that you check the additional states in the source ITSM, and map any outstanding states into Moveworks.
-
Next, we will add
custom_datafields to theQuerymapping.
Note: When instantiating ticketing for an organization, the configuration will start with a list of default fields. If the client requires us to operate on fields that do not exist out of the box, we can add additional fields as custom_data. These can then be leveraged as reference values for downstream ticketing workflows.
-
Based on our requirements, we will add the following
custom_datafields to theQueryticket mapping:Note: In the
Queryconfiguration, all fields on the left are the Moveworks defined fields, while all fields on the right are the field name from the source system. Reference the Ticket Data Object page on the Moveworks Help Site to understand all of the fields available on the Moveworks Ticket object by default.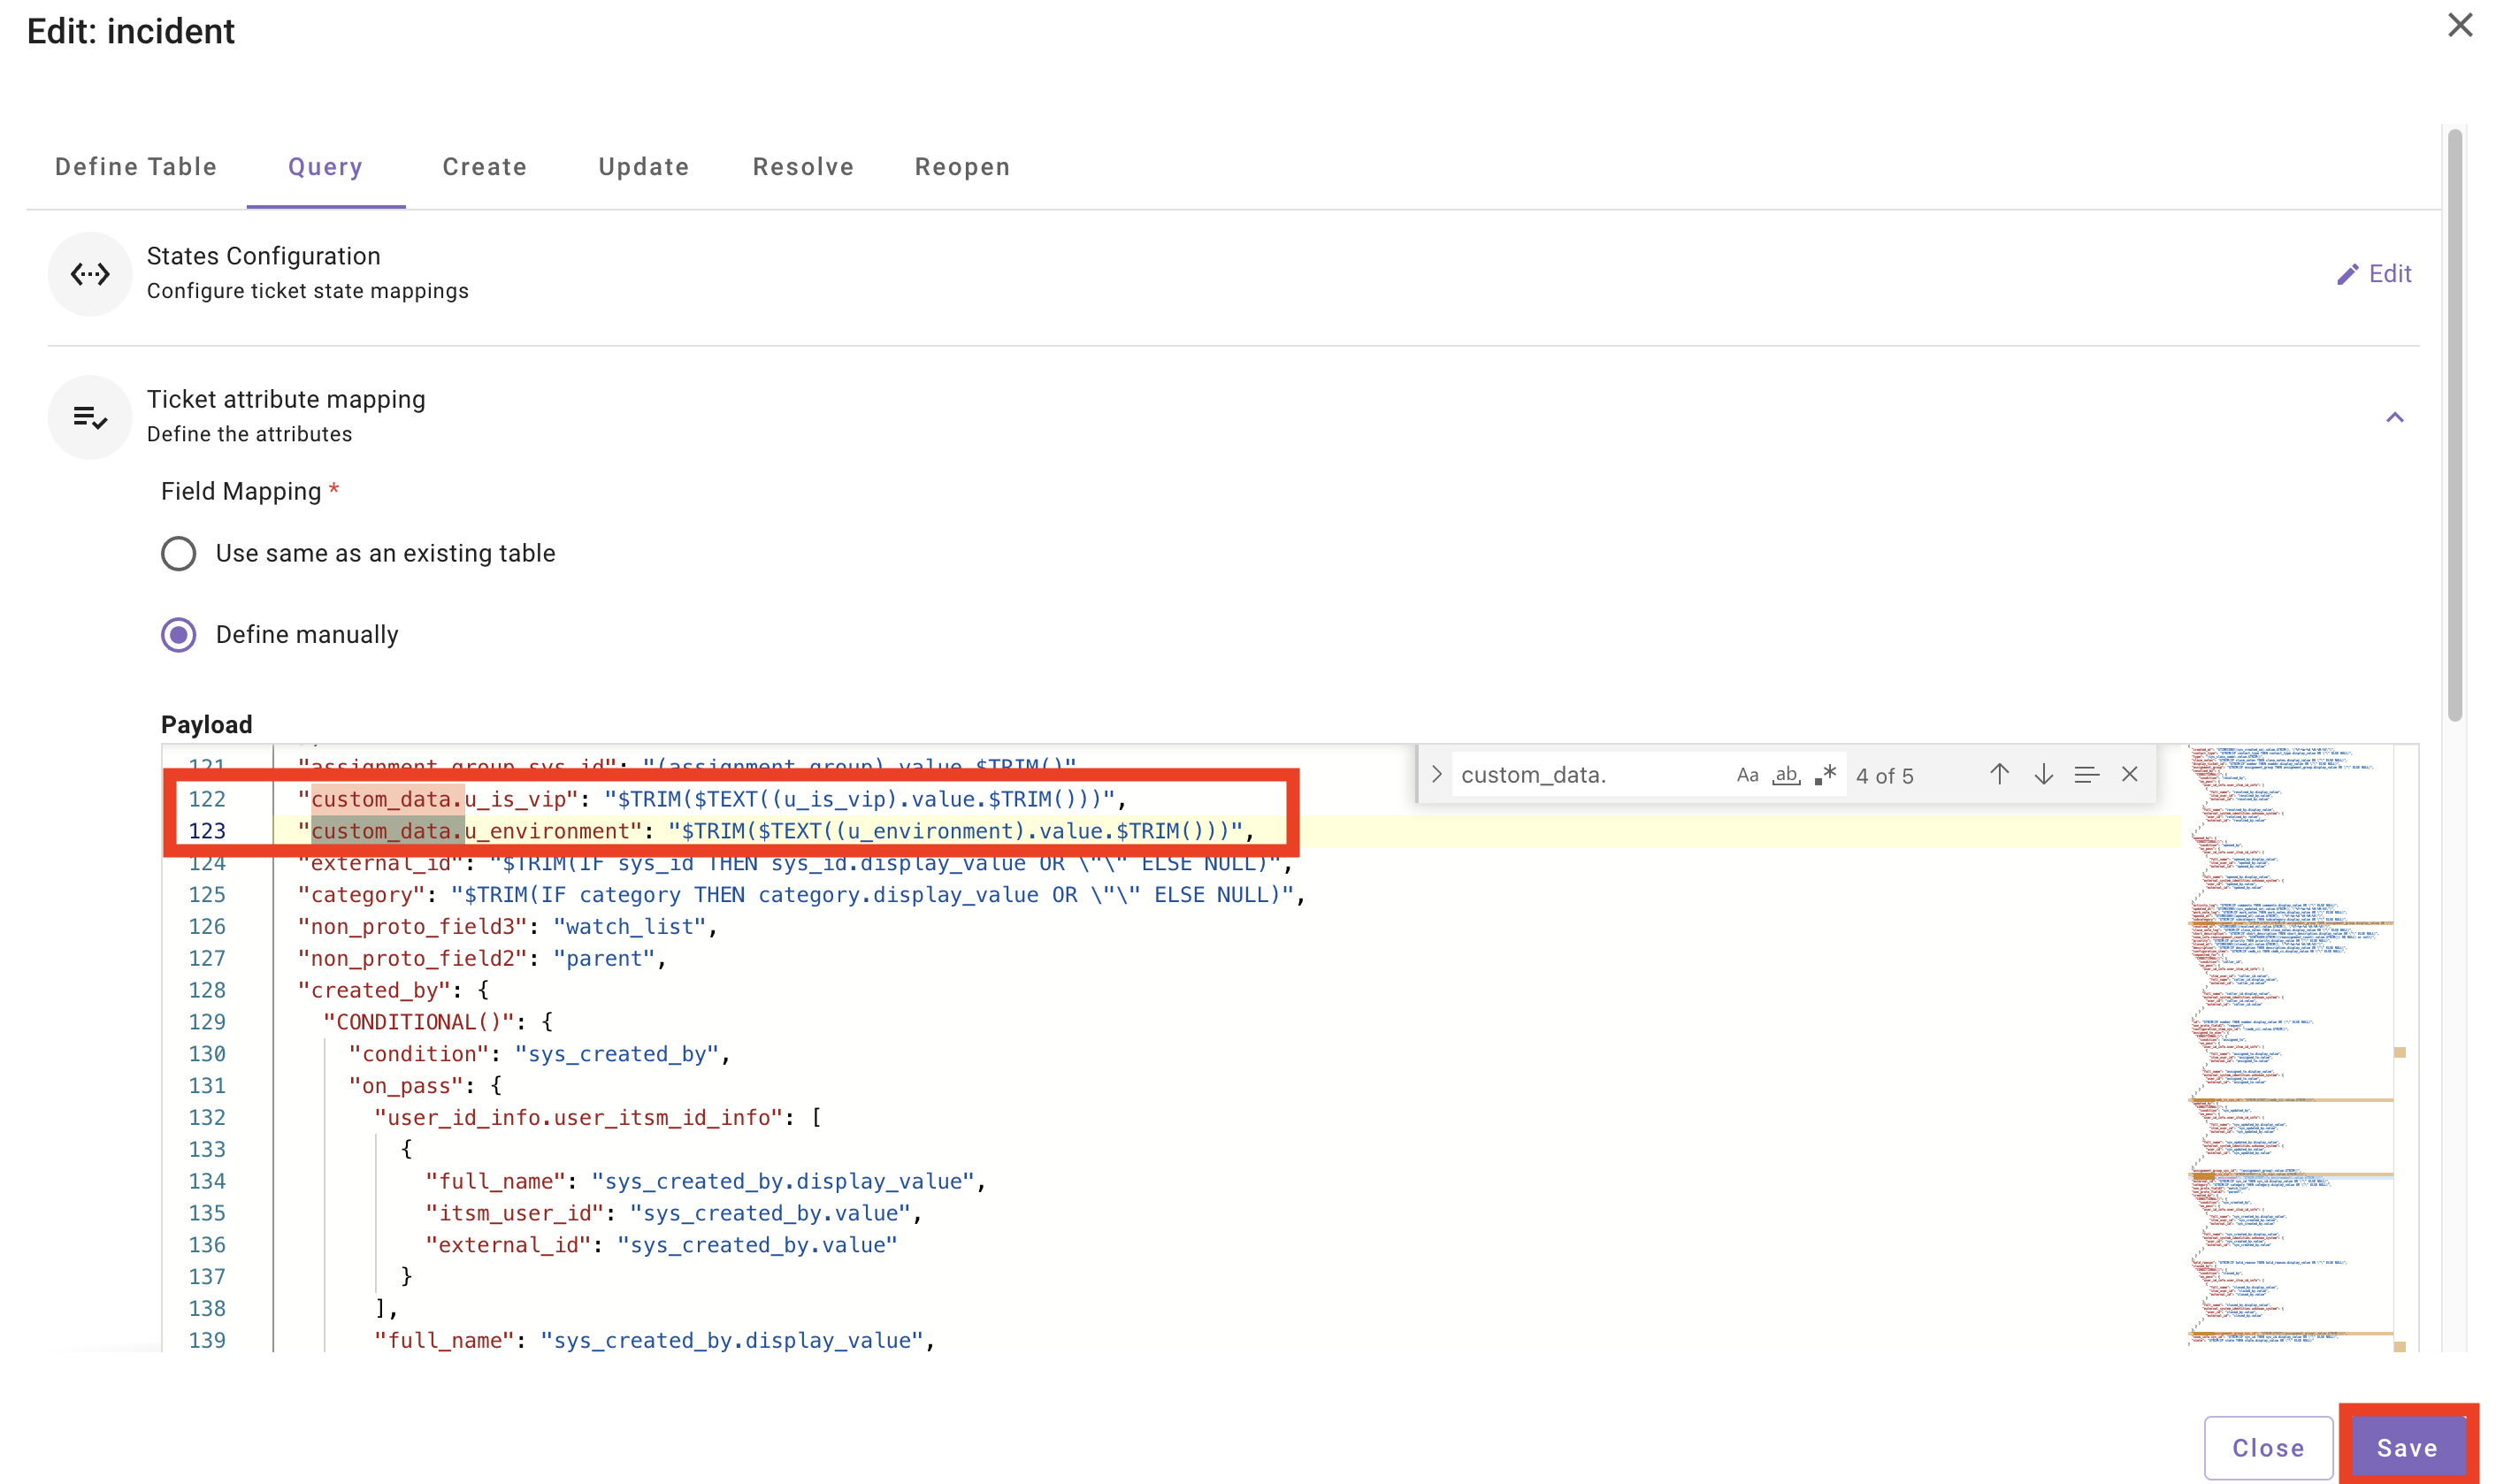
-
Scroll down to the
Input fields in Mappersection and add theu_environmentandu_is_vipfields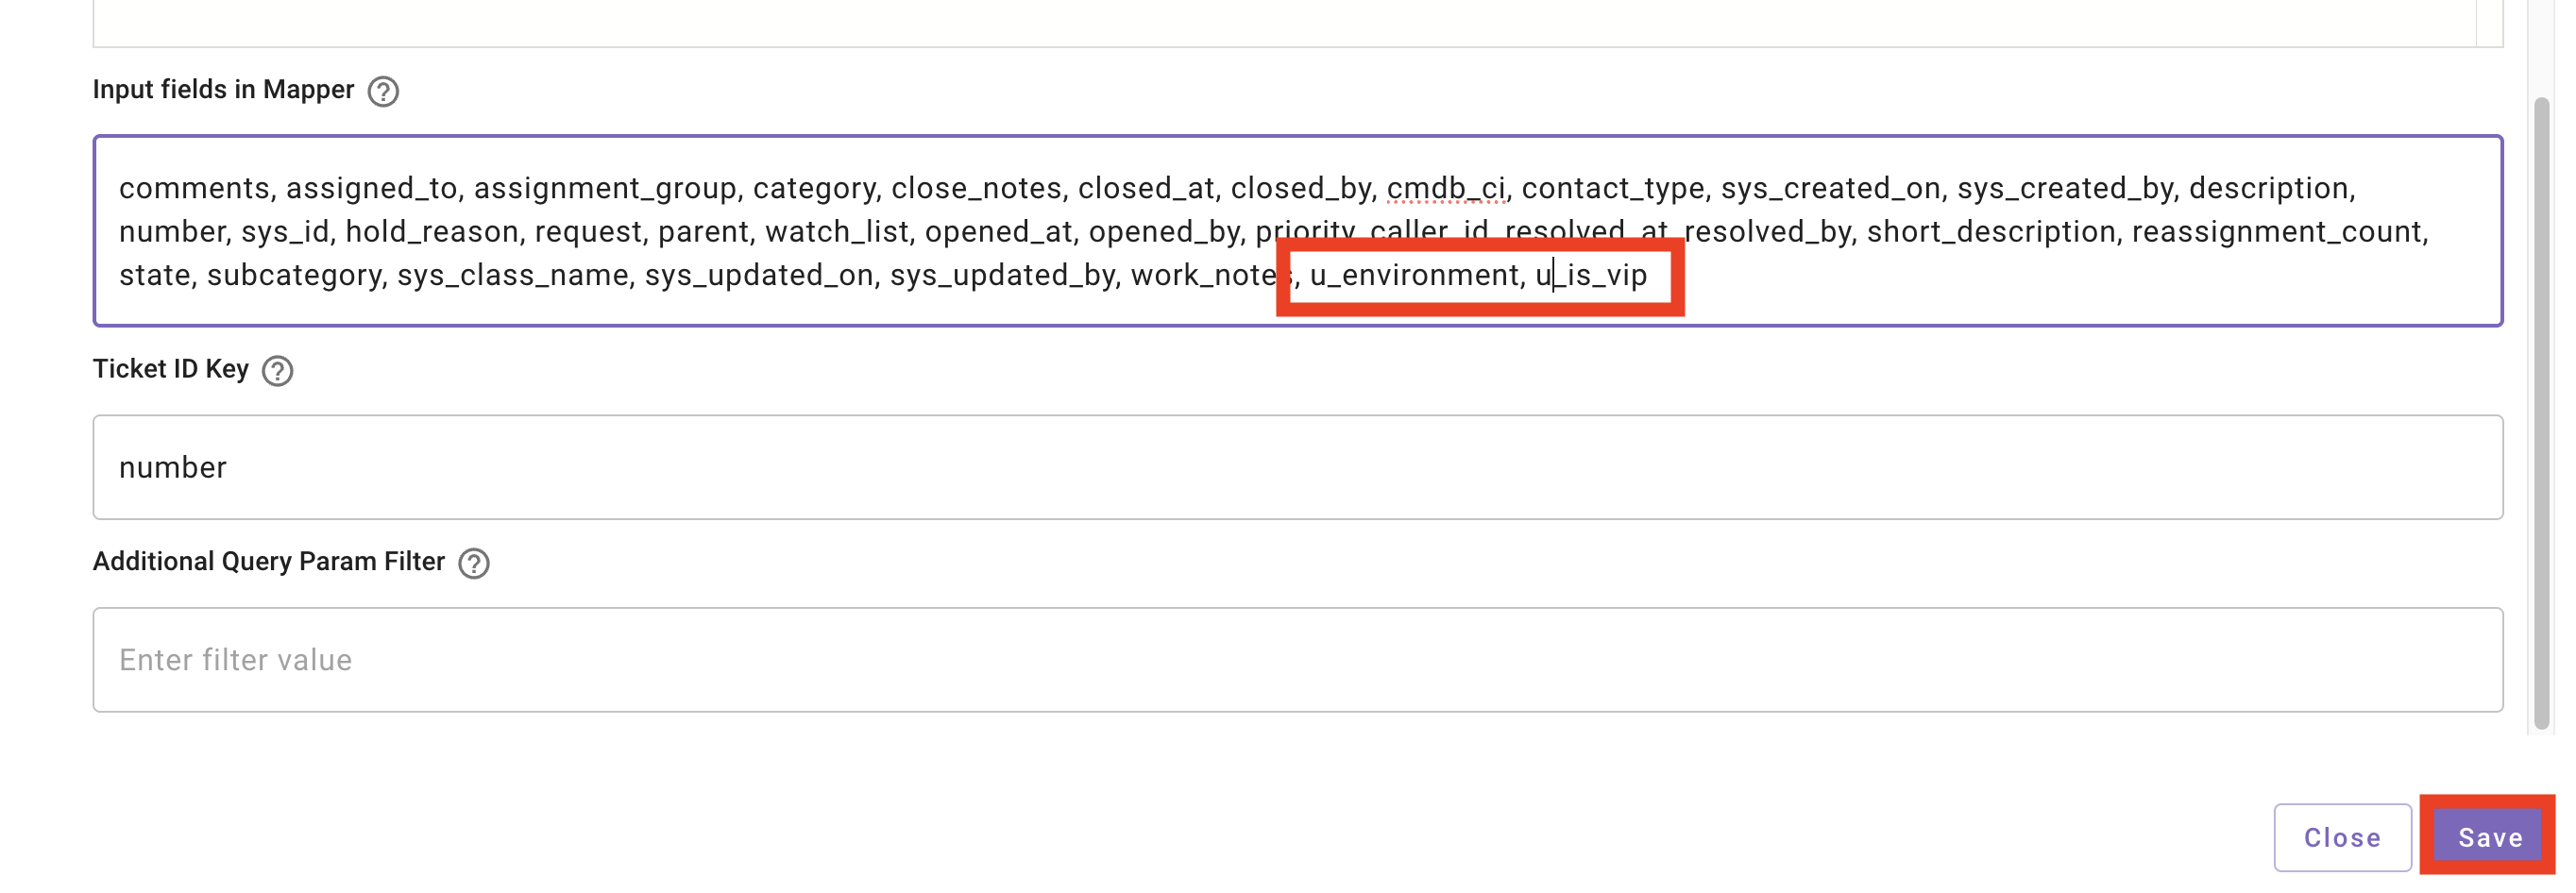
-
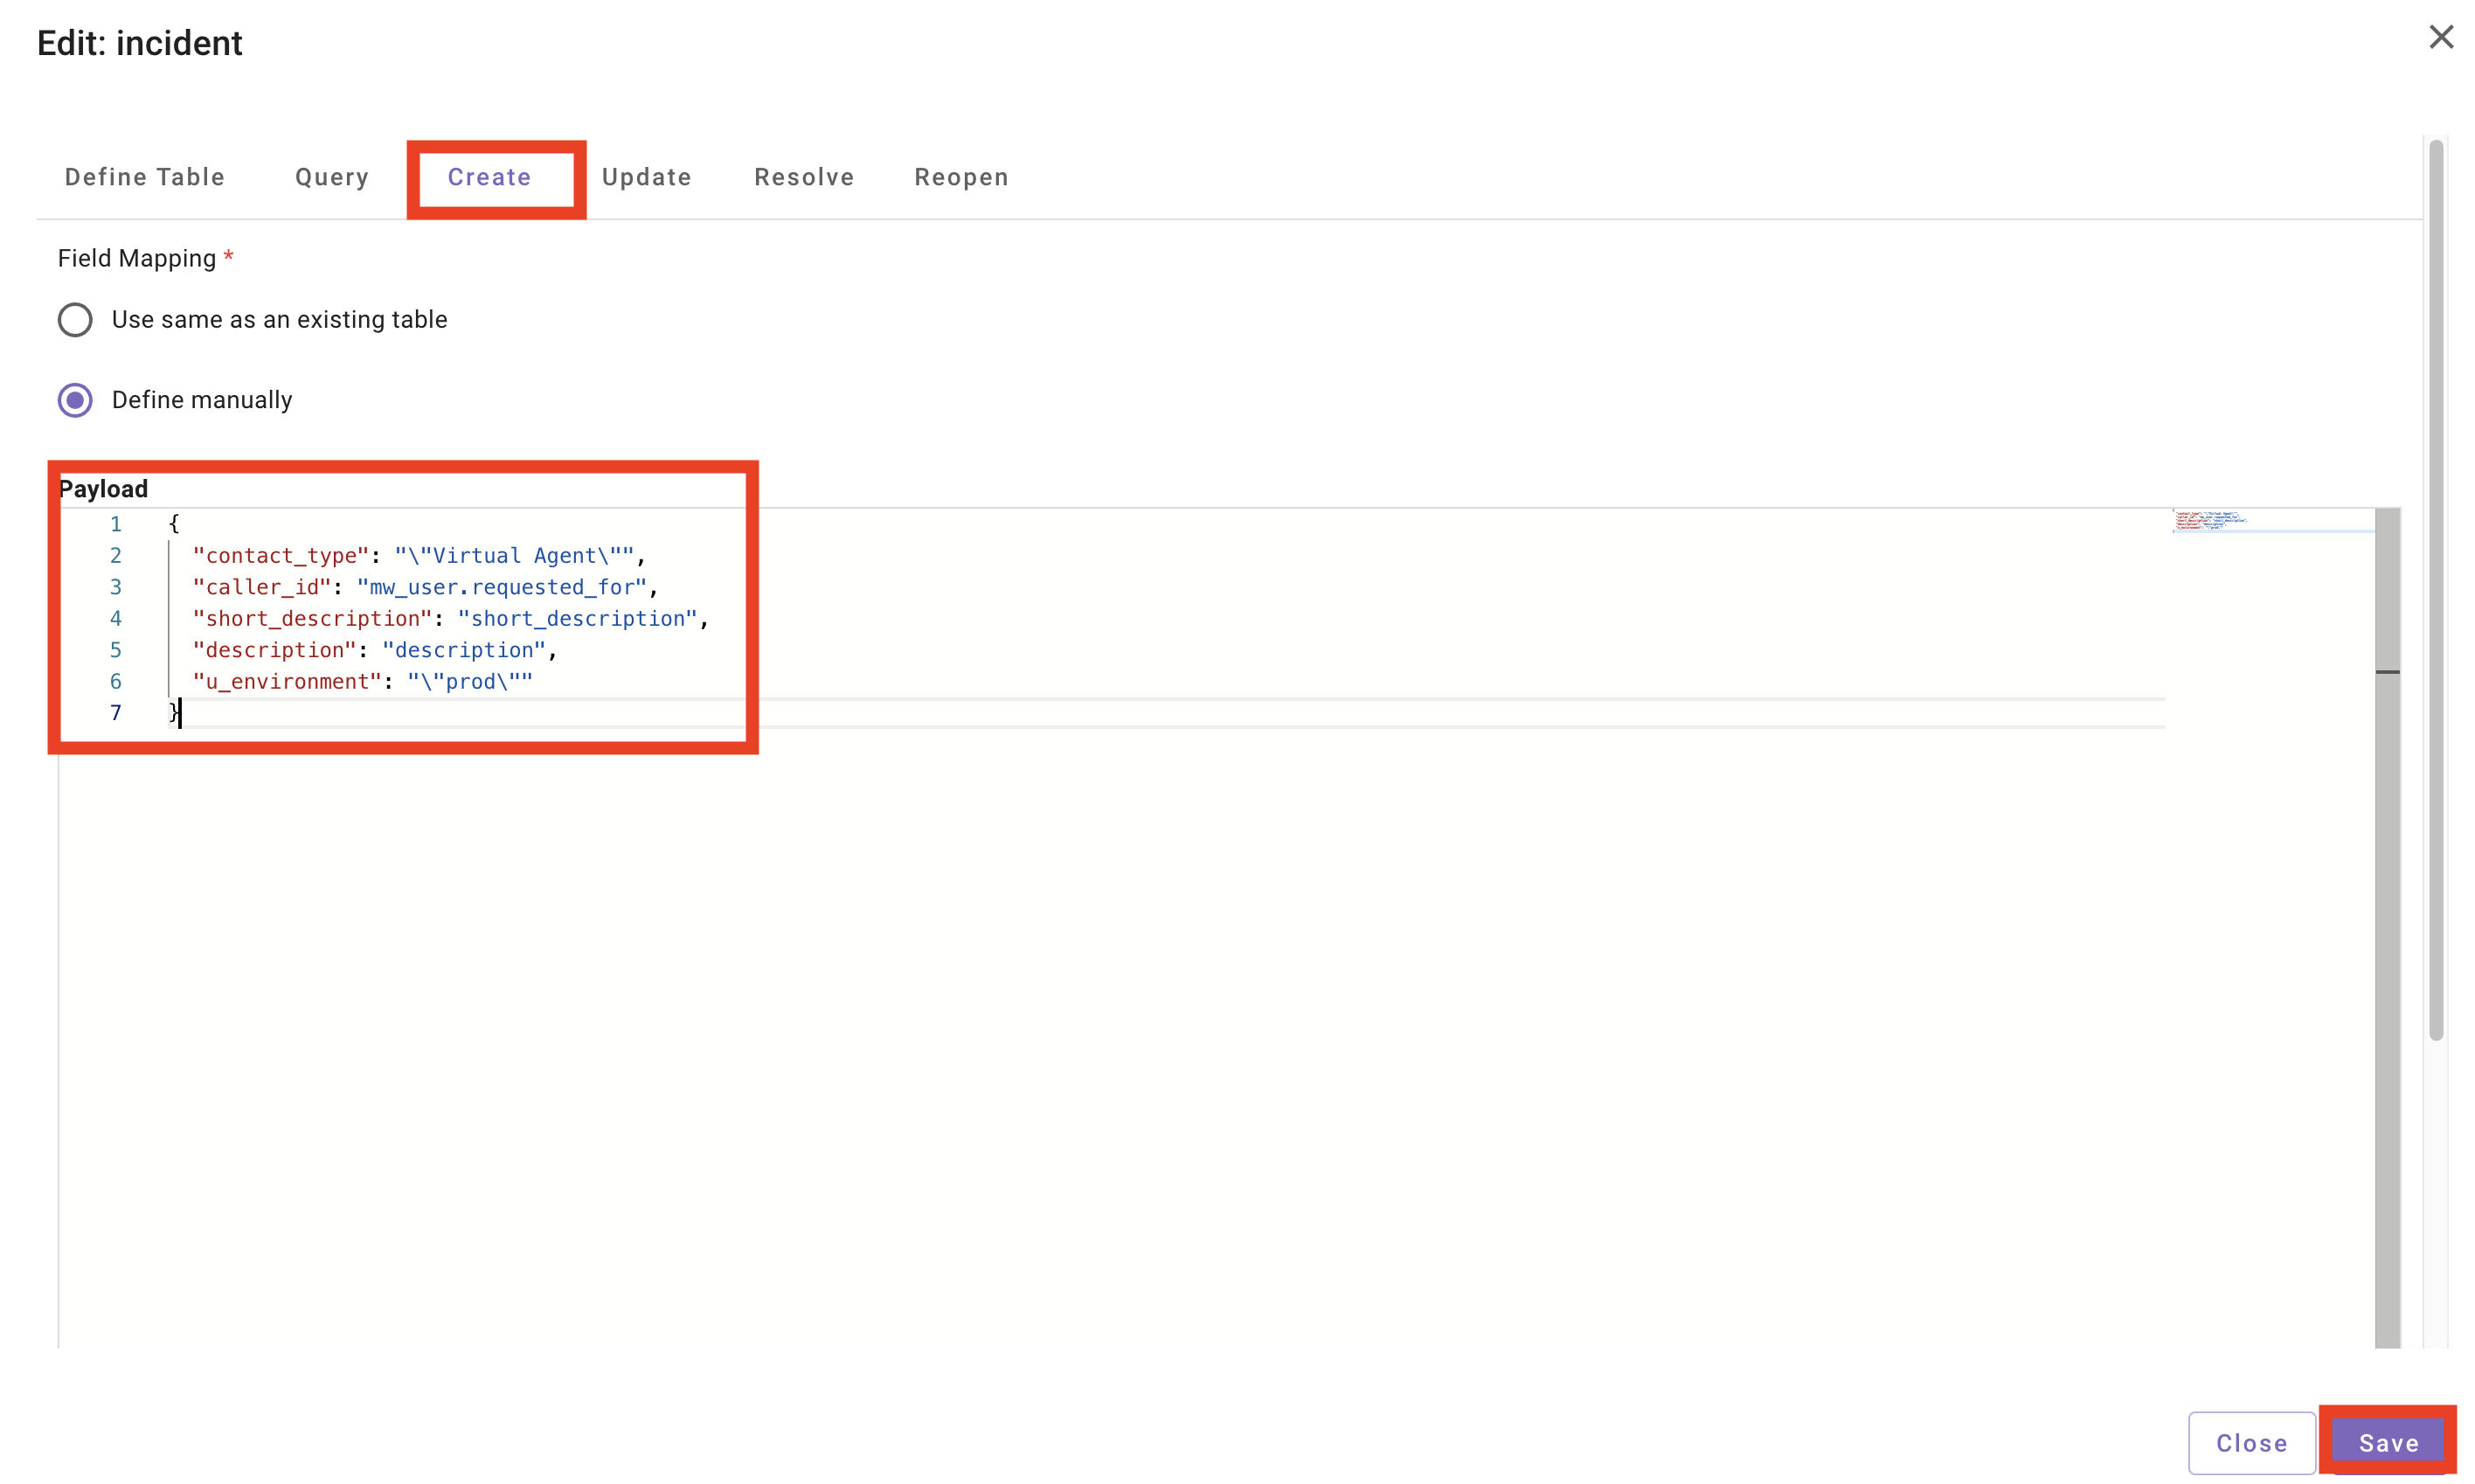
Add one of the
custom_datafields as a default value that will be populated when MoveworksCreatesanIncidentticket withinServiceNow- Select
Createand add the fieldu_environmentwith the valueprod, as shown below:"u_environment": "\"prod\""
Note: When configuring WRITE tables (Create, Update, Resolve, Reopen), the formatting tells Moveworks whether to use a fixed value or a variable you’ve already defined in your query configuration.
1. Using Moveworks Variables
To use data already stored in the Moveworks “data bank,” use a single pair of quotes. The “value” on the right must match the “key” you defined in your ingestion script.
- Syntax:
"target_field": "stored_variable" - Example:
"assignment_group": "assignment_group"In this case, Moveworks looks at your ingestion code, finds the key
"assignment_group", and pulls the result of that$TRIM(...)logic.
2. Using Static Raw Strings
To write a specific piece of text that isn’t a variable, you must escape the quotes or use single quotes — both are valid in Bender.
- Syntax:
"target_field": "\"Fixed Value\""or"target_field": "'Fixed Value'" - Example:
"short_description": "\"New Ticket from Moveworks\""or"short_description": "'New Ticket from Moveworks'"
- Select
-
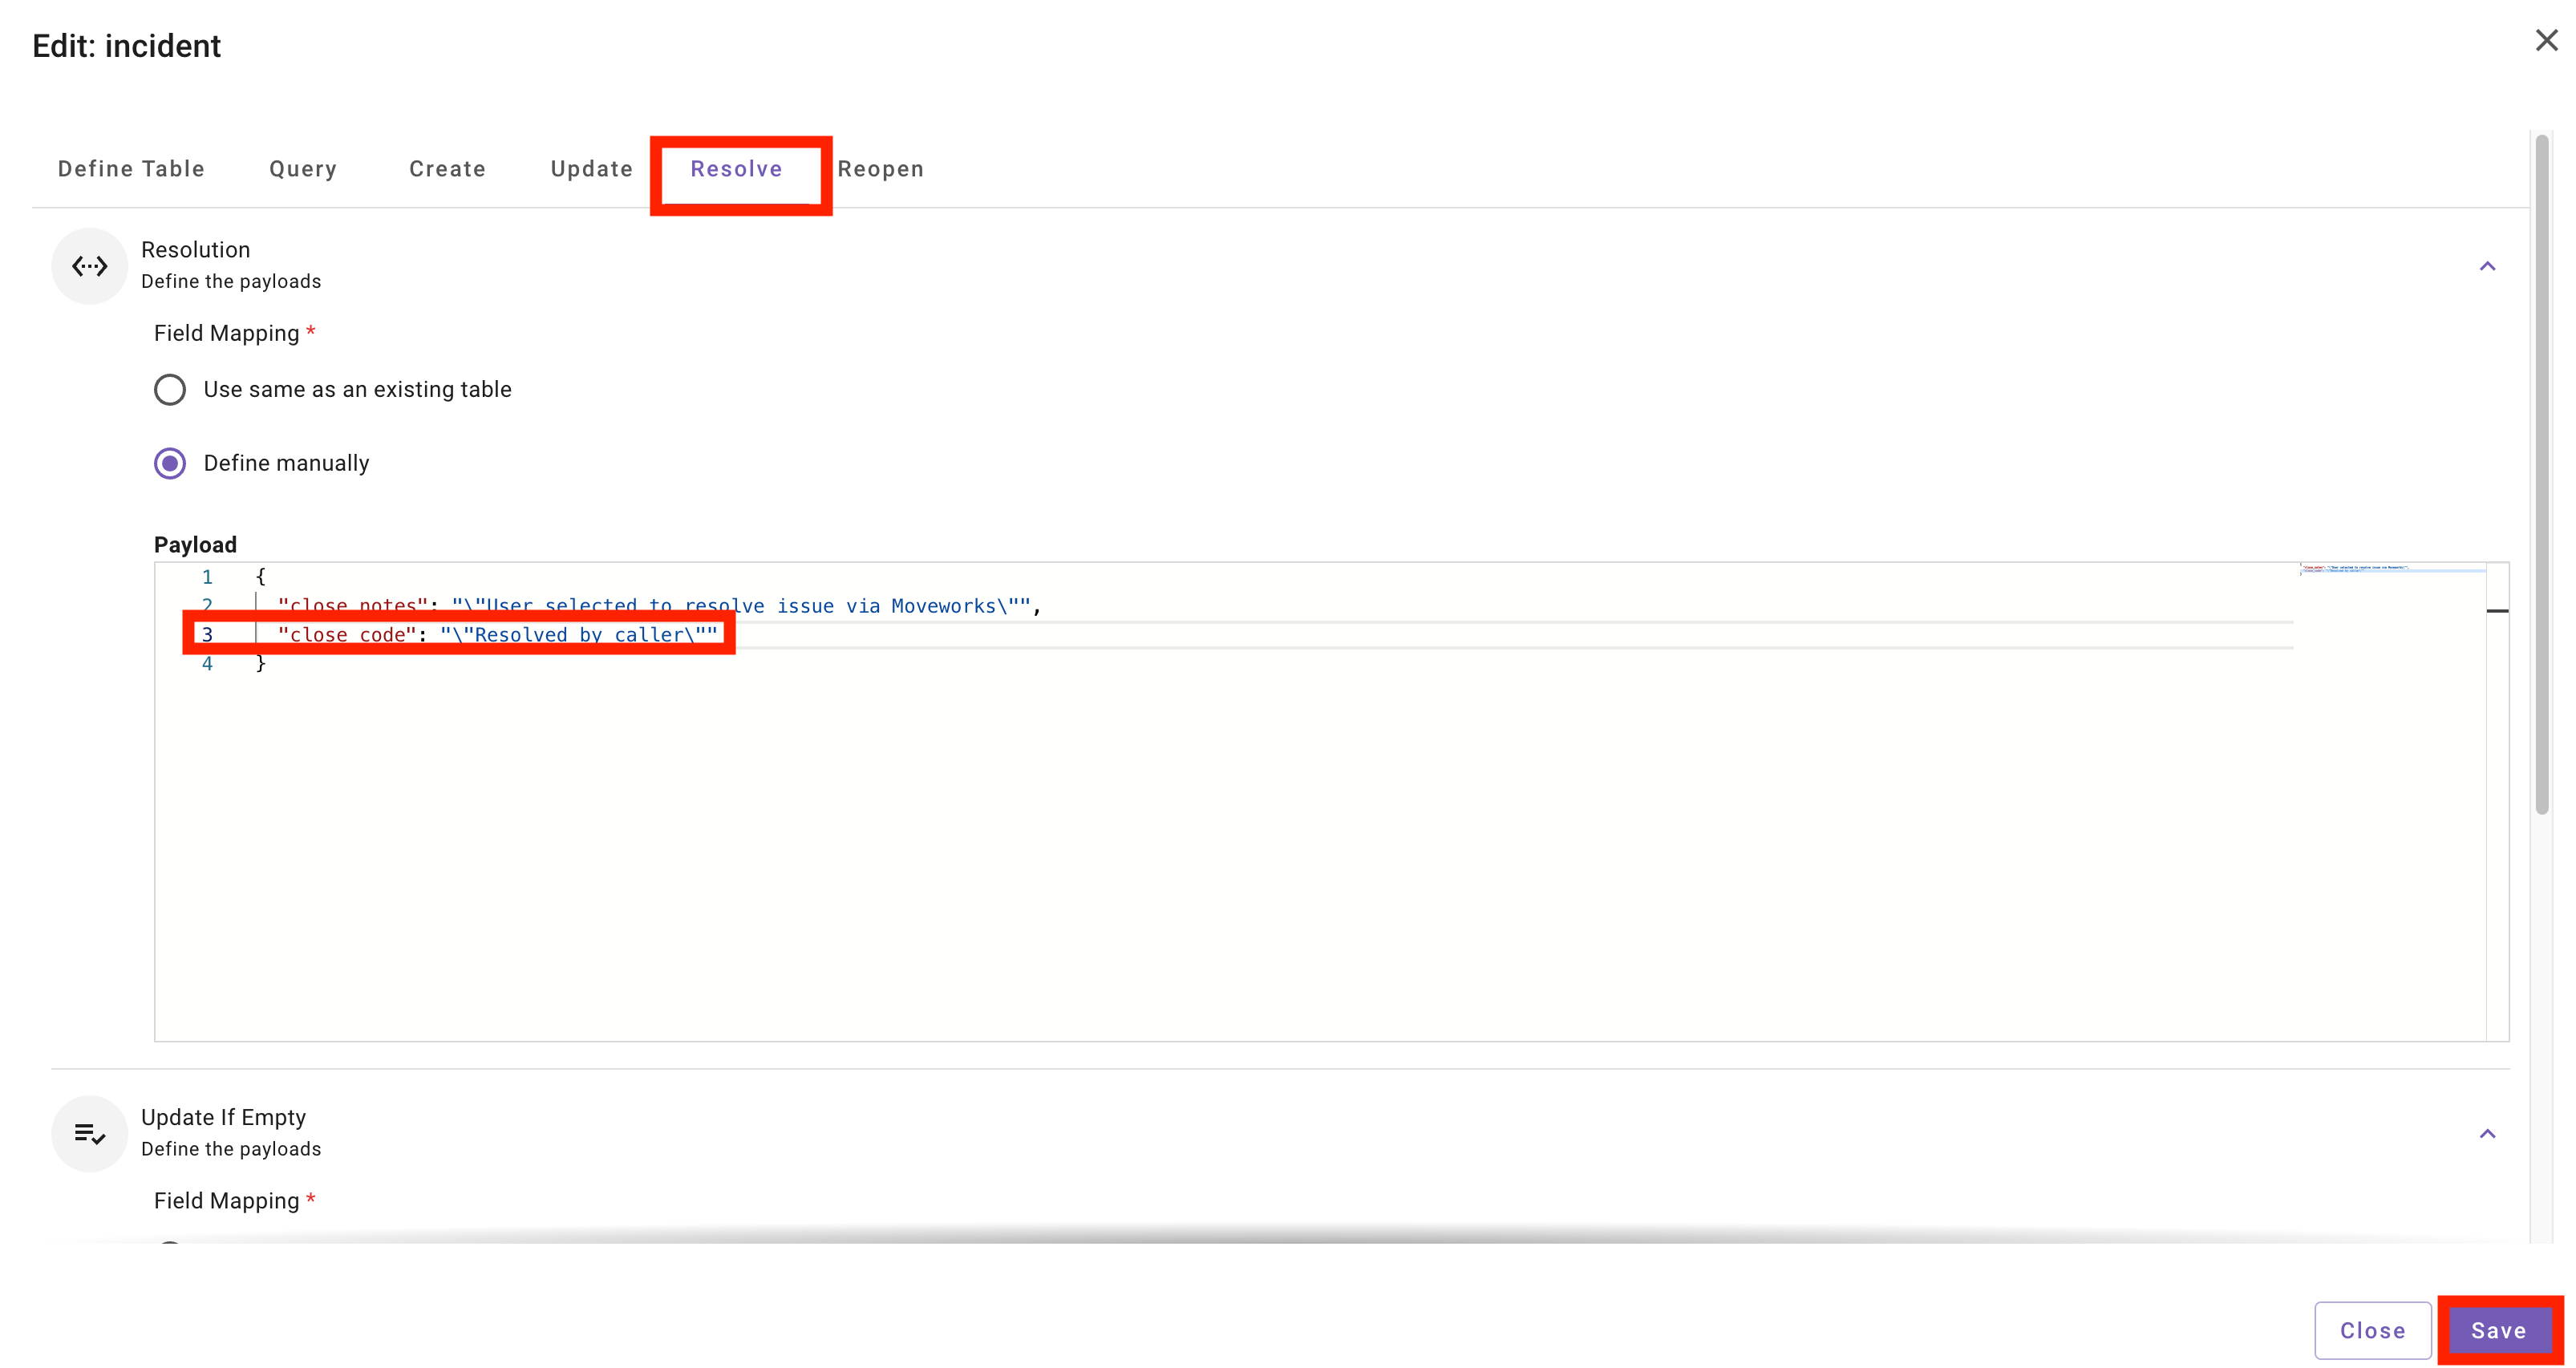
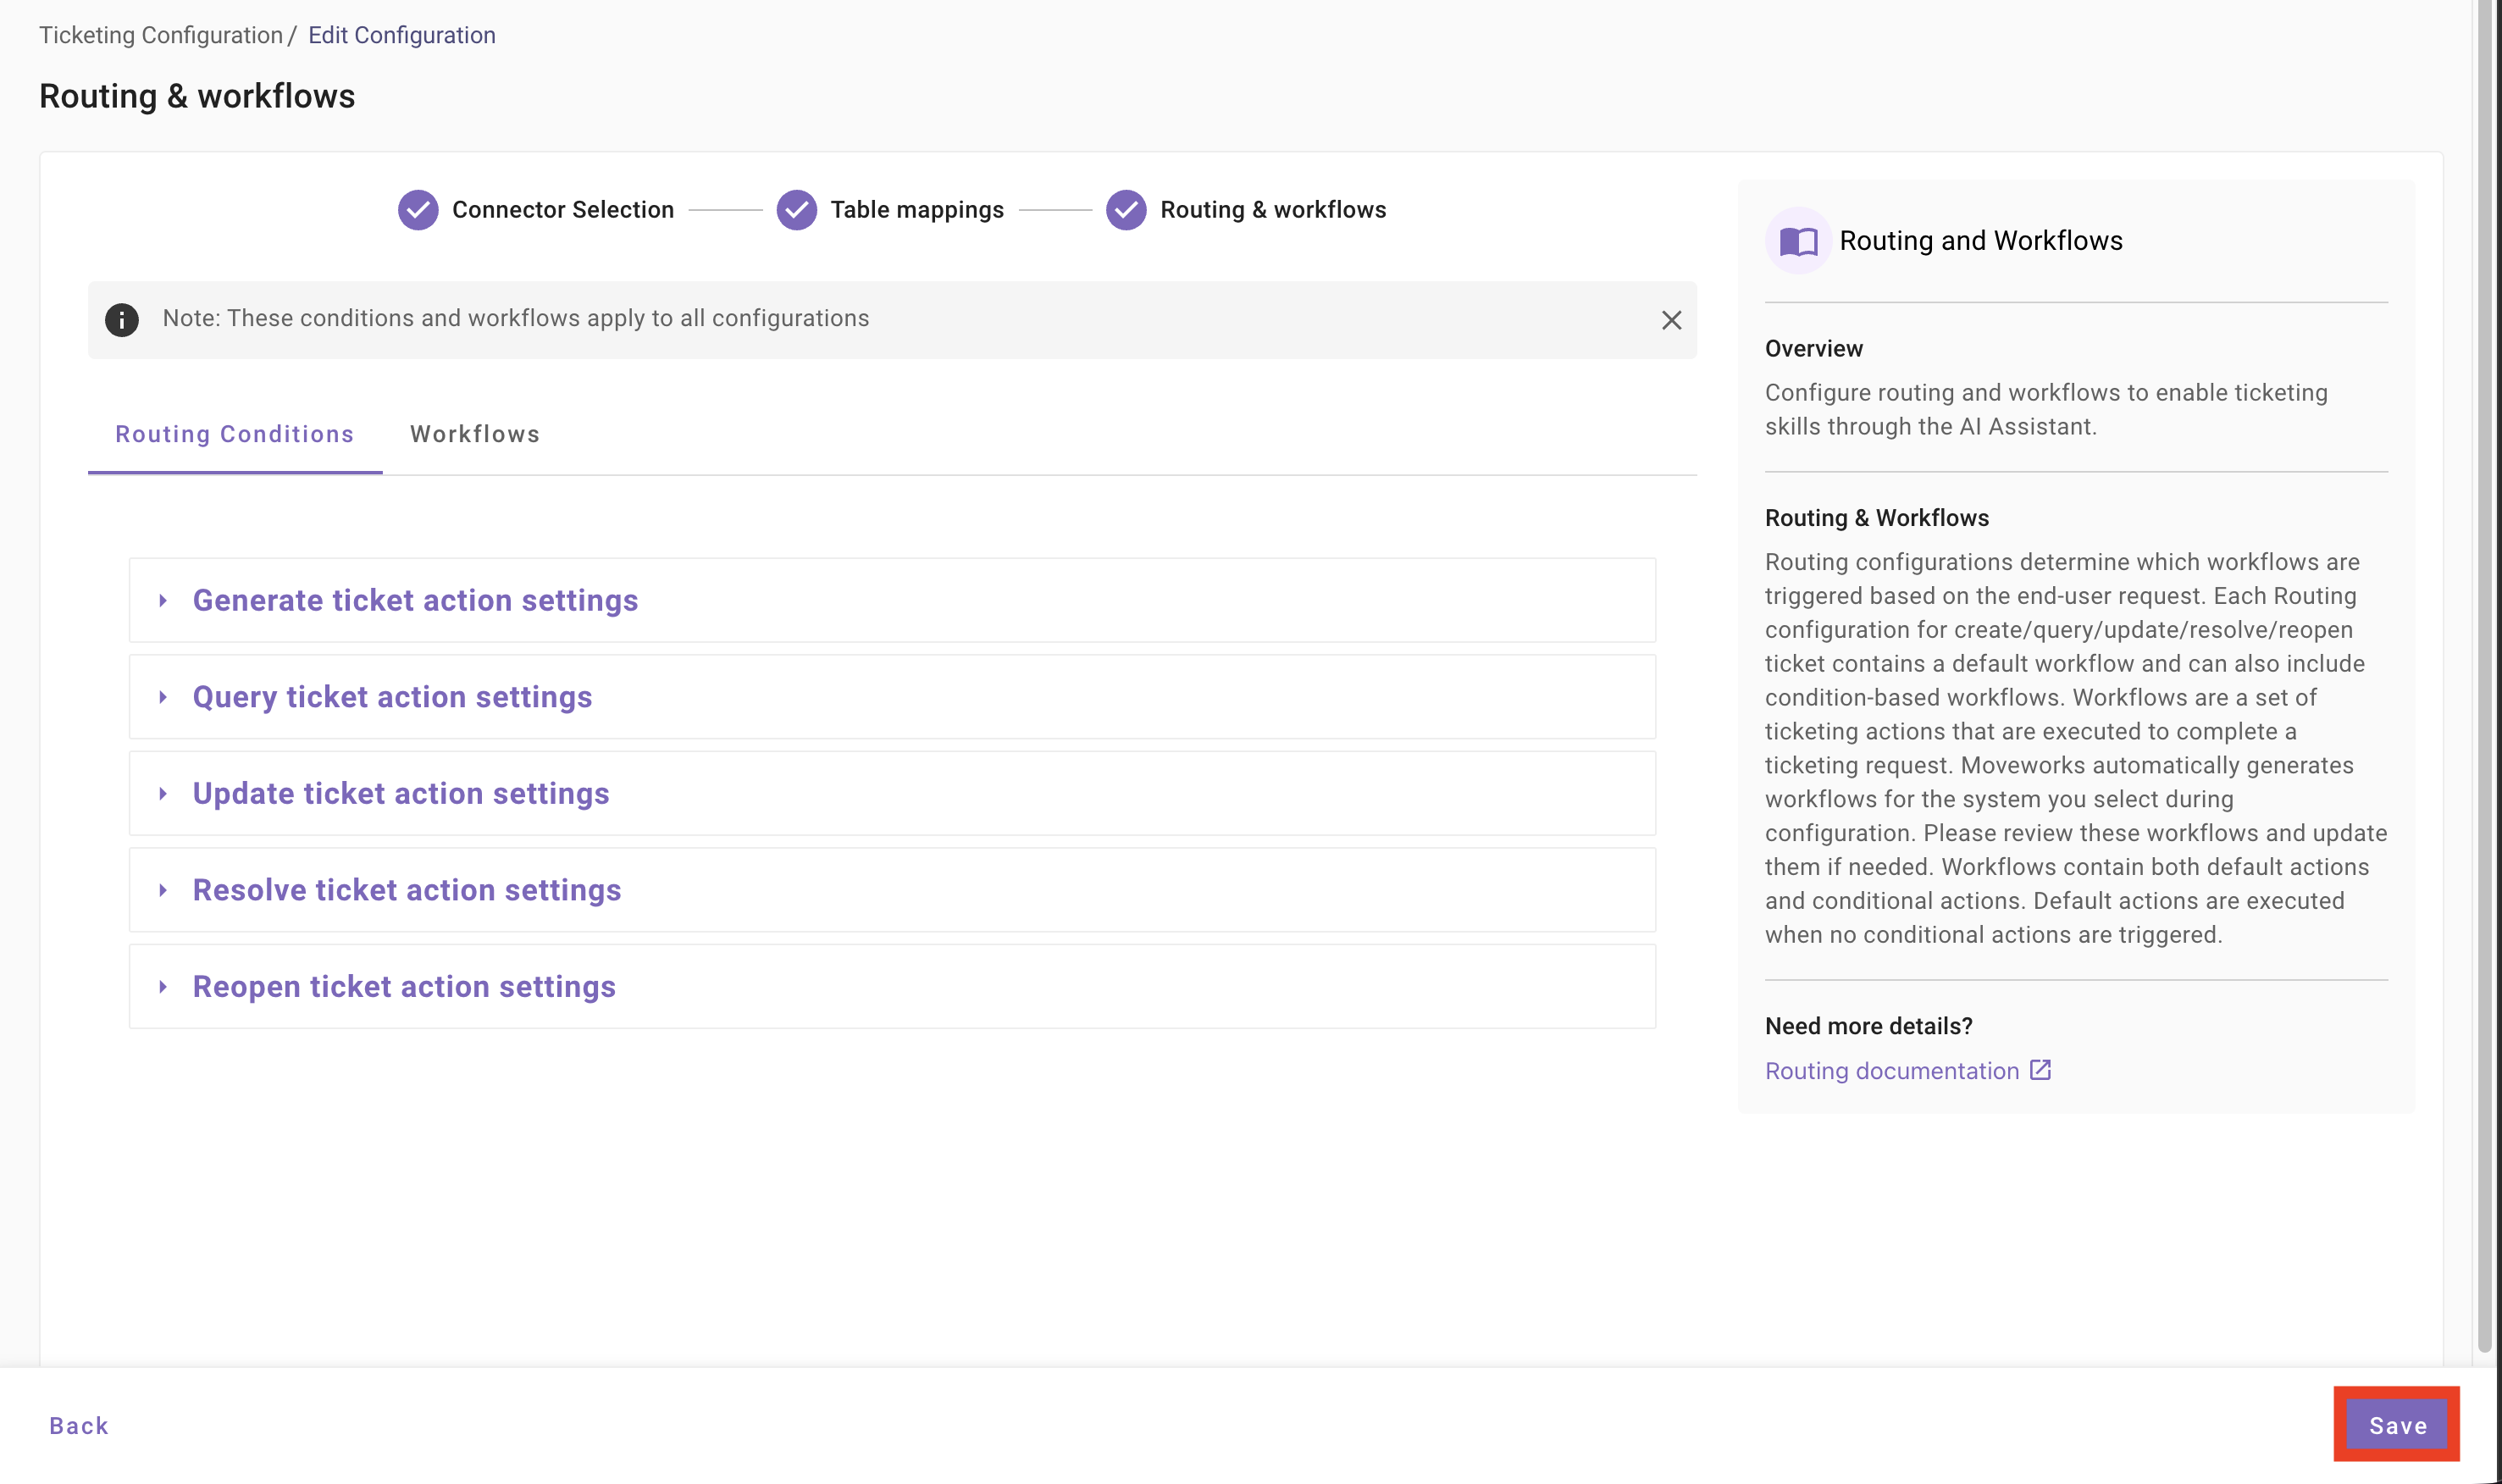
Next, navigate to the
Resolvetable and update theclose_codefield:"close_code": "\"Resolved by caller\""
-
Select
Next, review the Routing & Workflow conditions (no updates needed at this time), thenSave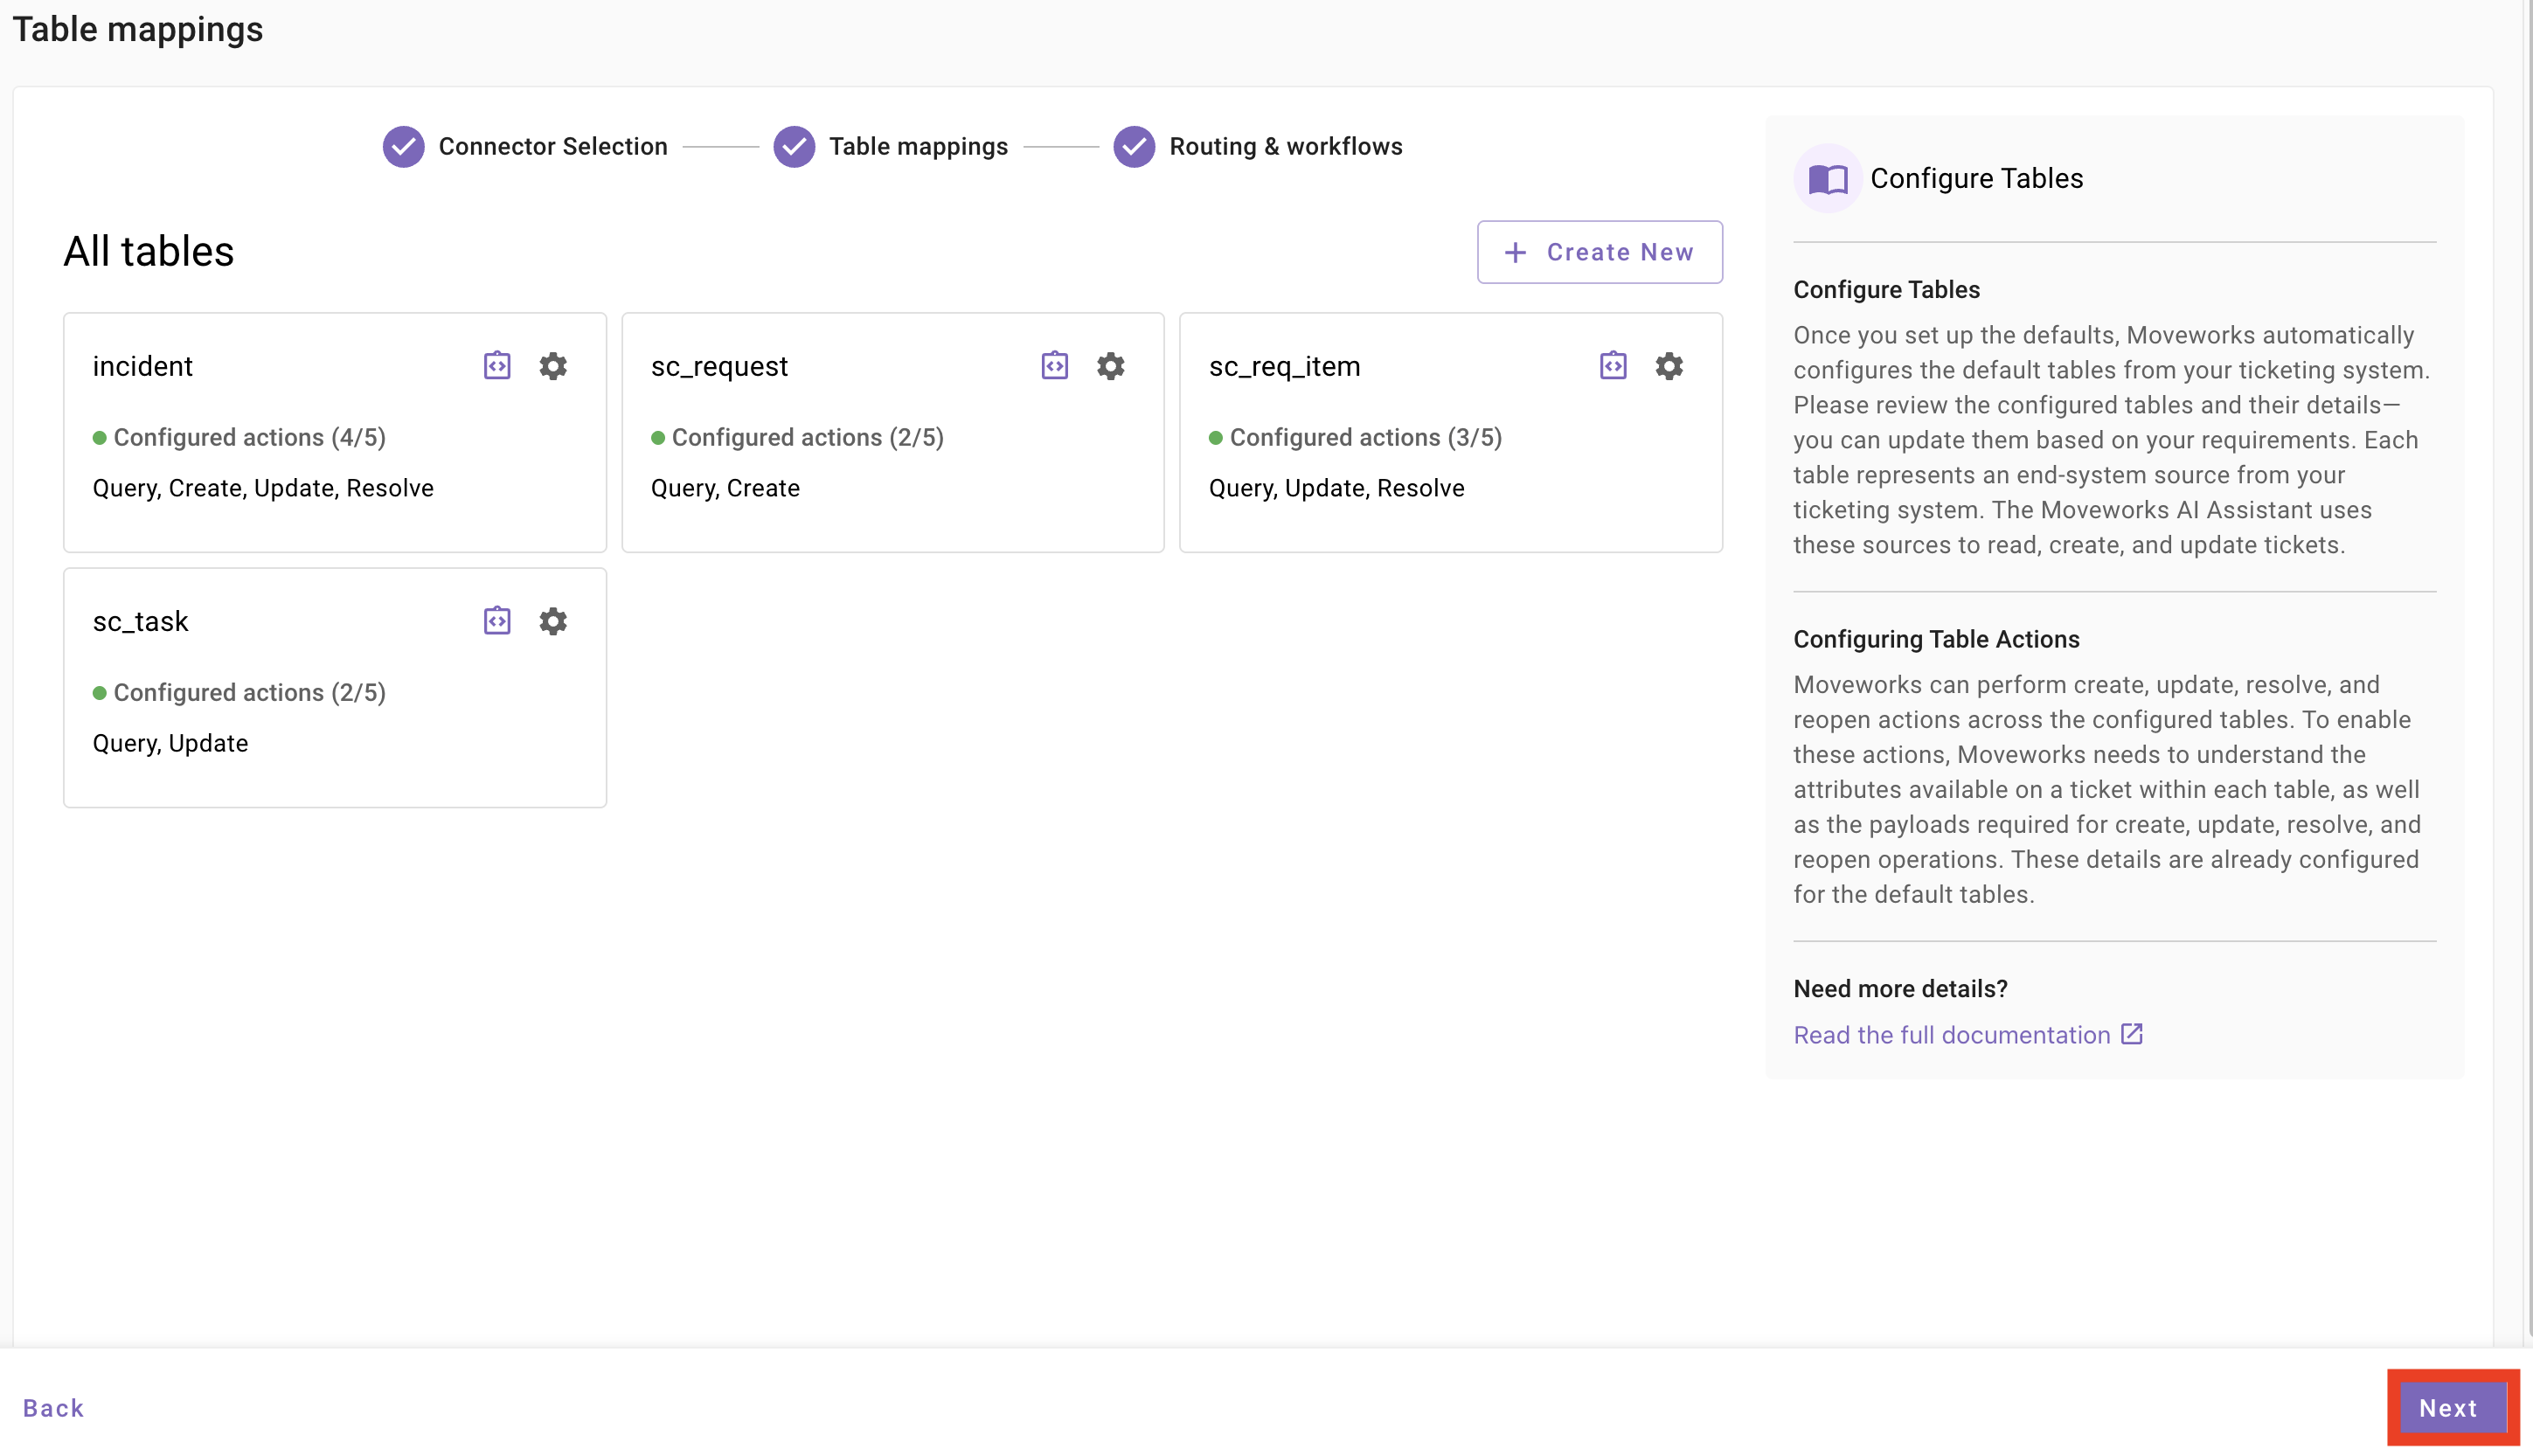
-
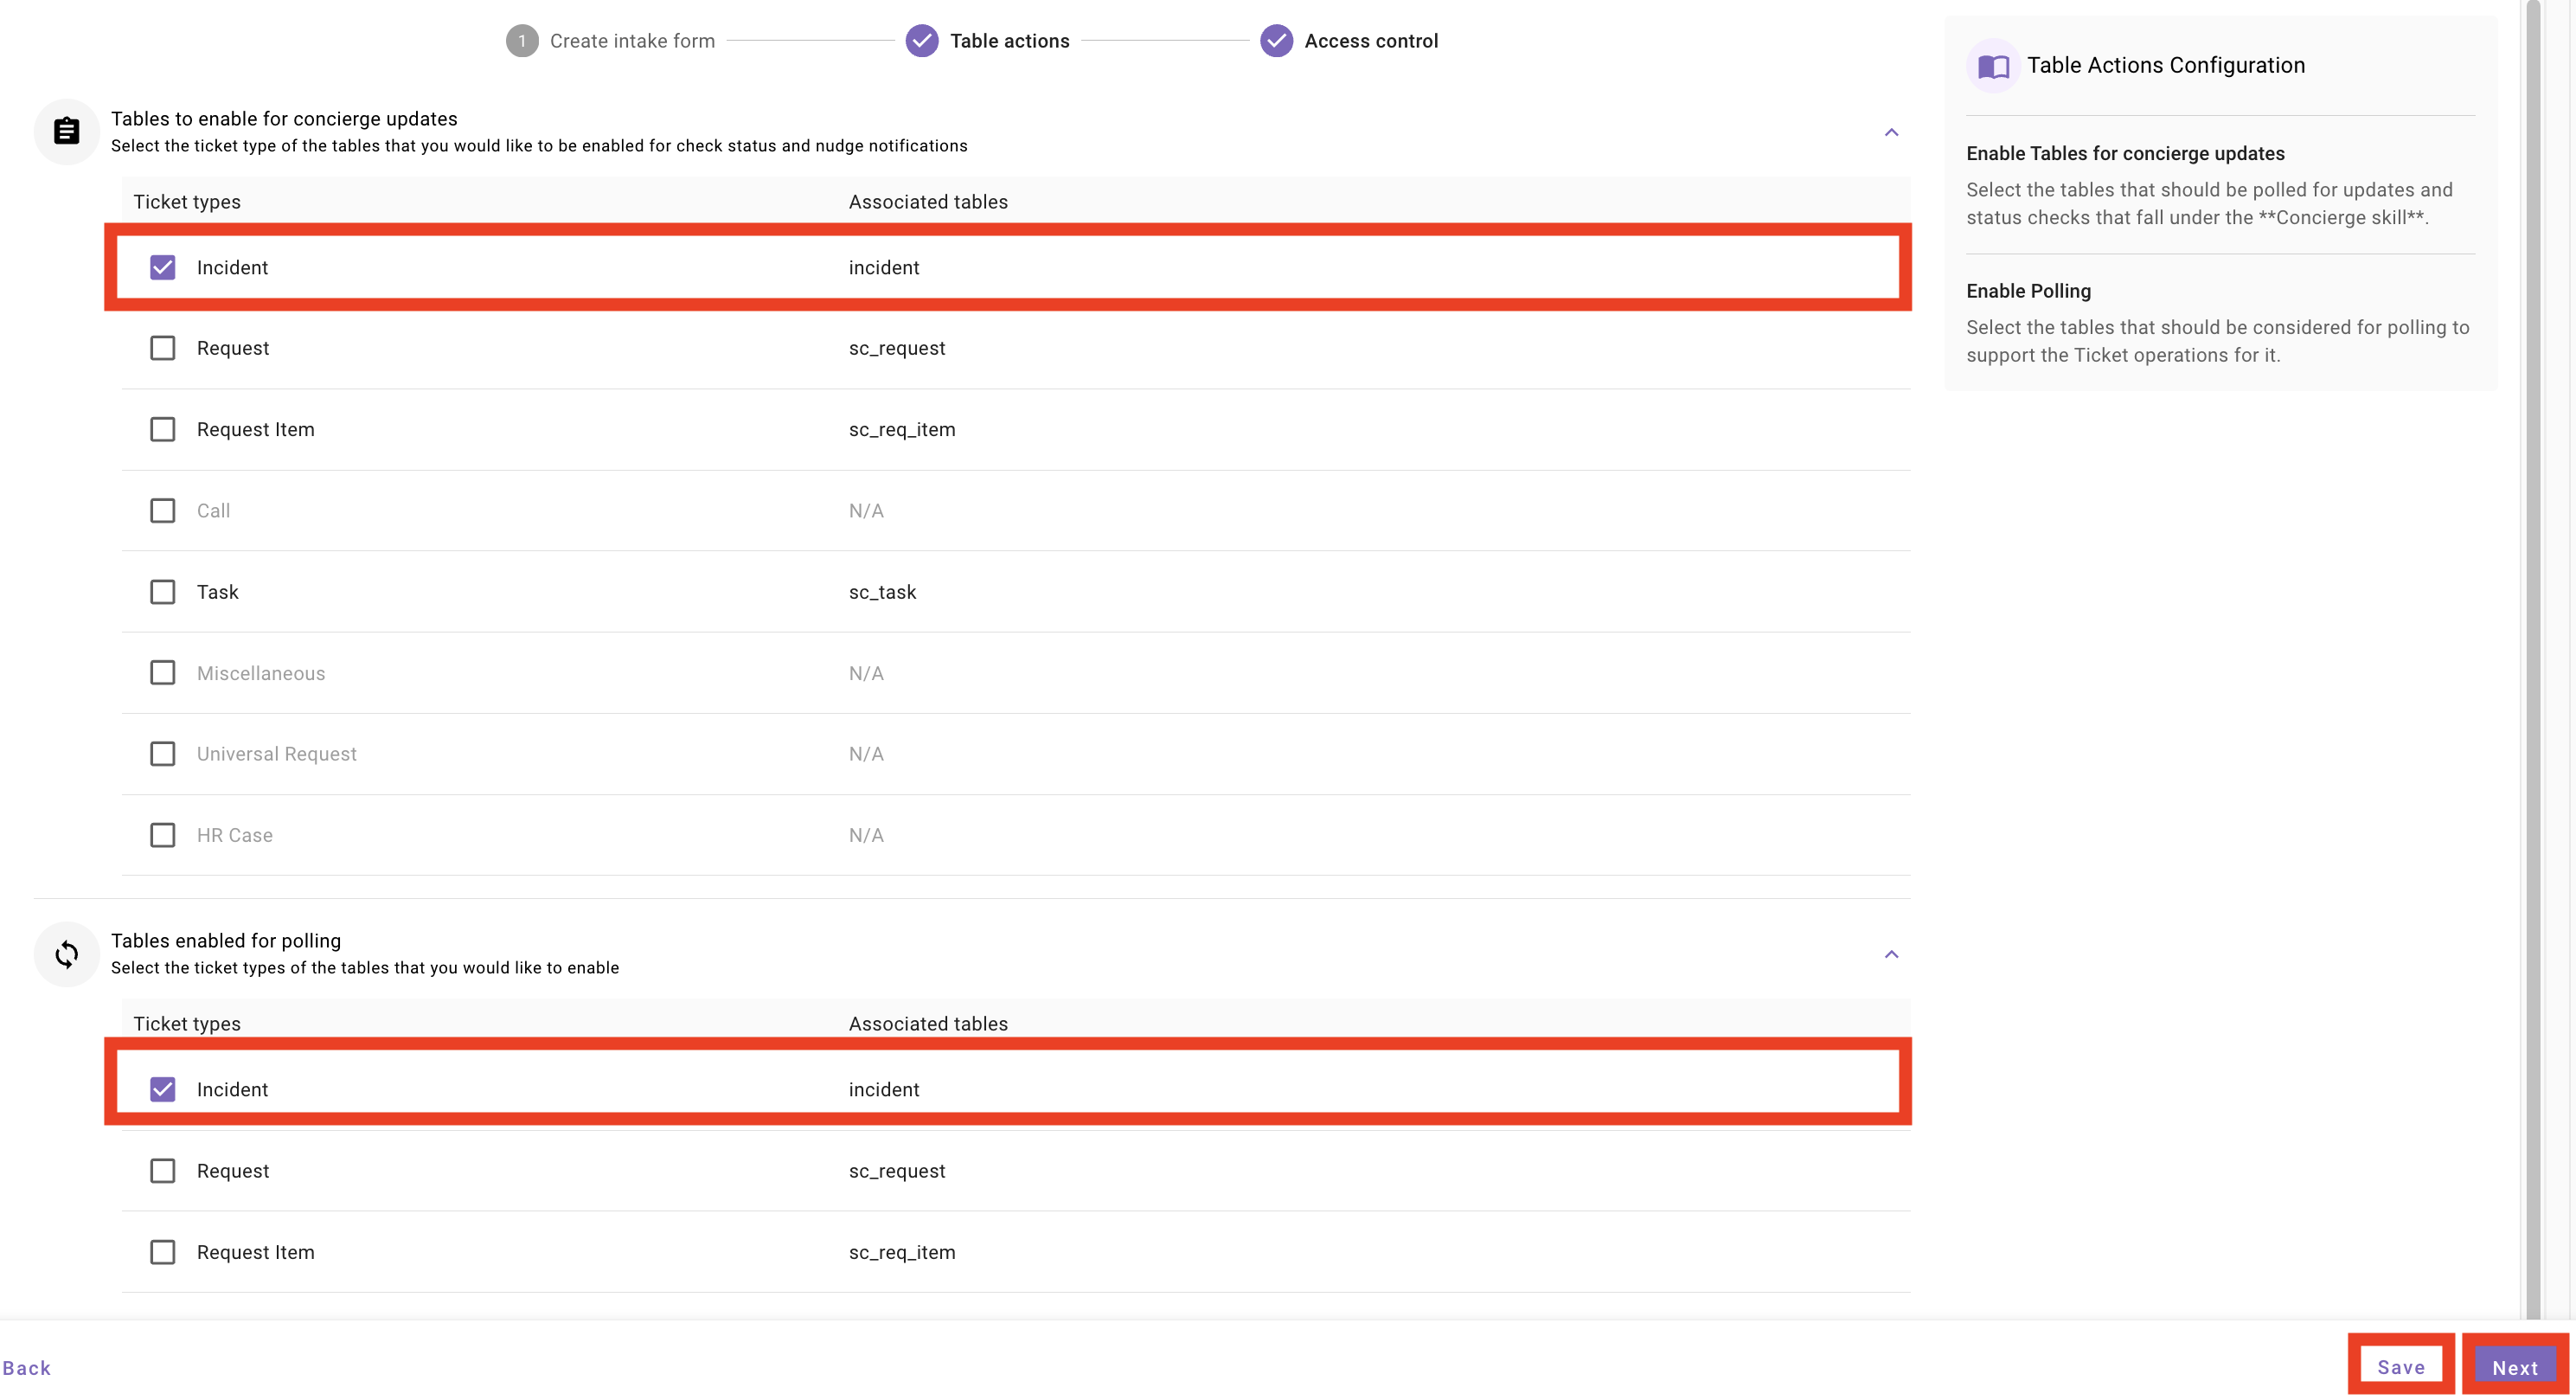
Navigate to the
Table Actionsand confirm that theIncidentticket type is enabled for Polling and Concierge Updates.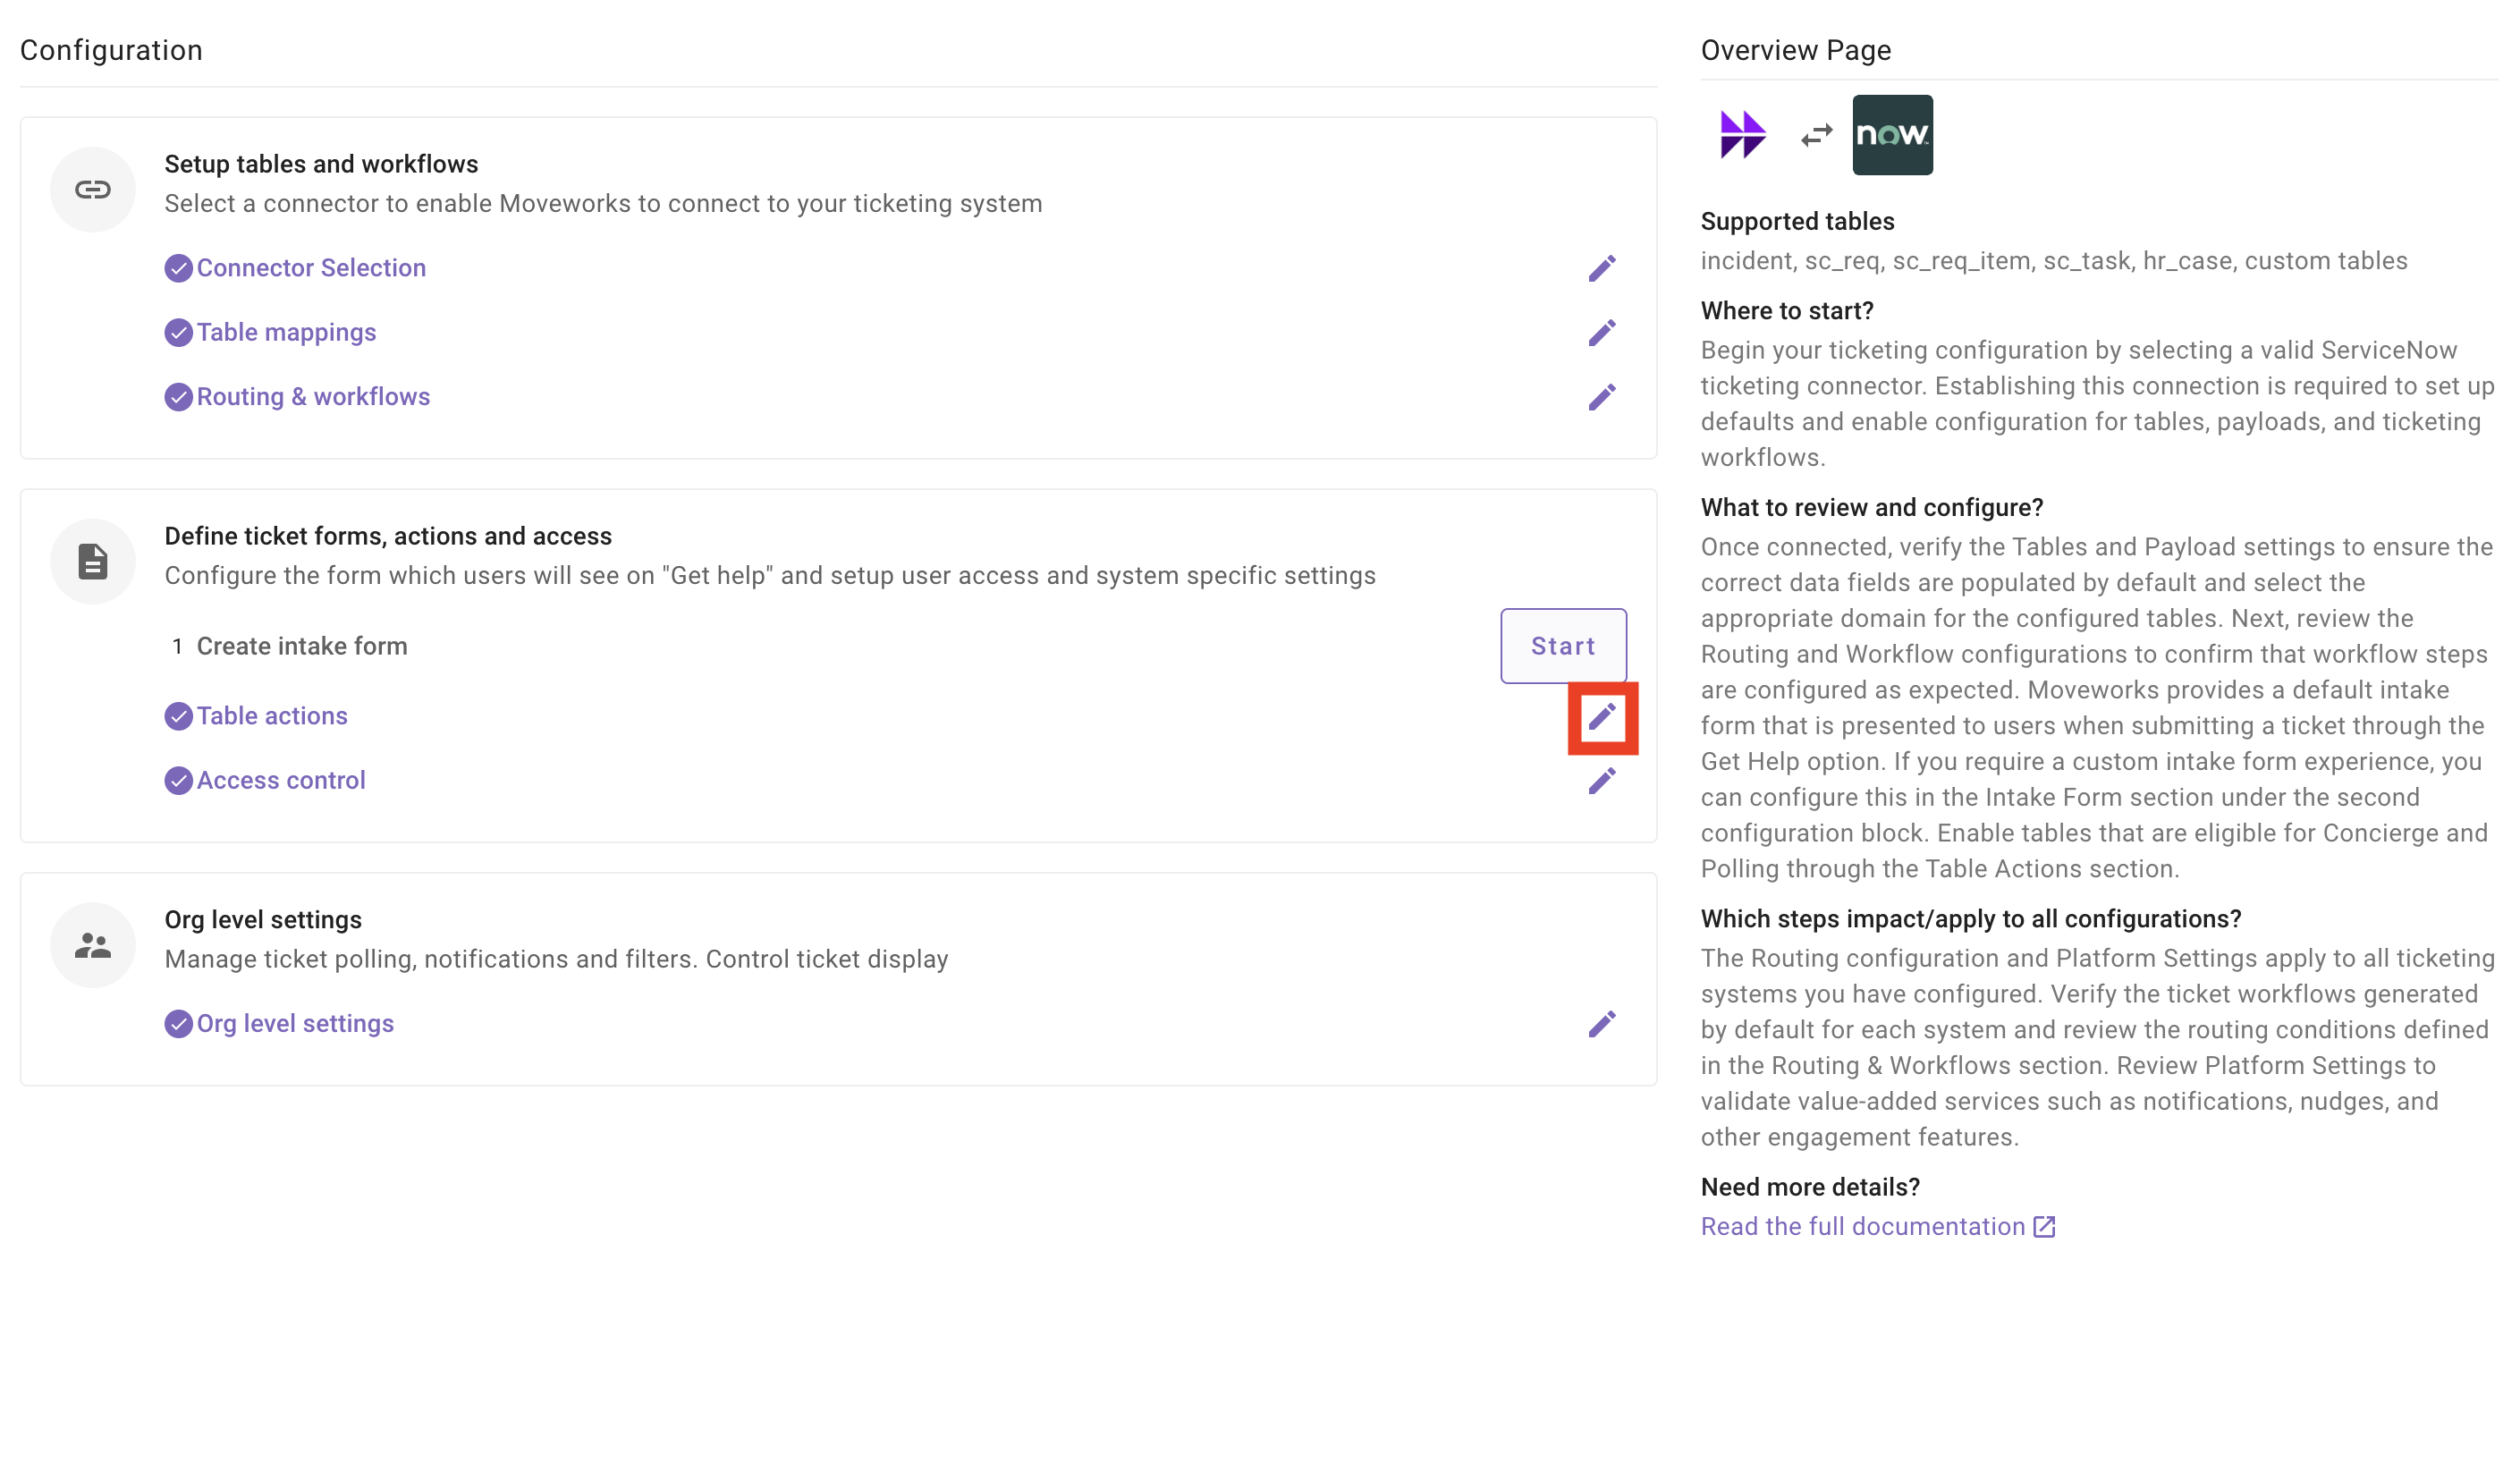
-
Ensure that the
Access Control Strategyis set toPublic to all members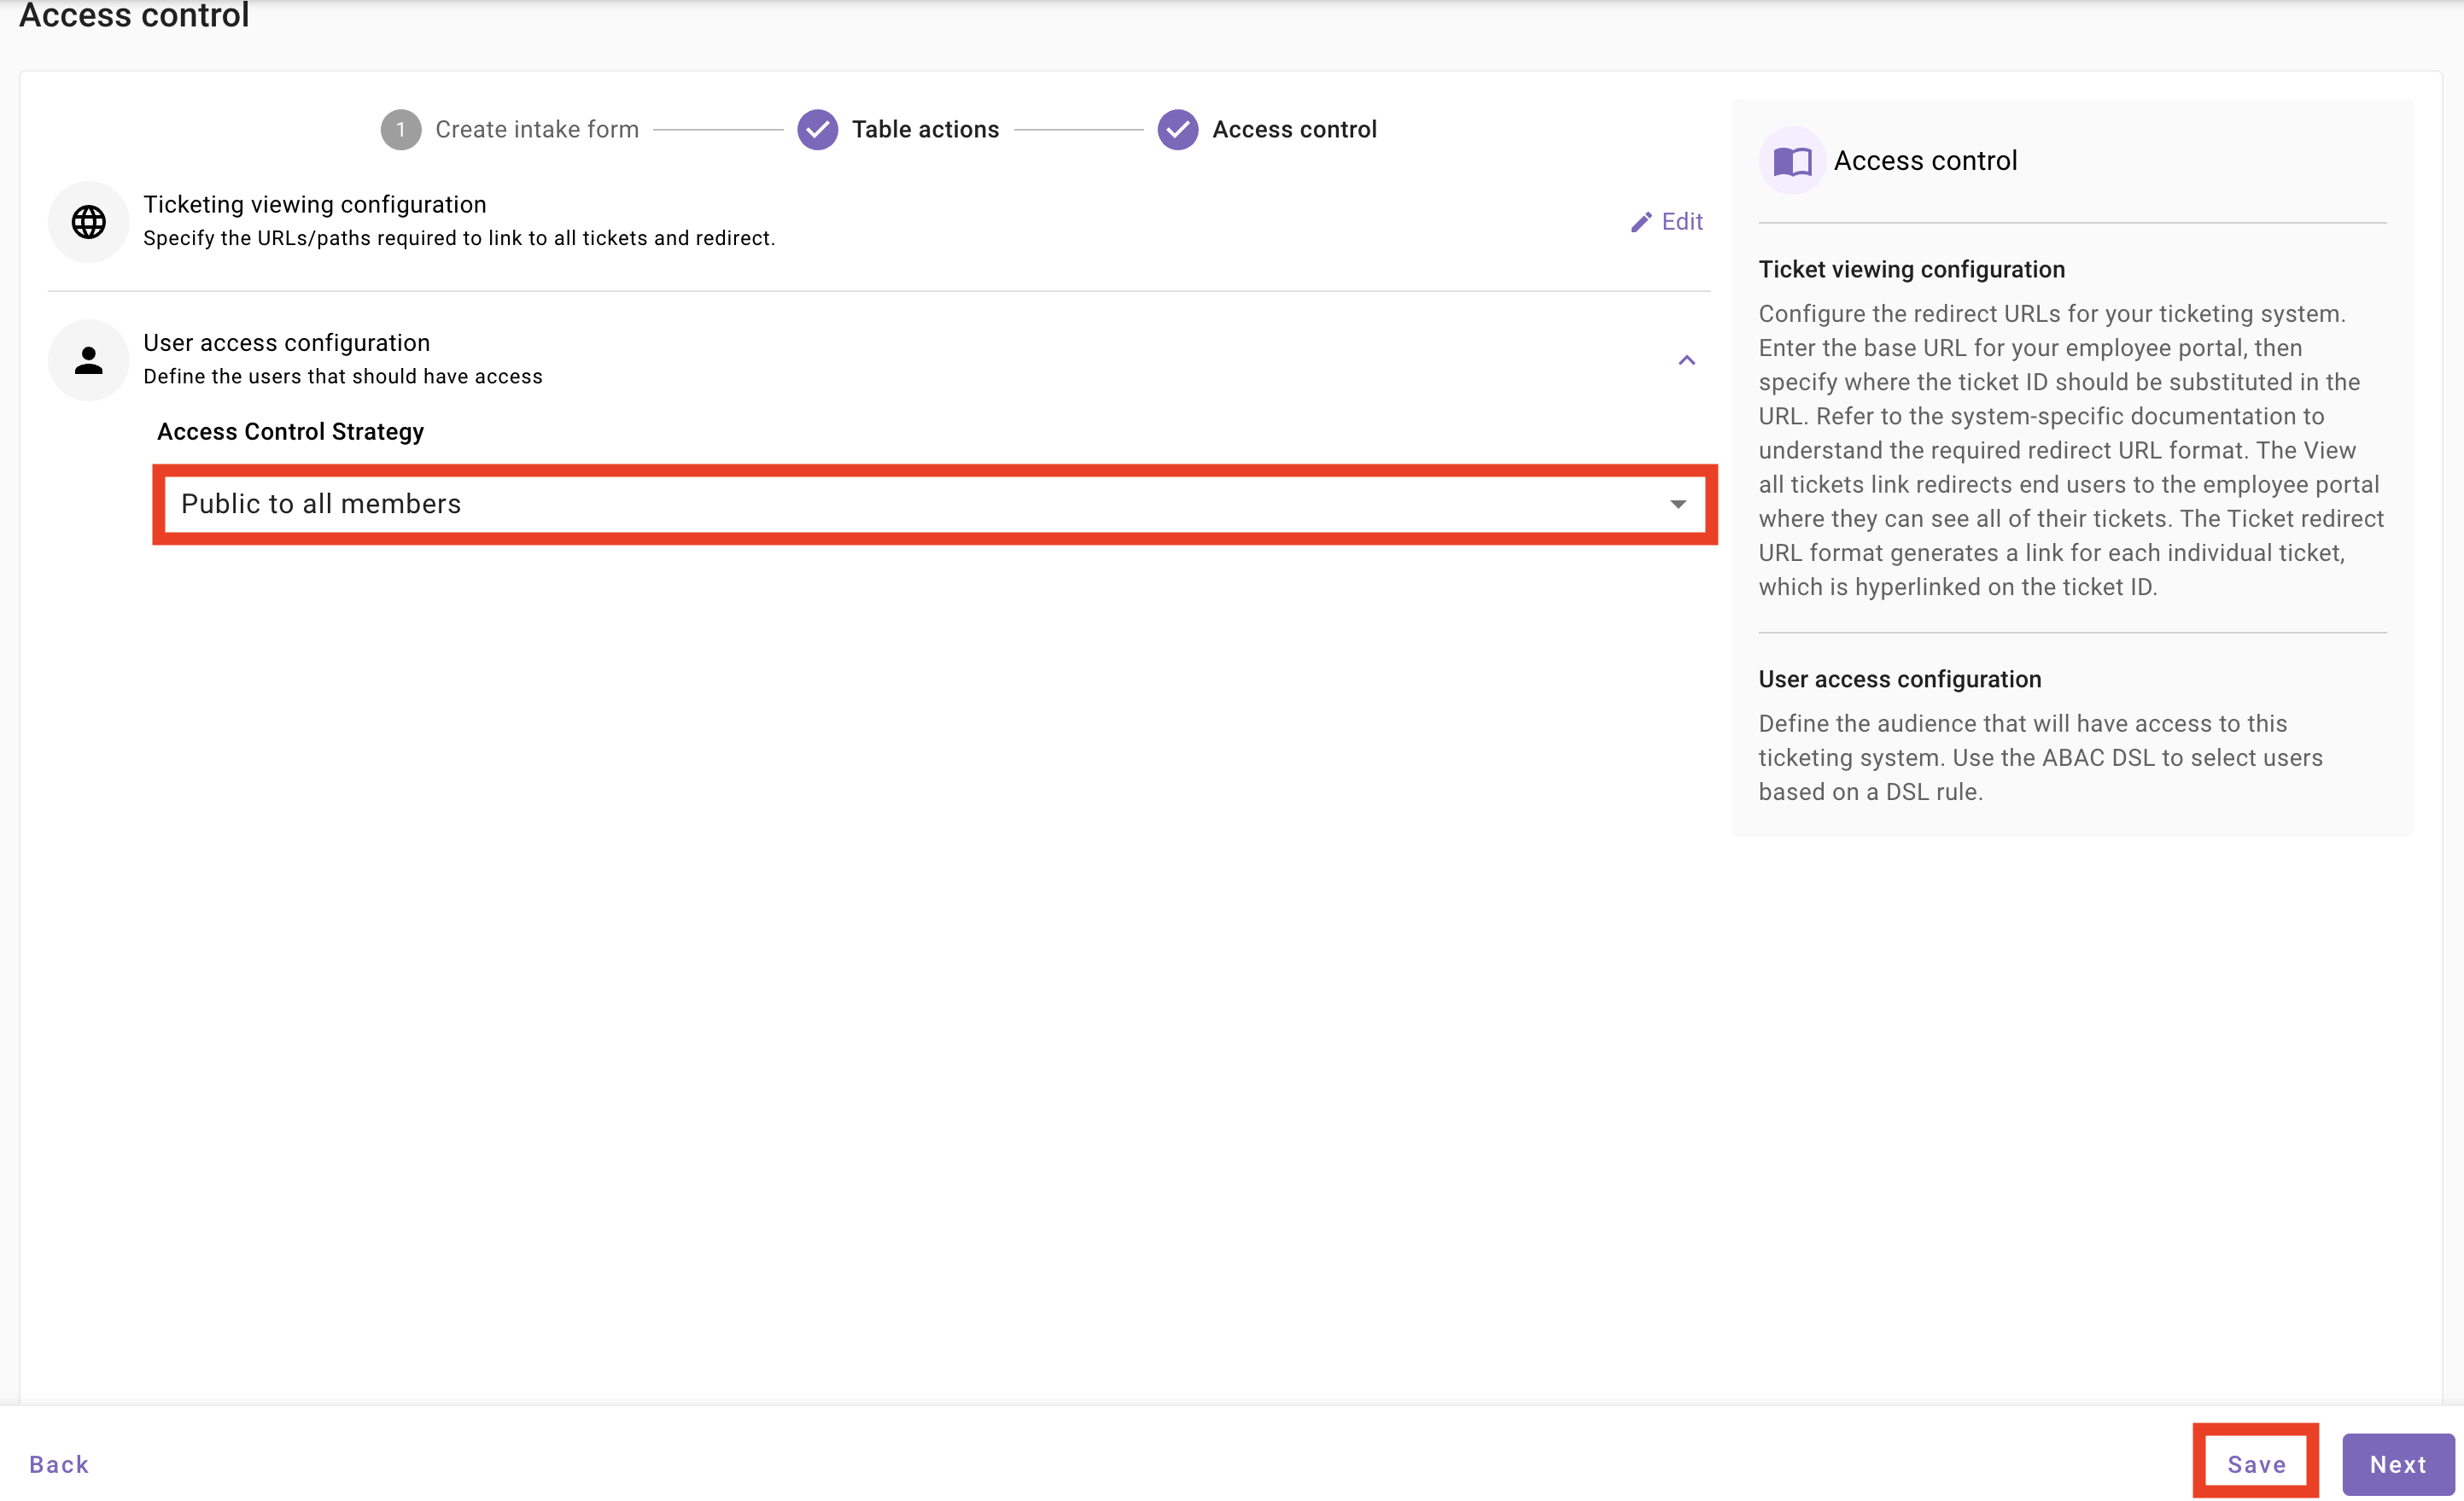
Note: We will not need to modify the Org level settings for this lab, but you should be aware that these global configurations control the following behaviors across all ticket types:
- Ingestion Control: Determines how often Moveworks polls your ITSM (e.g., ServiceNow) for updates and how far back it looks for changes.
- Notification Window: Sets “Business Hours” and weekend rules to ensure users aren’t pinged by the Assistant at 2:00 AM.
- Nudge Logic: Configures the “Inactivity Threshold” - the number of days a ticket sits idle before the Moveworks AI Assistant automatically nudges the assignee.
- User Display: Toggles what the employee sees in chat, such as the ticket state, assignee info, or the ability to upload attachments directly through the Moveworks AI Assistant.
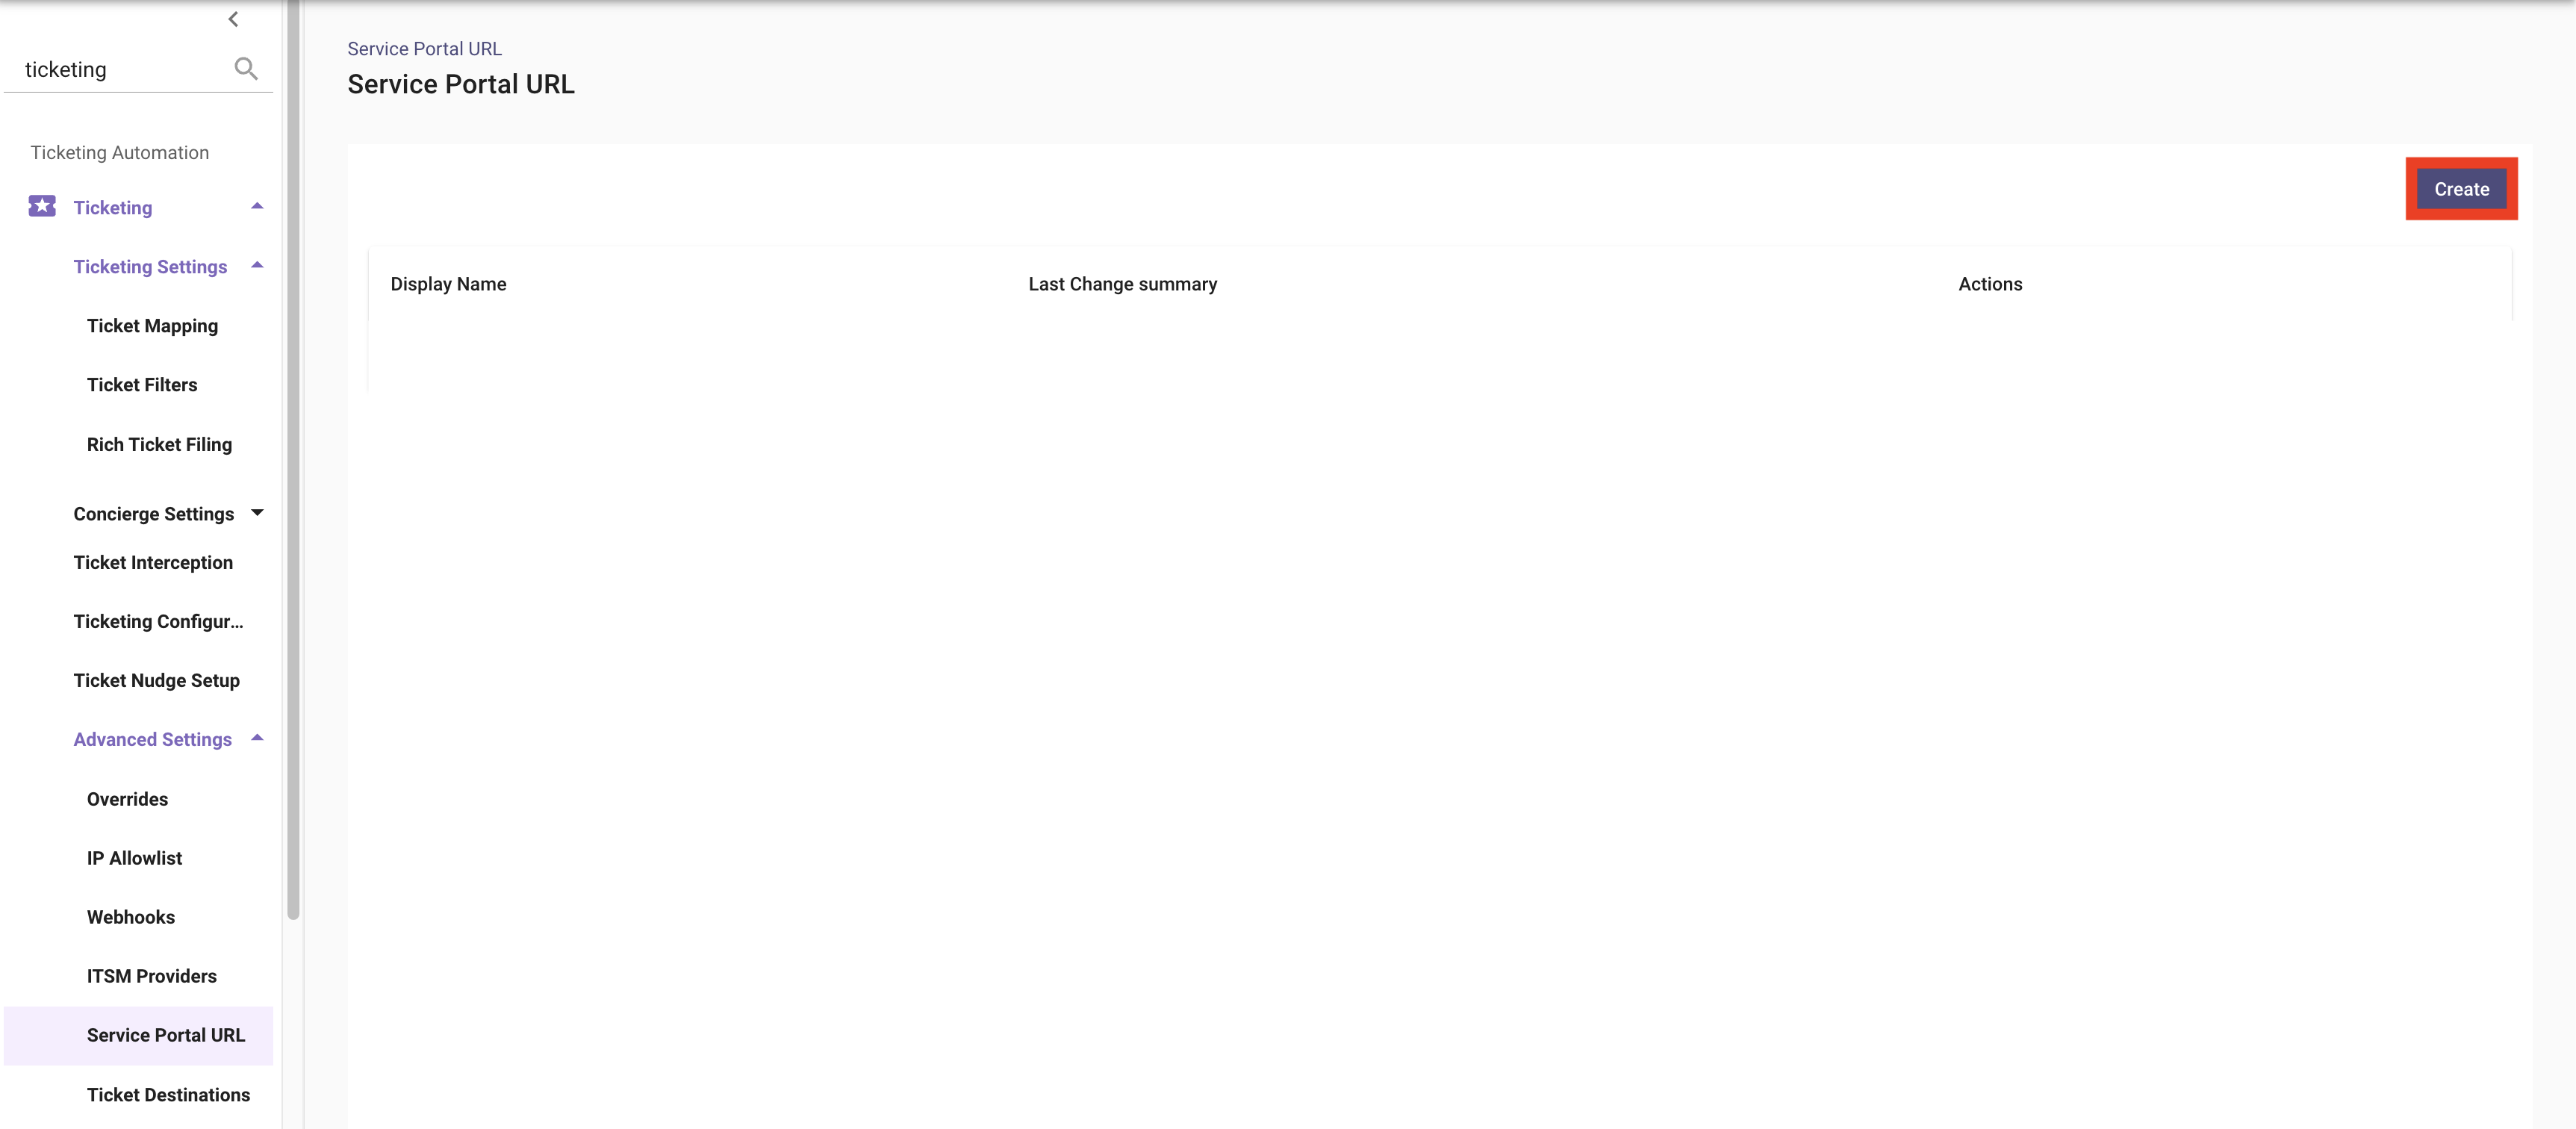
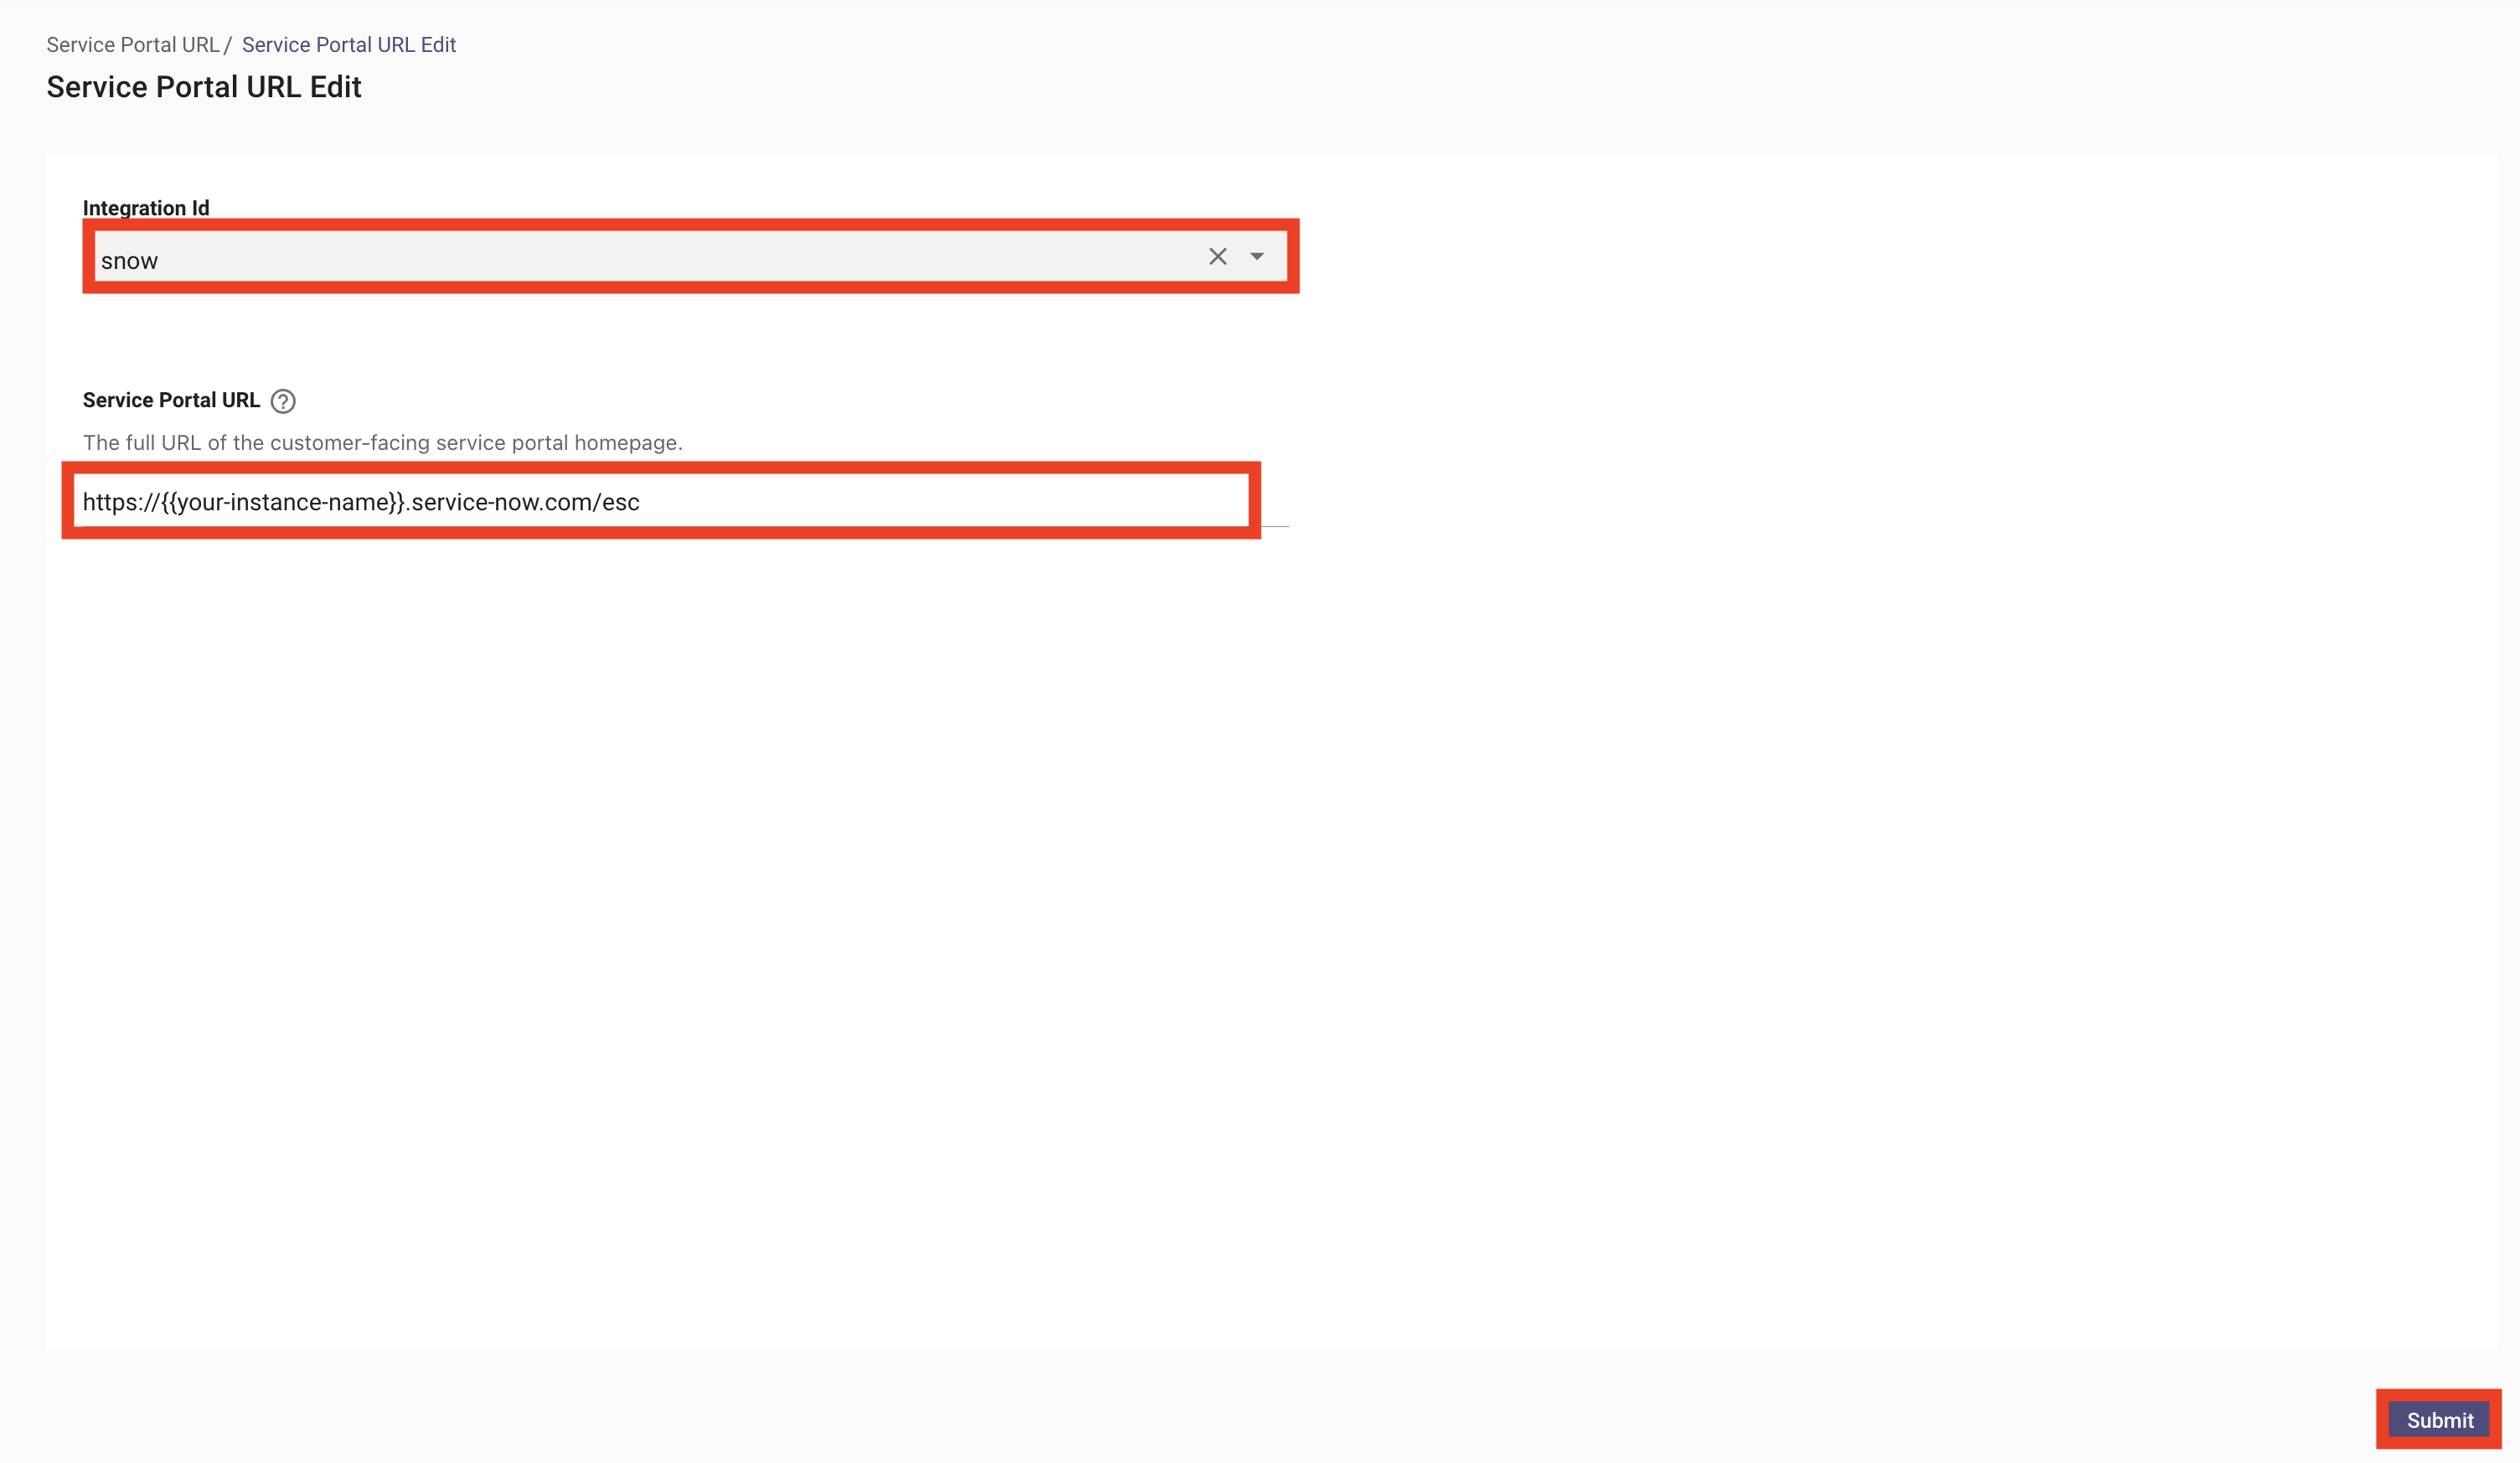
-
Navigate to the
Service Portal URLand create a configuration, leveraging yoursnowconnector and your portal URL- This configuration will control the redirect URL when a user clicks a hyperlink to a NOW ticket within Moveworks
- You have completed the Ticketing configuration for Incidents, now file a Ticket with your Moveworks AI Assistant and test all of the functionality to ensure it is working!
🔄 2: Revisiting Lab 4a — Why Form Submission Failed
2.1: Why “I need a standard laptop” didn’t complete
At the end of Lab 4a, you asked the AI Assistant "I need a standard laptop". The Assistant surfaced the Standard Laptop form and walked you through filling it in chat — but when you tried to submit, nothing was actually created in ServiceNow.
That’s because form handling in Moveworks splits across two capabilities:
- Form ingestion (Lab 4a) makes forms discoverable and fillable. Moveworks pulls the catalog items, permissions, and field definitions from ServiceNow so the AI Assistant can ask follow-up questions and render the form in chat.
- Ticketing configuration (this lab) provides the destination tables Moveworks writes to. A form submission creates a Request Item (
sc_req_item) record in ServiceNow, which requires the Request and Request Item tables to be mapped in your ticketing configuration.
Without ticketing configured, the Assistant can collect the inputs — but it has nowhere to post the final payload.
Relevant Documentation:
- Moveworks Help: Forms Integration — ServiceNow — how form ingestion works and which fields Moveworks supports
- Moveworks Help: Configuring Ticketing for ServiceNow
2.2: Good news — defaults already covered most of it
When you clicked Setup Defaults in step 7 of the walkthrough, Moveworks pre-loaded mappings for four ticket types, each with a different set of default actions:
Section 1 walked you through customizing the Incident mapping. The other three — Request, Request Item, and Task — are already in place from the defaults. You only need to verify them.
Why these four tables work together: When the AI Assistant submits a form, it invokes the Create action on sc_request — this is the parent record (REQ). ServiceNow’s own workflows then generate the child line items on sc_req_item (RITM) and any fulfillment tasks on sc_task. That’s why only sc_request needs Create enabled on the Moveworks side — the RITM and Task records are derived downstream inside ServiceNow.
2.3: Verify the Request, Request Item, and Task mappings
-
Navigate to
Ticketing > Table Mappingsin Moveworks Setup. -
Confirm all four tables —
incident,sc_request,sc_req_item, andsc_task— appear in the list. -
Click into
sc_requestand verify the default fields: -
Repeat for
sc_req_item: -
Repeat for
sc_task: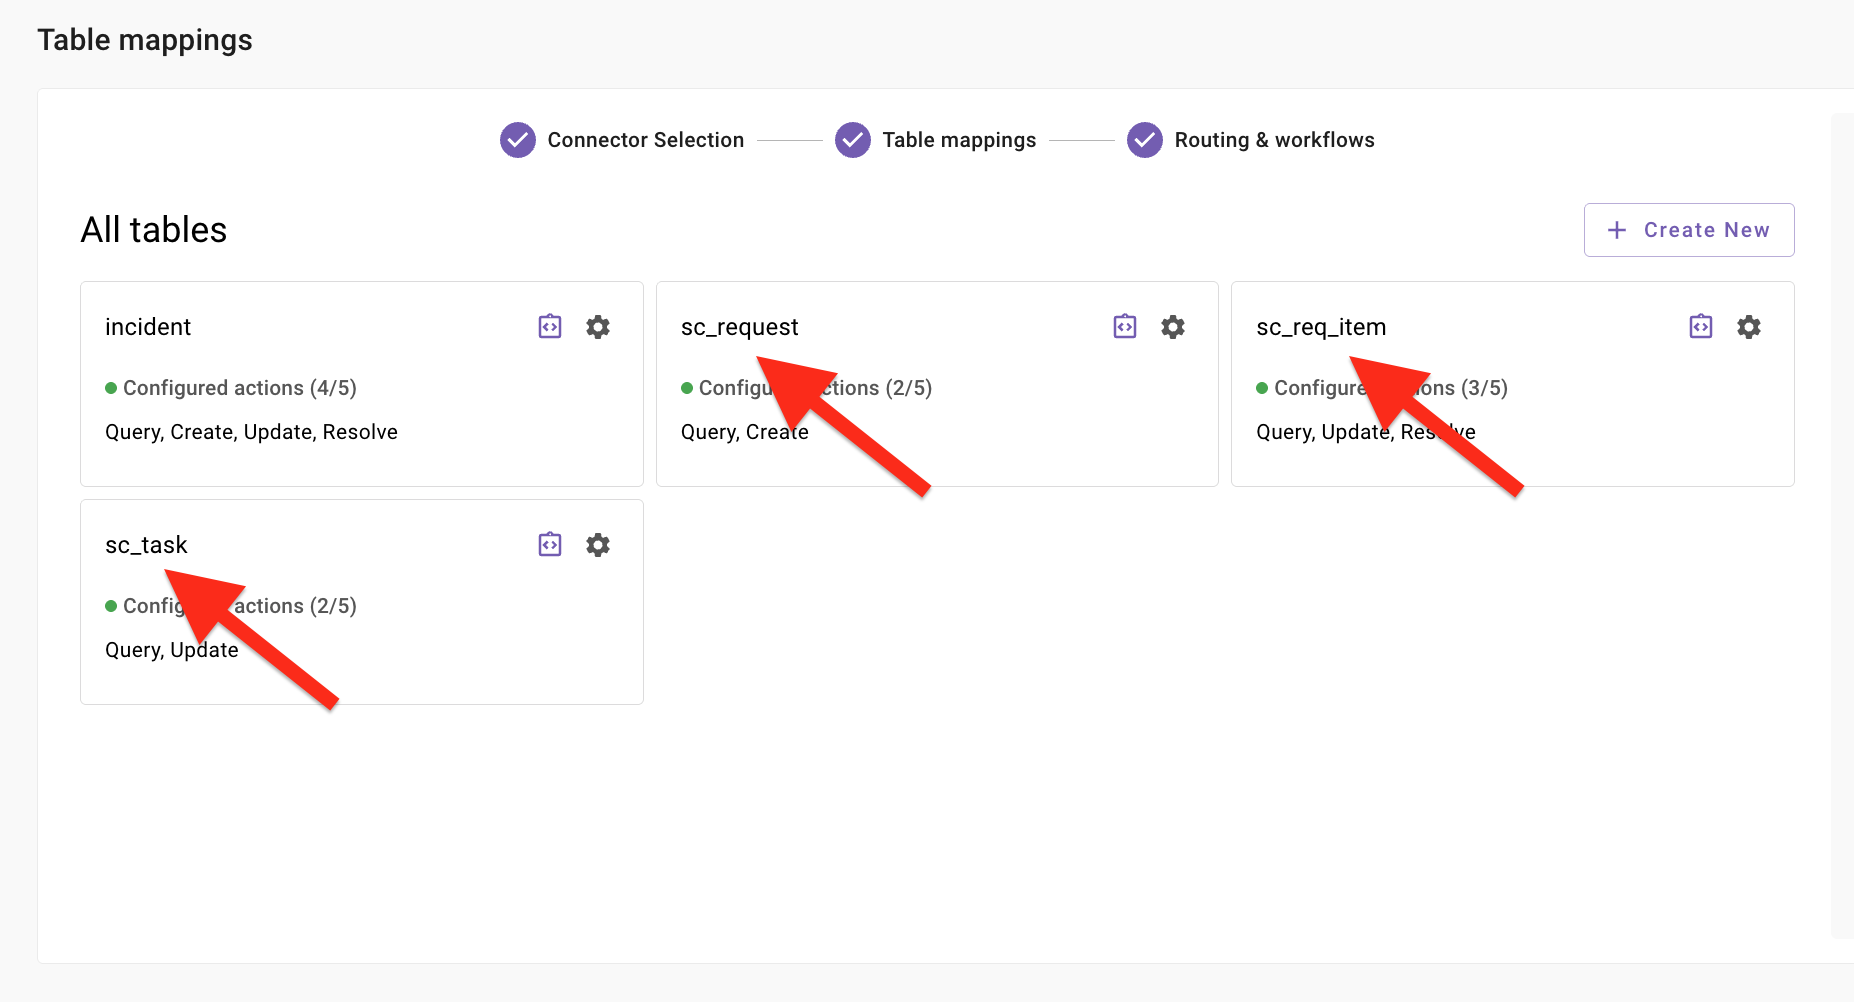
-
Under Table Actions for
sc_request, confirmCreateis enabled. This is the action Moveworks invokes when a form submission completes.Save your Table Mappings if you made any changes.
2.4: Re-test the Lab 4a query
Head back to the Moveworks AI Assistant and type "I need a standard laptop" again.
This time the form should fill and submit — creating a new RITM in your ServiceNow training instance. Verify it appears under sc_req_item.list in ServiceNow.
Still failing? If submission errors out, jump to Section 4: Troubleshooting Triage below. The most common culprits are missing required fields on sc_req_item in your instance — check the API Logs to see exactly which field ServiceNow is rejecting.
✅ 3: Verification & Next Steps
- Finalize: Confirm all configurations are saved
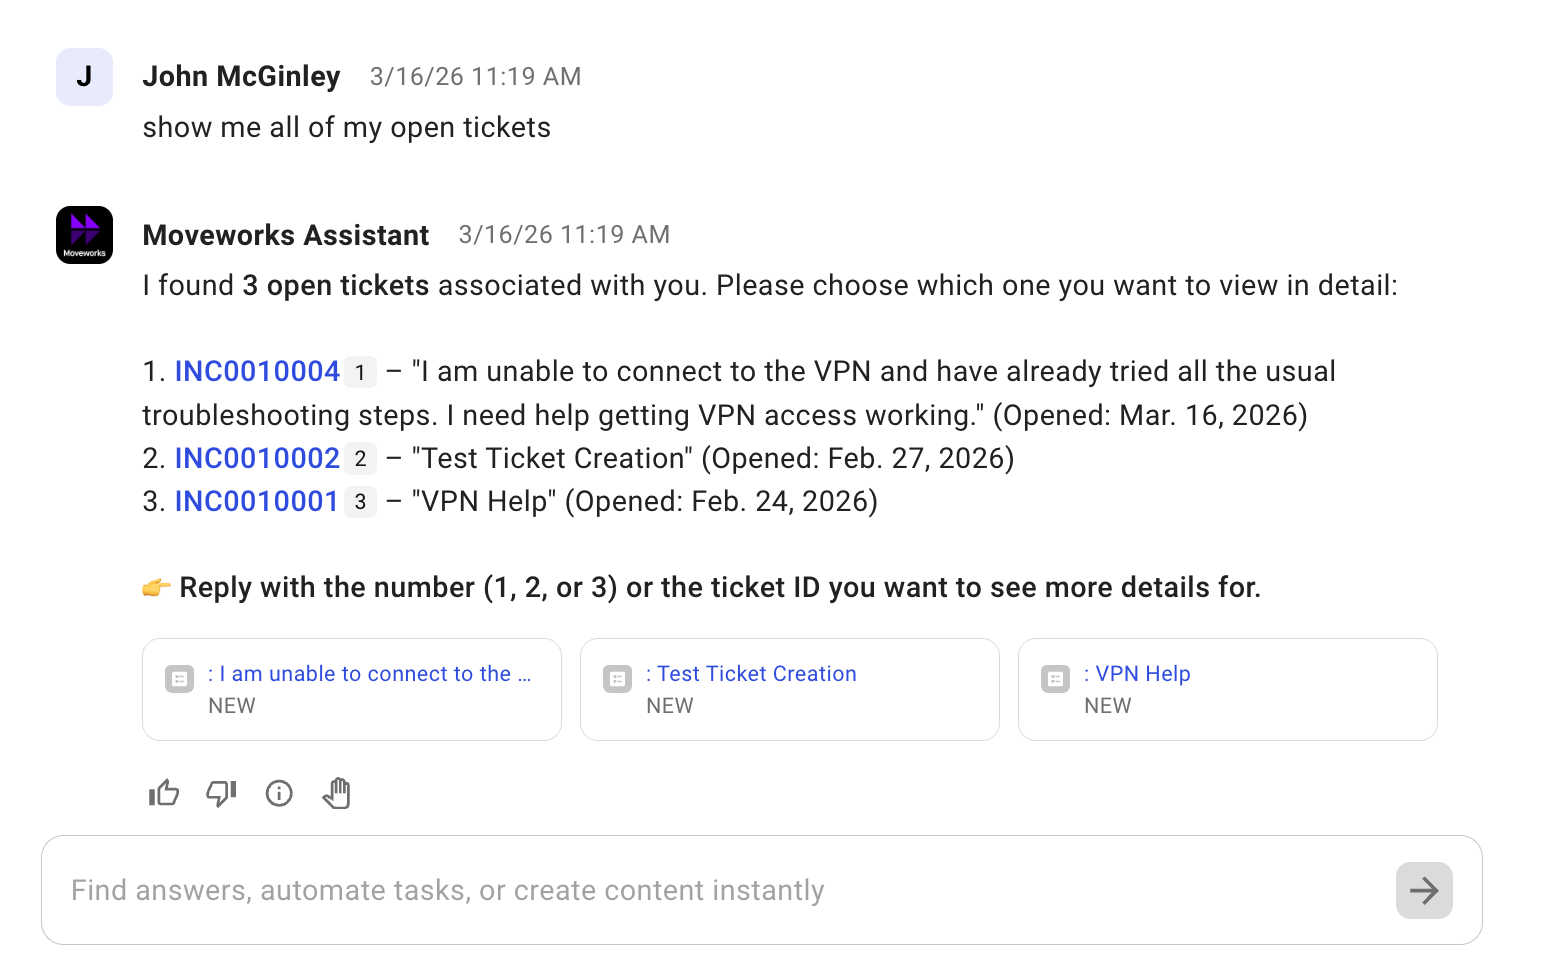
- Check Success: Talk to Moveworks! Confirm you are able to do the following ticket actions:
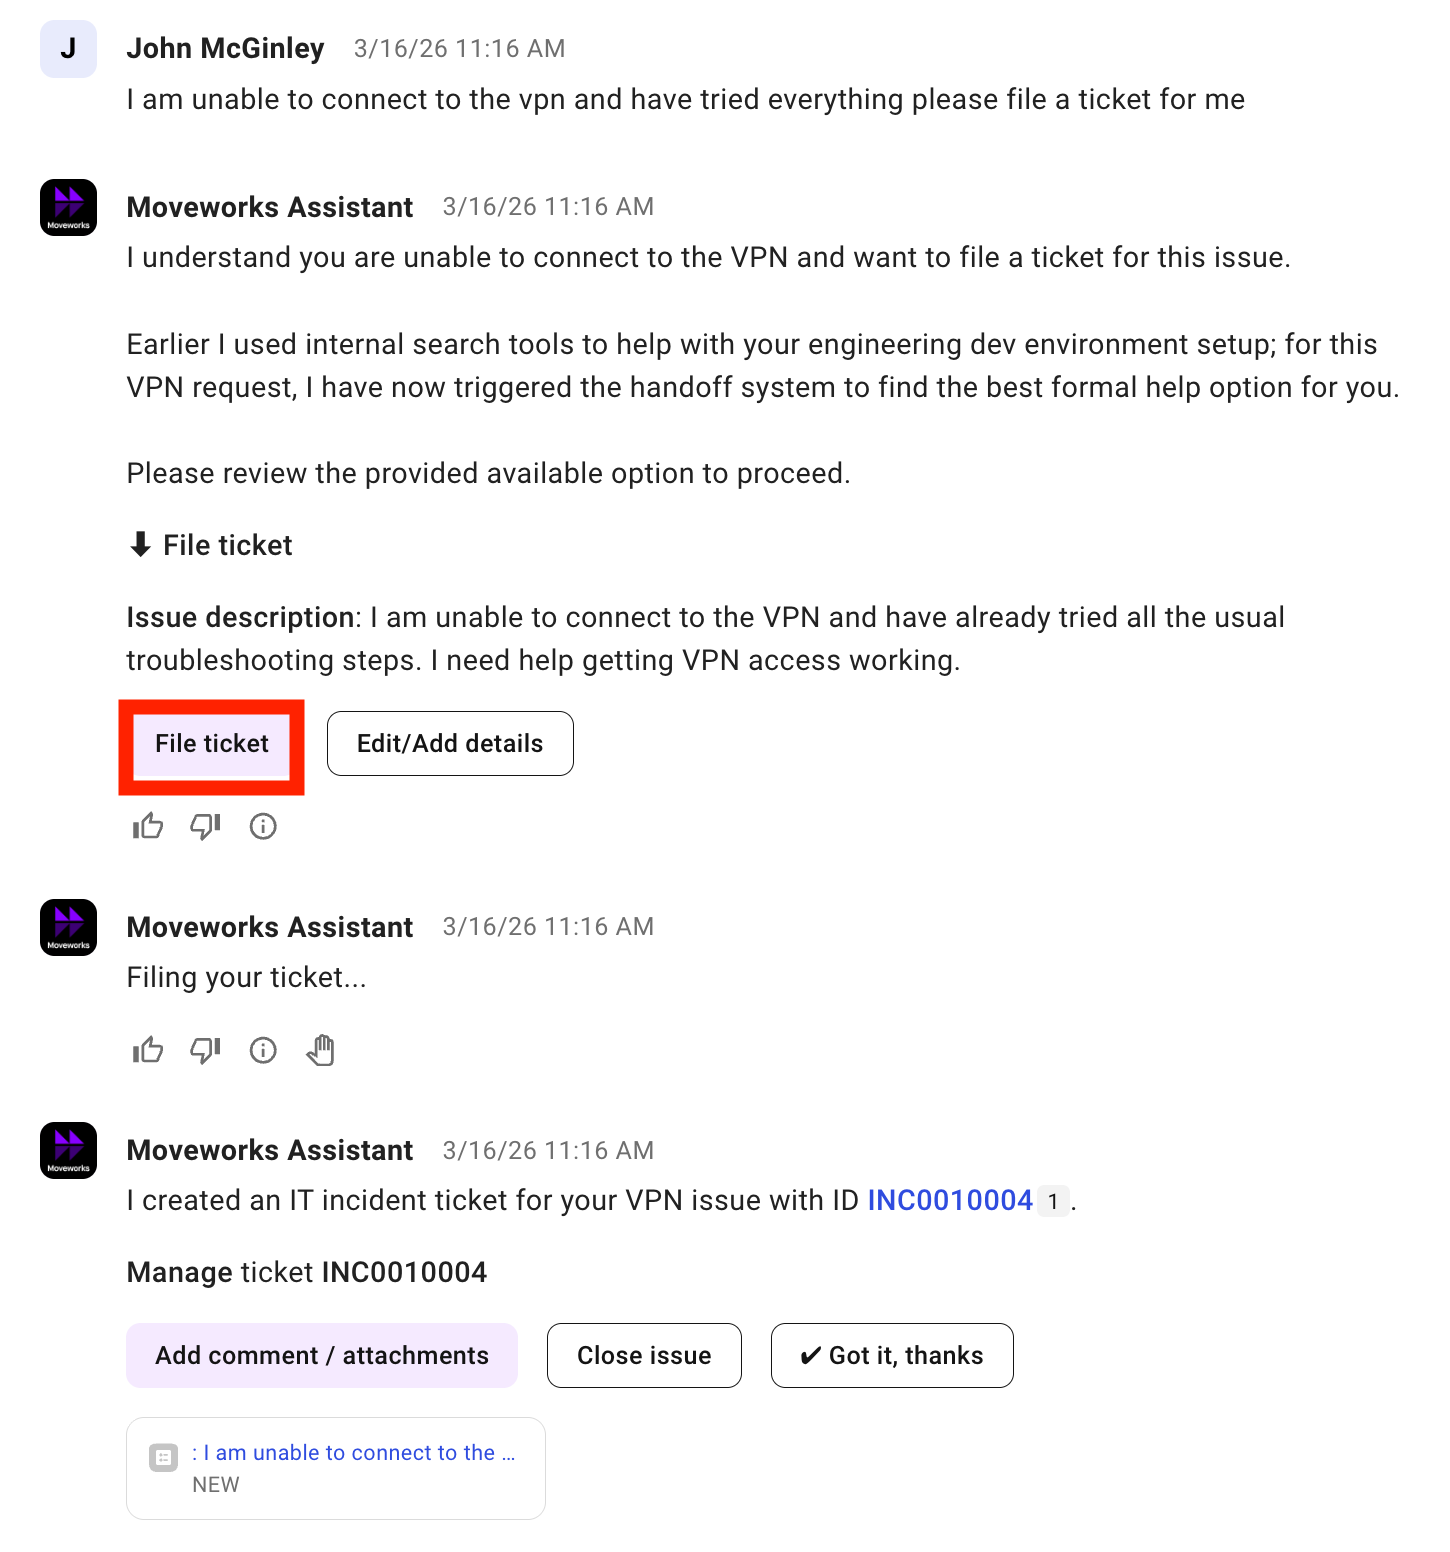
-
File
-
Query
-
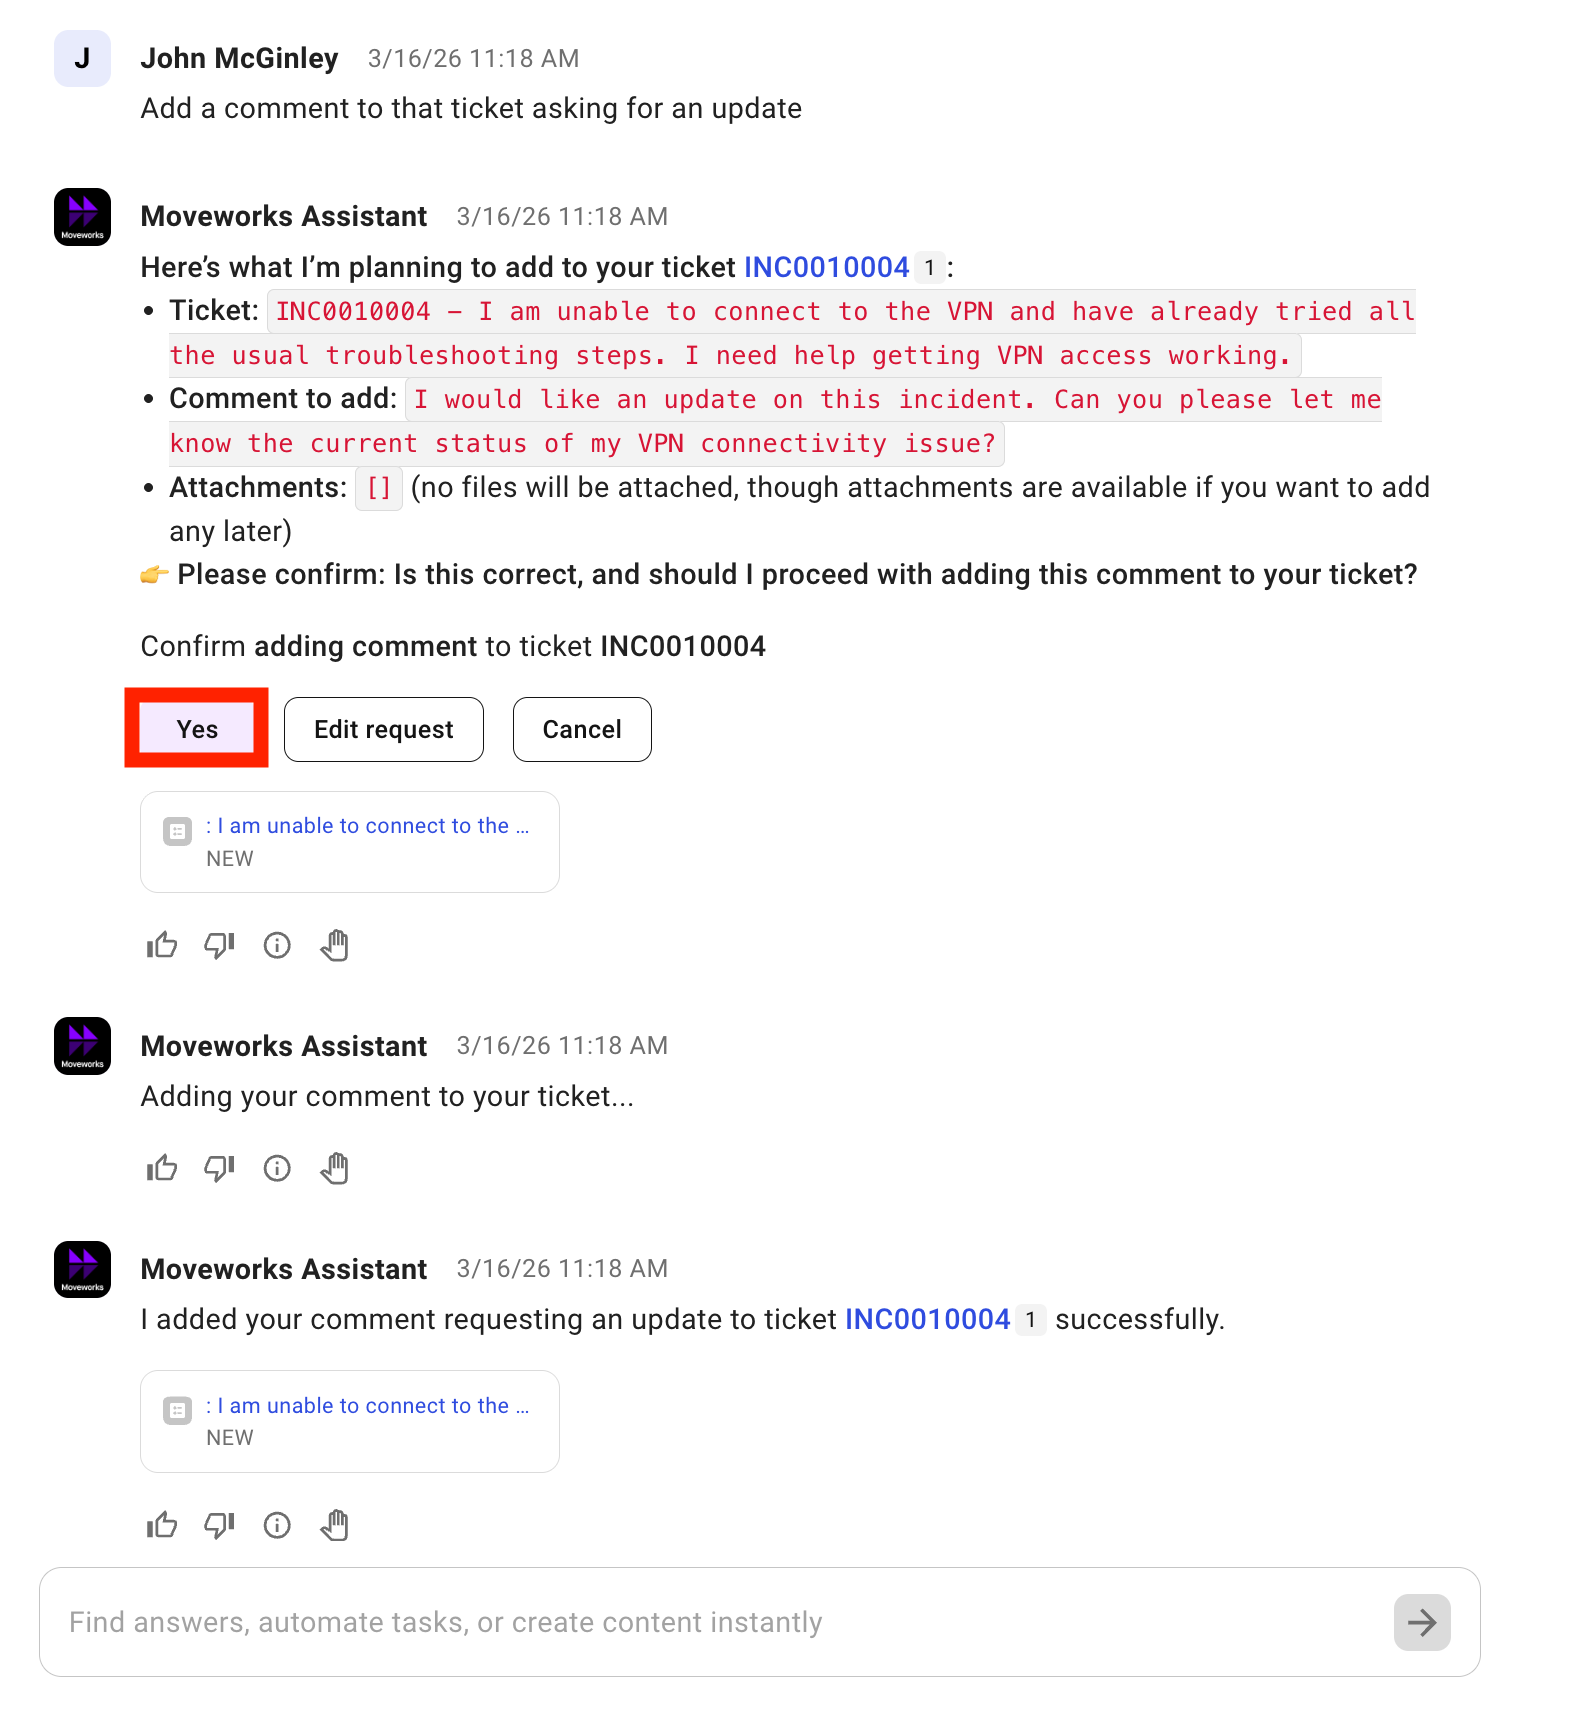
Update (Add Comment)
-
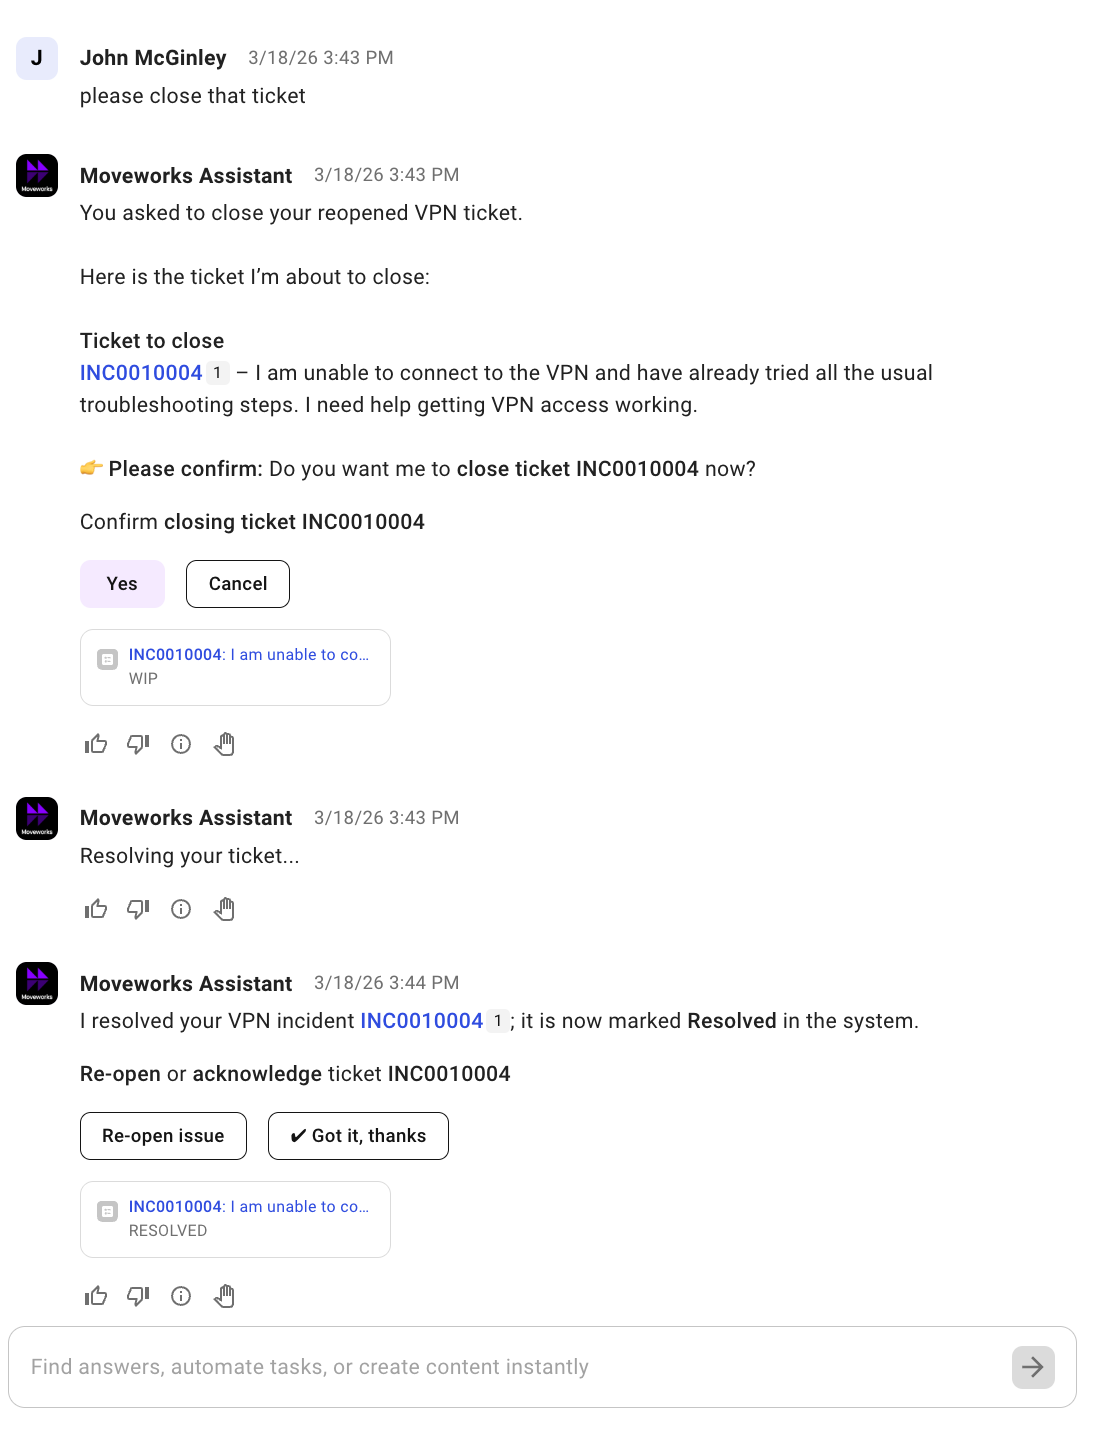
Resolve/Close
-
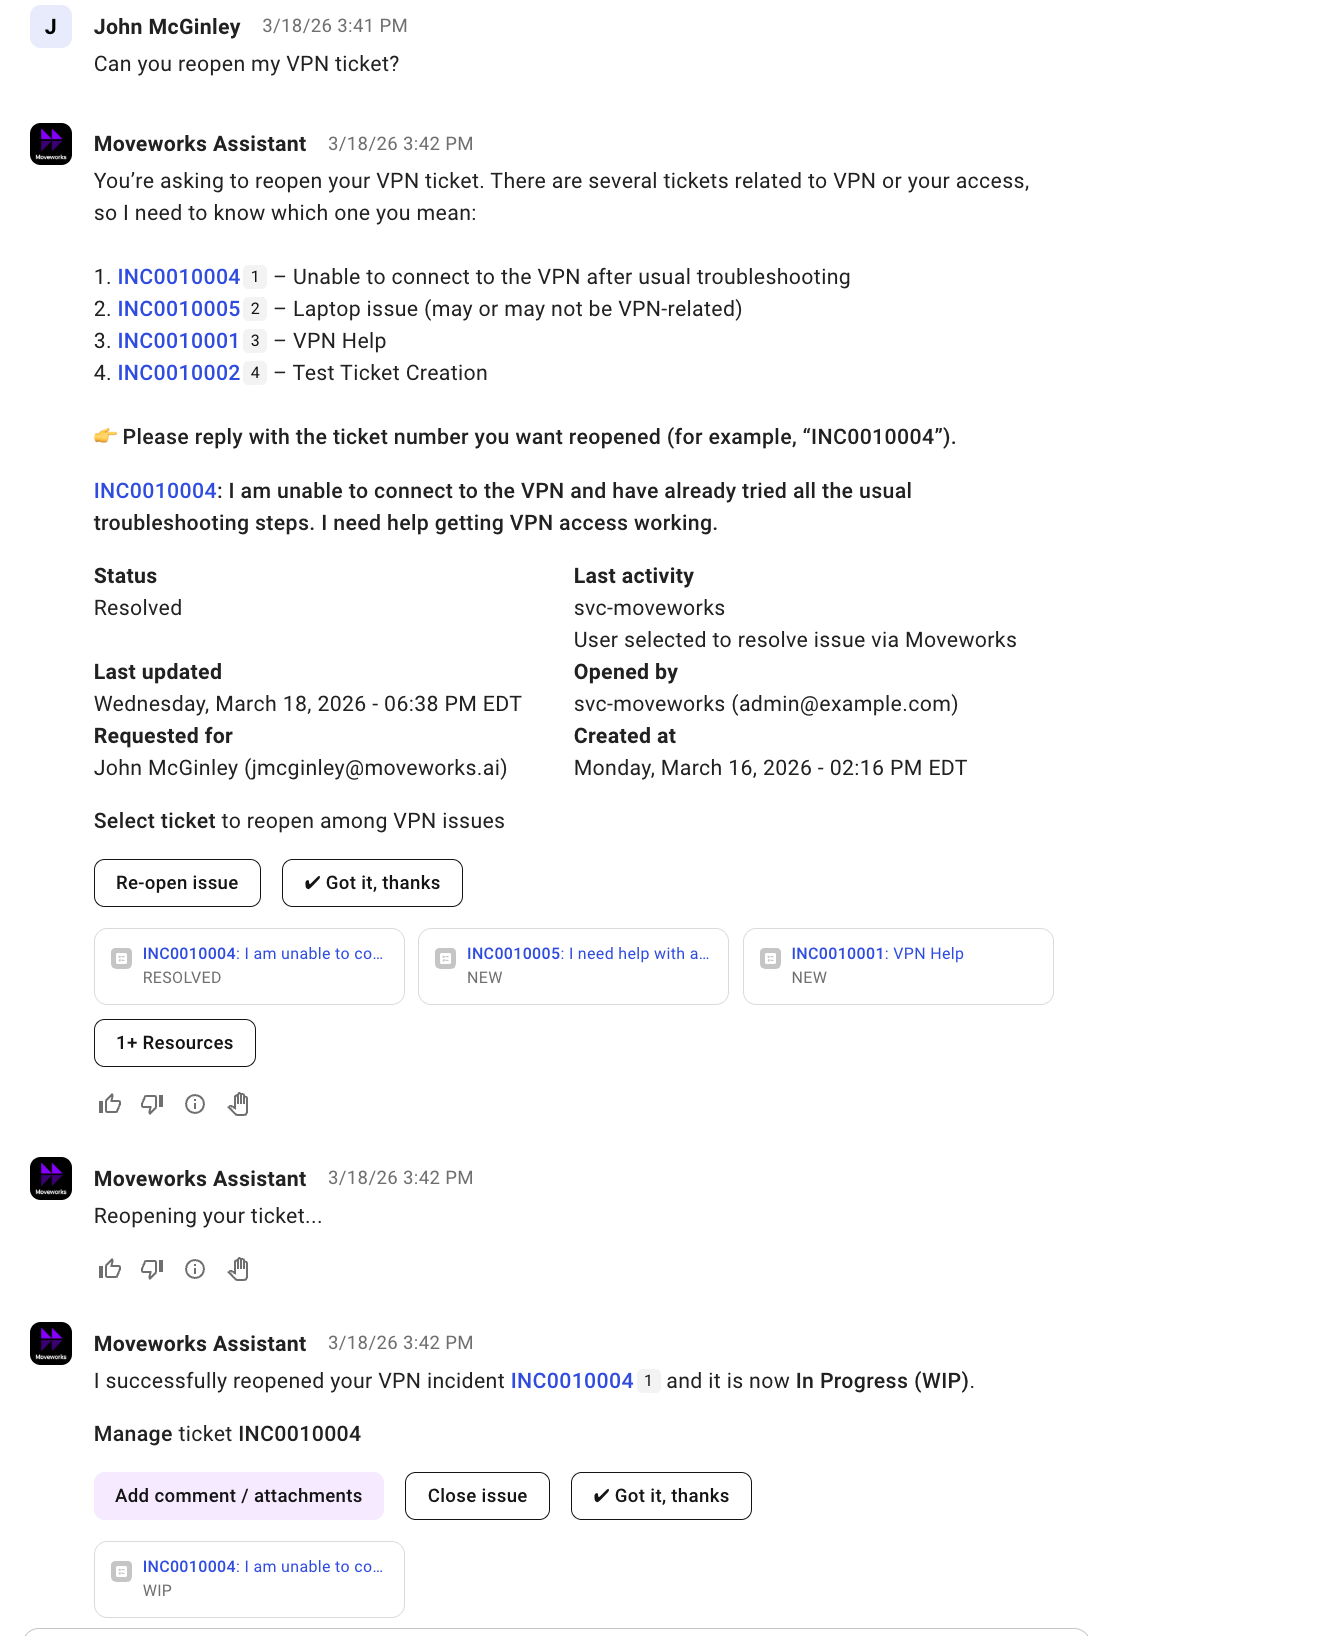
Reopen
-
Next:
- If you want to learn how to use Moveworks Data Syntax Language (DSL) to write rules that filter and shape data, continue to Lab #6a — Data Syntax Language (DSL) (Optional).
- If you want to learn about live-agent handoff instead, jump to Lab #7 — Handoff: Live Agent (Optional).
- Otherwise, you’ve completed the core Moveworks Setup labs.
❗ 4: Troubleshooting Triage: Why am I unable to Action on a Ticket?
When a user attempts to do a ticketing action within Moveworks, the action may fail if there is a misconfiguration between how Moveworks is creating or updating the ticket, and what the source system expects. We should go through the following troubleshooting flow if we are experiencing issues with ticketing.
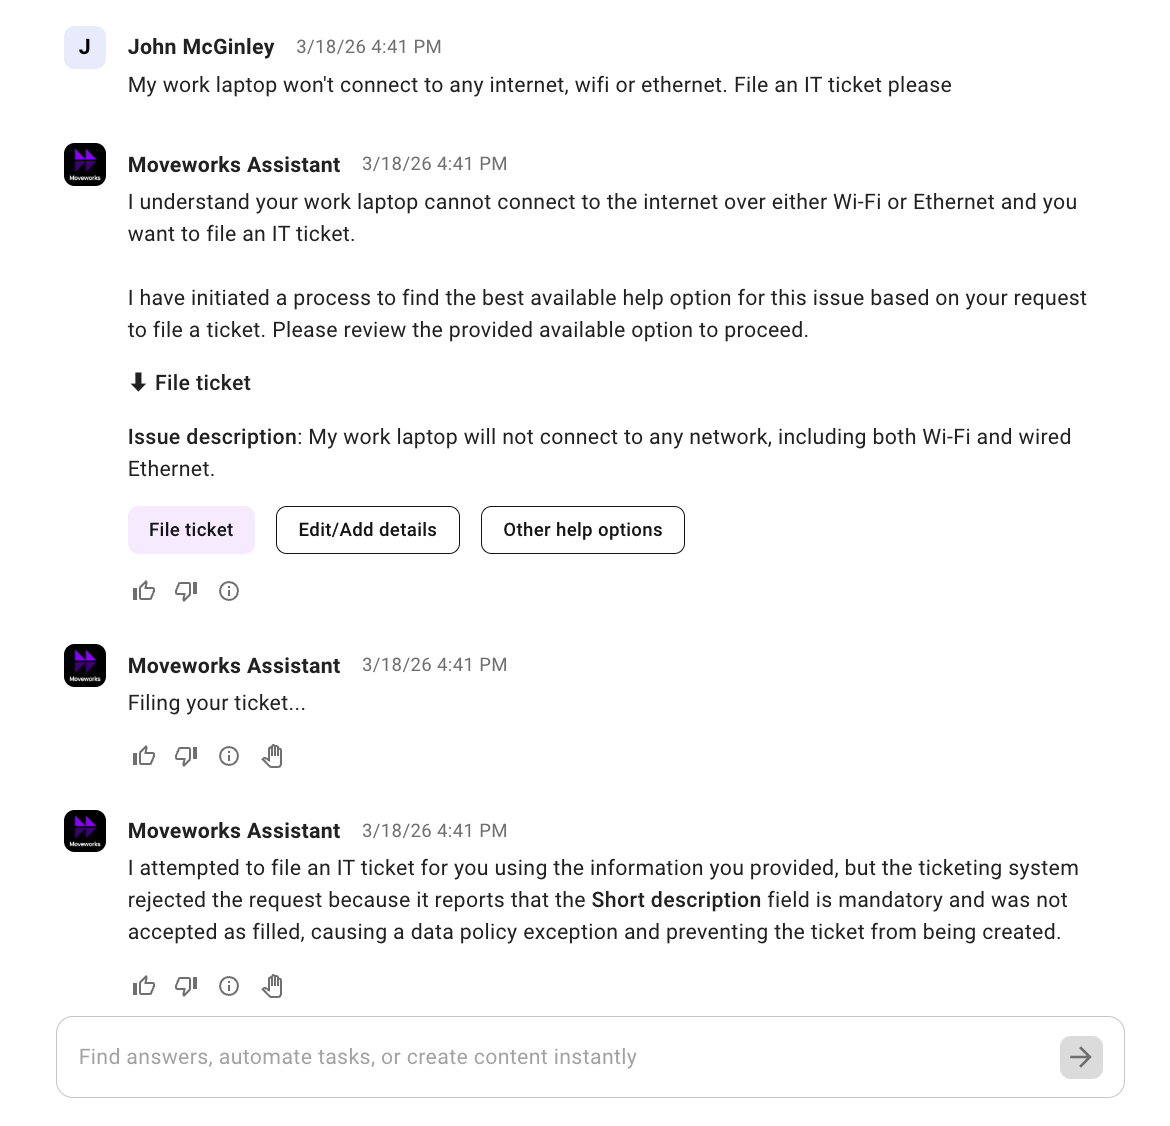
4.1: Encountering a Ticketing Error — “Failure Identification”
If the Assistant fails in a communication to the ticketing platform, it will state to the end-user that it failed to take the requested action.
The Assistant will often provide a short summary of what the occurring failure mode was. In the following case, we can see that Moveworks failed to create a ticket, and it looks like the issue may be related to a mandatory field not being included in the API request.
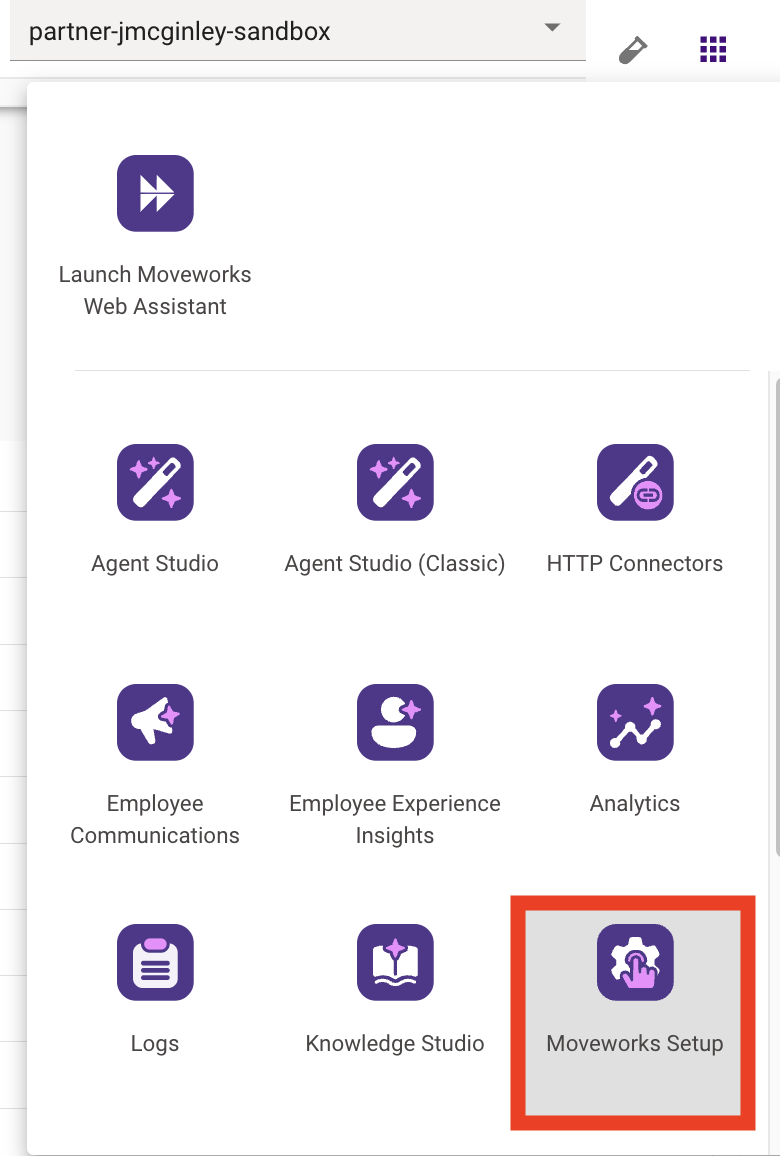
4.2: Check the API Logs — “What is Being Sent?”
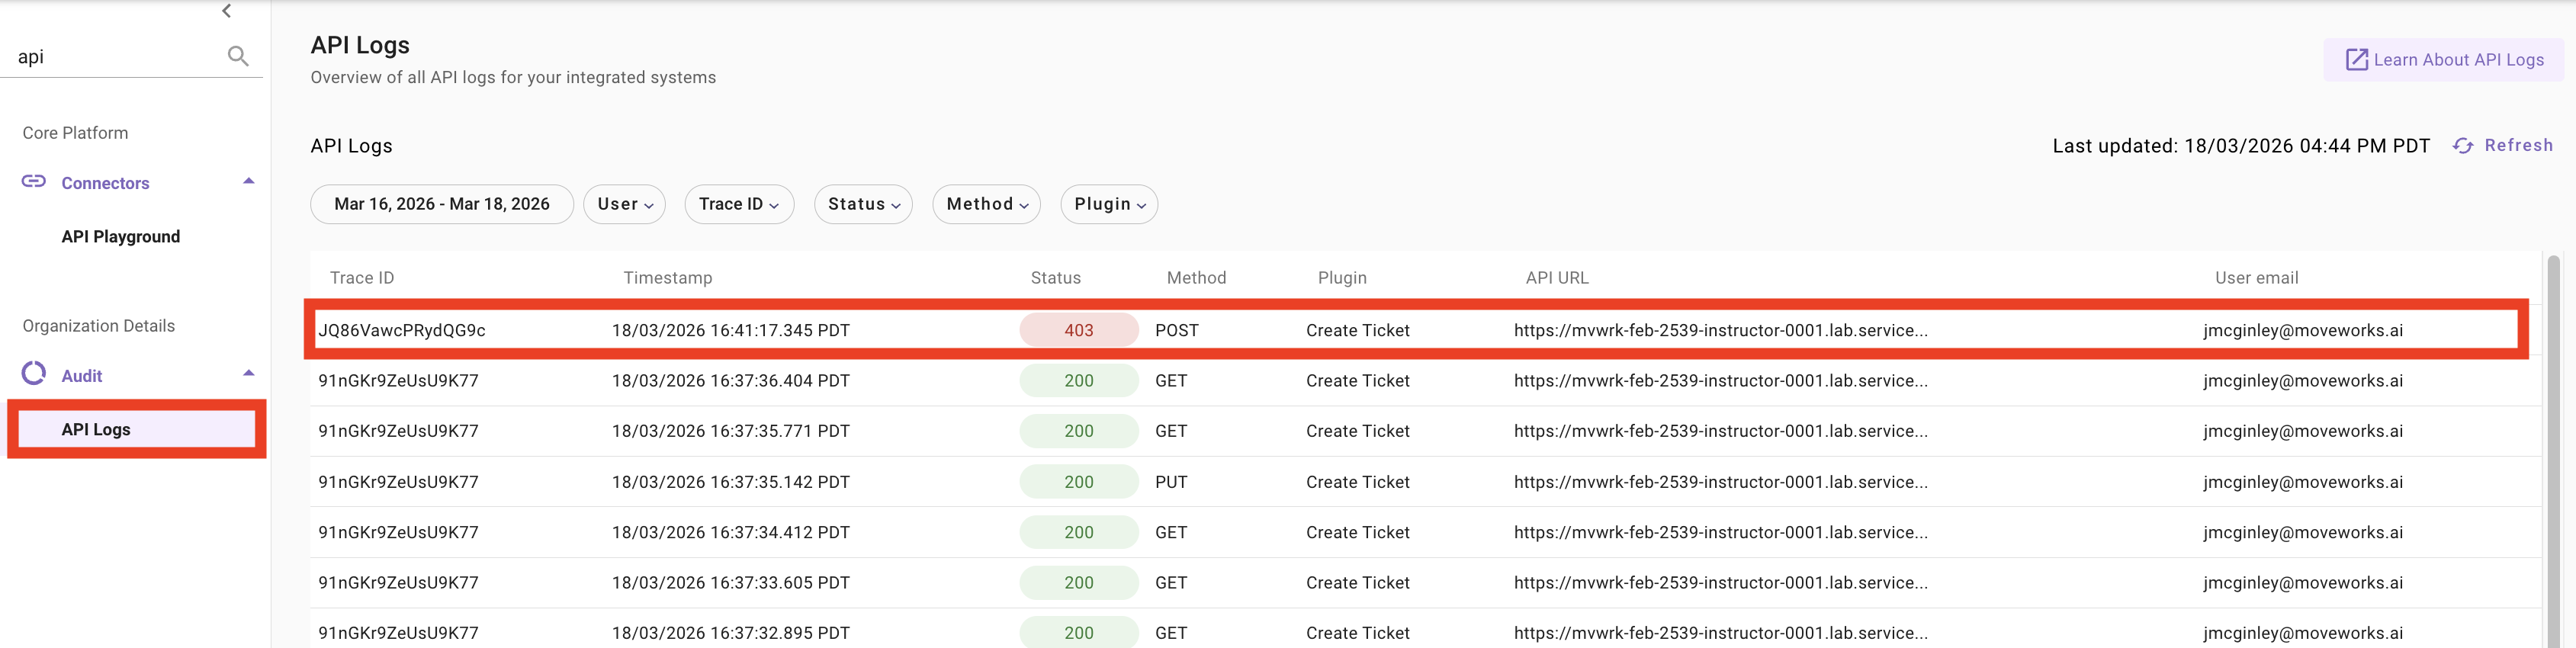
Within Moveworks Setup, we can check the API Logs module to see what Moveworks tried to send to the endpoint system and how it failed.
-
Identify the log that indicates the error. You can search by the requesting user, trace id, method, or plugin
-
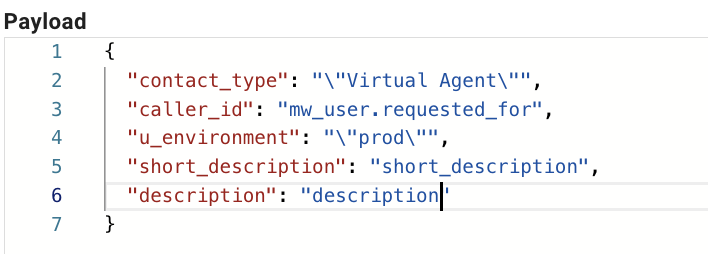
Analyze the error message. In this case we can see that our request payload is missing
short_description, and the ServiceNow instance is stating that it is a required field
4.3: Constructing the Proper Payload in API Playground — “Solutioning”
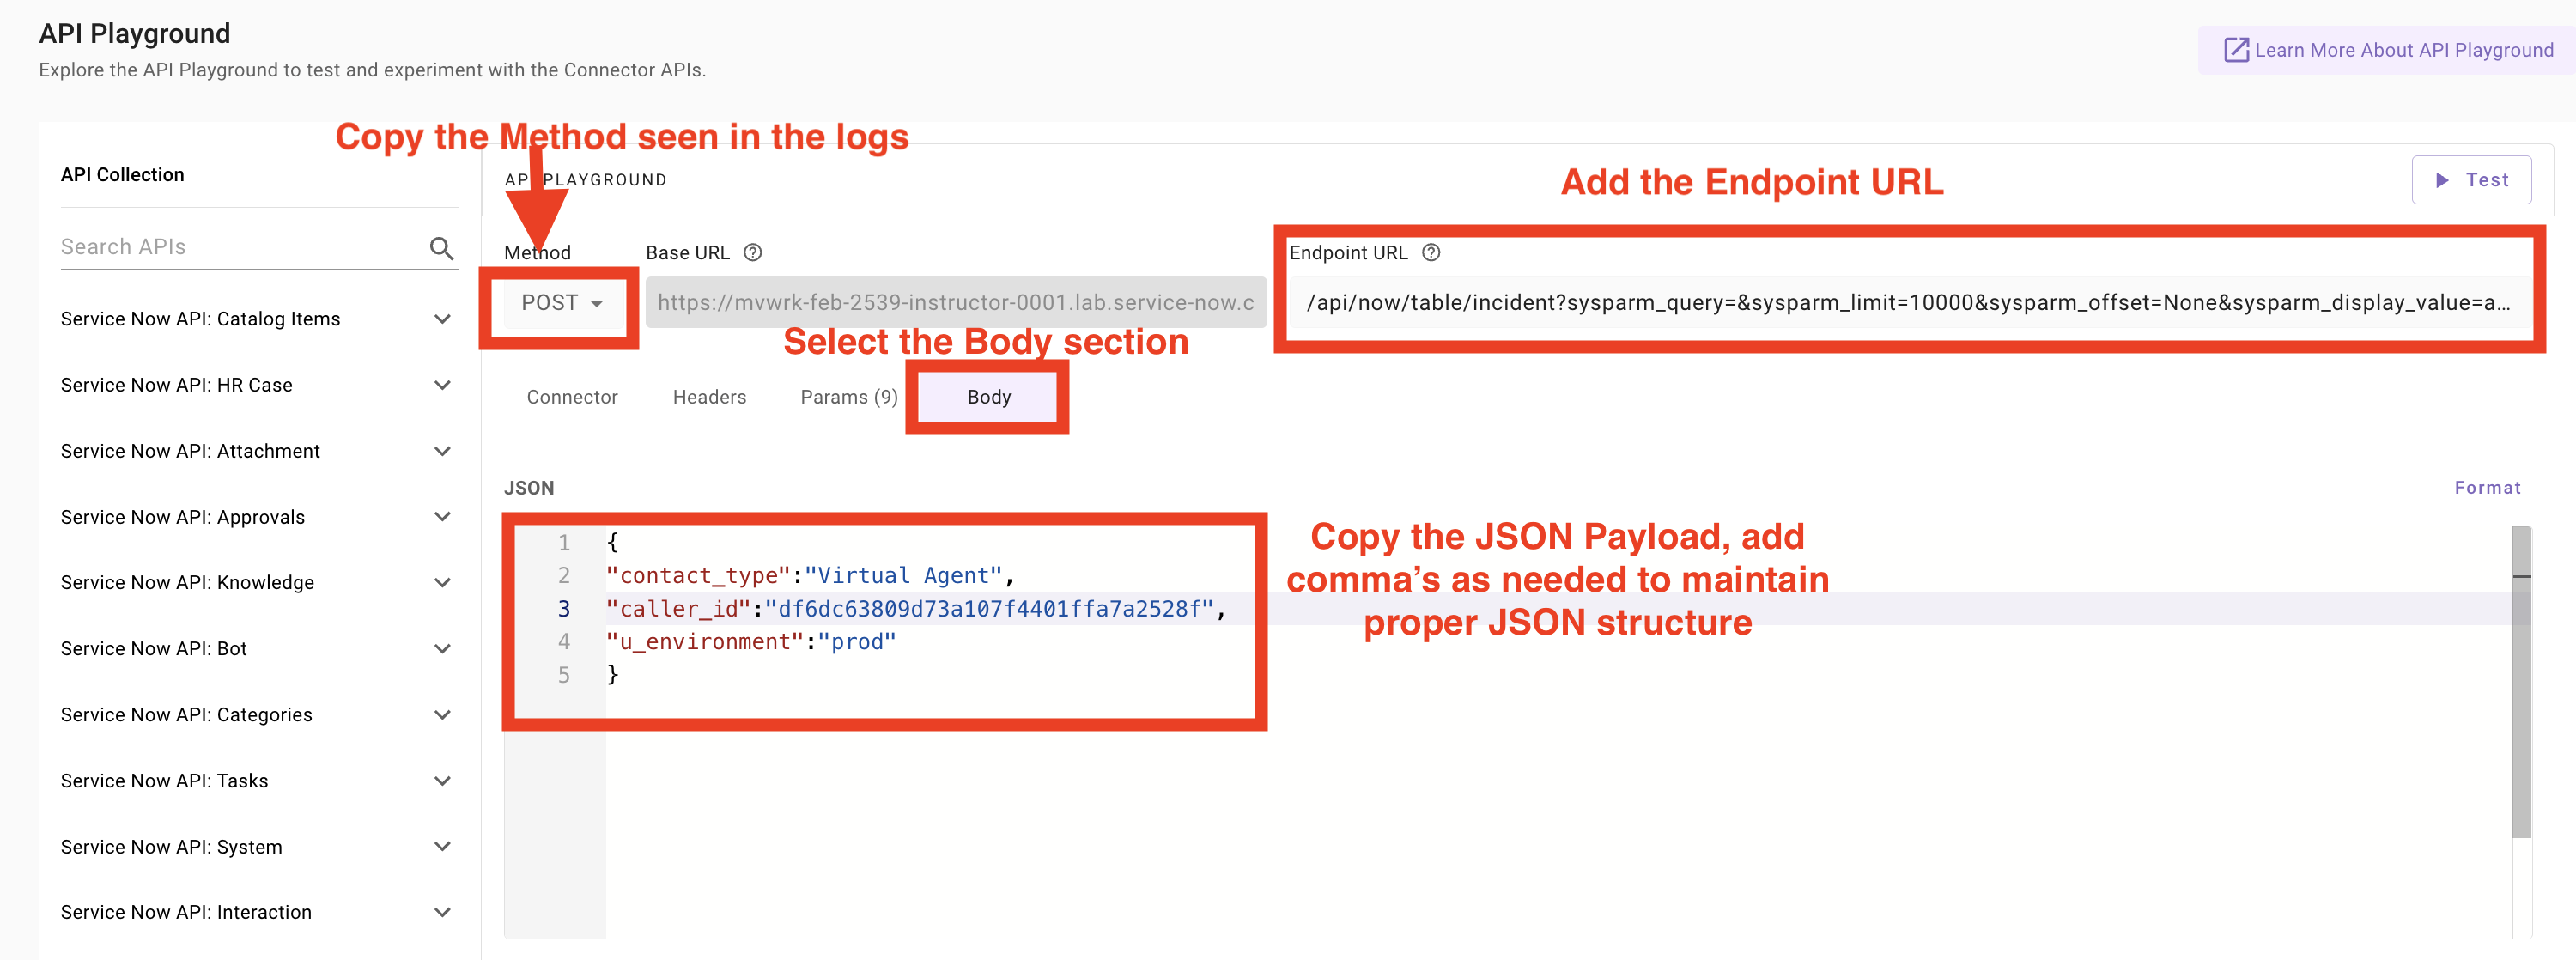
Within API Playground, we can take the following information from step 2, and reconstruct our payload until we get a success in the system. This may be an iterative process, and we may need to ask our client for more information if we cannot properly resolve some values during this step.
-
Open another Moveworks Setup tab & navigate to API Playground
-
Copy the
api_url_endpoint&request_payload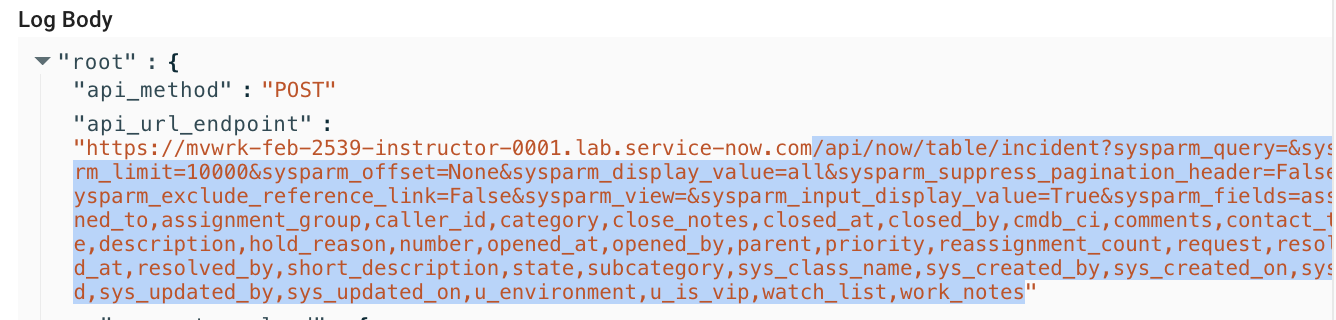

-
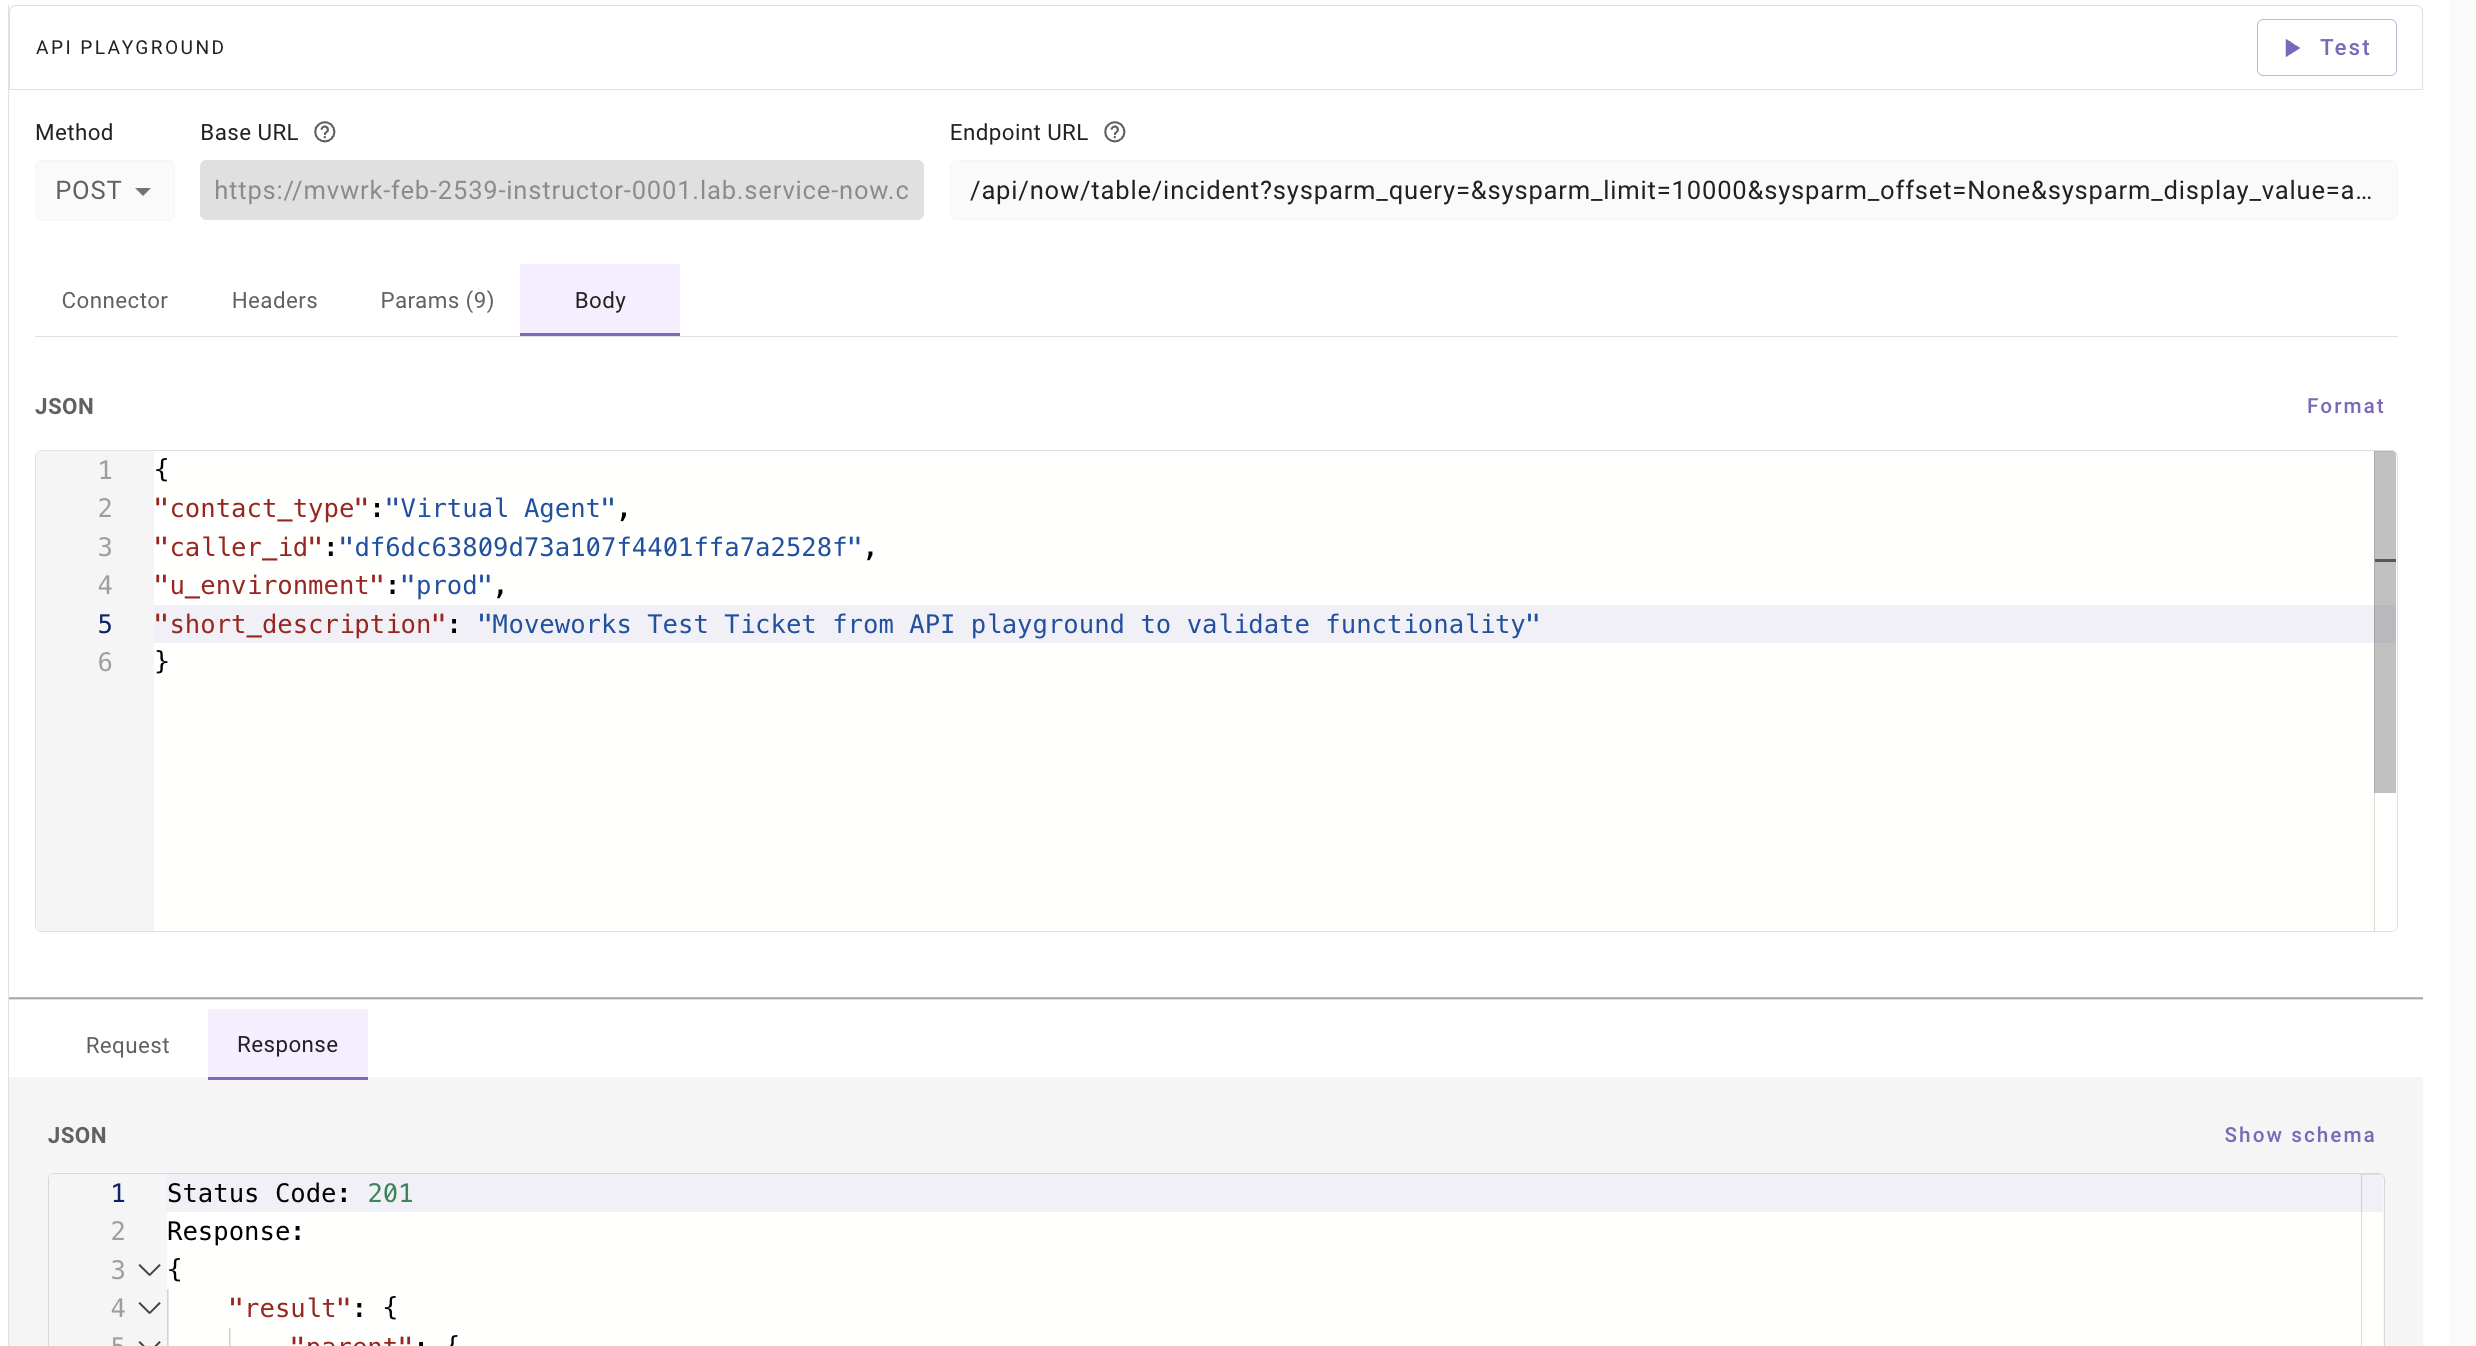
Plug them into API playground and try creating a new payload & test it to get feedback from the system
-
Iterate on it until you get a working result
4.4: Updating the Associated Ticket Mapping — “The Fix”
Now that we understand the problem and have a working solution, we can navigate to the segment of our ticketing configuration that was causing the issue, add our fix, save it, and validate the Assistant is now working as expected.

4.5: Check the Moveworks Status Page
Validate that there have been no broader issues reported by the Moveworks team on the Moveworks Status Page
4.6: Escalate to Moveworks Support
Almost always, Moveworks ticketing issues are caused by a misconfiguration. This is often the Ticketing Configuration is not aligned with what the Source System is expecting. Ensure that you have synced with the ITSM System Administrator and can confirm that API calls to do the given ticketing action are working outside of Moveworks.
If we have validated the following, and are unable to diagnose the root cause, we can open a ticket with the Moveworks support team and include the following details related to the failure mode we are seeing:
- The email of the user experiencing the issue
- The action they are attempting to take
- How the Moveworks Ticketing Plugin is failing
We always want to provide the Moveworks team with as much information as possible, to accelerate their ability to provide us support.
🪞 5: Reflecting on This Configuration
Through this guide, you’ve learned the following:
- How to complete the Ticketing Configuration
- How to add
custom_datafields to the Ticket Query Mappings - What ticketing actions Moveworks can take
- How to validate the actions are working as expected
- The thought process to follow when ticketing is not operating as expected
⚙️ 6: Configuration Details
Use the table below to fill in the required fields accurately.