
ServiceNow MCP: Knowledge Graph
MCP Workspace is available to a limited set of customers. Moveworks is validating the experience and gathering feedback, so capabilities and limits may change. To request access, register your interest.
ServiceNow Knowledge Graph gives AI relationship-aware access to live data on your instance. With MCP Server Console, you can expose a Knowledge Graph as an MCP tool. Once that server is connected to MCP Workspace, the assistant can answer natural language questions over your ServiceNow data, such as “Which open P1 incidents are tied to vendors with an expiring contract?”
This is a good fit when employees need answers that span several related tables, or when you’ve brought external data into ServiceNow with Workflow Data Fabric and Zero Copy connectors.
This guide walks through the full setup end to end:
- Choose a schema and prepare it: Enterprise Graph with tags, or a custom graph.
- Create a Knowledge Graph tool and an MCP server in ServiceNow’s MCP Server Console.
- Create an OAuth inbound integration so Moveworks can authenticate.
- Connect the server in Moveworks MCP Workspace, test, and launch.
ServiceNow updates Knowledge Graph and MCP Server Console regularly, so each ServiceNow step below links to the matching ServiceNow page. If what you see on your instance differs from this guide, follow ServiceNow’s docs. Start with Create a tool from a Knowledge Graph.
Before You Start
Prerequisites
ServiceNow
- An instance with MCP Server Console and Knowledge Graph.
- If you’re querying external data: Workflow Data Fabric with Zero Copy connectors set up and data fabric tables created.
- A user with admin (to create Knowledge Graph tags or graphs), sn_mcp_server.tools_admin or sn_mcp_server.admin (to create tools and servers), and oauth_admin, mi_admin, or admin (to create the OAuth integration).
Moveworks
- MCP Workspace enabled for your organization.
- Agent Studio admin access.
How Access Works
Knowledge Graph tools respect ServiceNow security. ACLs are enforced at the node (table) level as the graph is traversed, so two employees can get different results for the same question. With per-user OAuth, each employee only sees records they can already see in ServiceNow.
See the access control section of ServiceNow’s Creating tools for a Model Context Protocol server.
Step 1: Choose and Prepare a Knowledge Graph Schema
The Knowledge Graph tool can use the out-of-the-box Enterprise Graph or a custom graph you build in Knowledge Graph Designer.
Enterprise Graph schema overview and Create Knowledge Graph tags
Option A: Enterprise Graph with Tags
A tag is a named list of the tables that matter for a use case (for example, HR or Vendor Management). Tags tell Enterprise Graph which tables to prioritize, and let you add business context that improves query accuracy.
Follow ServiceNow’s Create Knowledge Graph tags. In summary:
- Go to Knowledge Graph Designer > Enterprise Graph Tags and select New tag.
- Enter a Tag name and Description, then under Select Tables choose the tables for this use case.
- Select Next, then configure each table:
- Synonyms: Up to five alternative names per table, column, or relationship. For example, add “Tickets” for the Incident table.
- AI Instructions: Up to five instructions per table, column, or relationship that give the query engine business context. Select Always include to apply one to every query.
- Data filters: For example,
Active = trueto exclude inactive users. - Hidden columns: Exclude columns that shouldn’t be queried or returned, such as employee numbers.
- Select Create tag.
- Write down the tag name. You’ll reference it when you create the tool.
Option B: Custom Graph
Use a custom graph when you want the tool limited to a specific set of tables, such as data fabric tables created from a Zero Copy connector.
- Go to Knowledge Graph Designer and create a new graph with a clear name (for example,
Vendor Risk Knowledge Graph). - Add each table as a node. For external data, choose Data Fabric Table as the node type.
- For each node, add a Description, Synonyms, and the Queryable columns the assistant can use.
- If the graph has more than one table, define the relationships between them and describe how to query one table using another (for example, “Find incidents using the Vendor ID from the Vendor table”).
- Test the graph in Knowledge Graph Designer before moving on.
Step 2: Create a Knowledge Graph Tool and MCP Server in ServiceNow
Create a tool from a Knowledge Graph and Create a Model Context Protocol server
Create the MCP Server
If you already created a ServiceNow MCP server for Subflows and Actions, you can add the Knowledge Graph tool to that server instead.
-
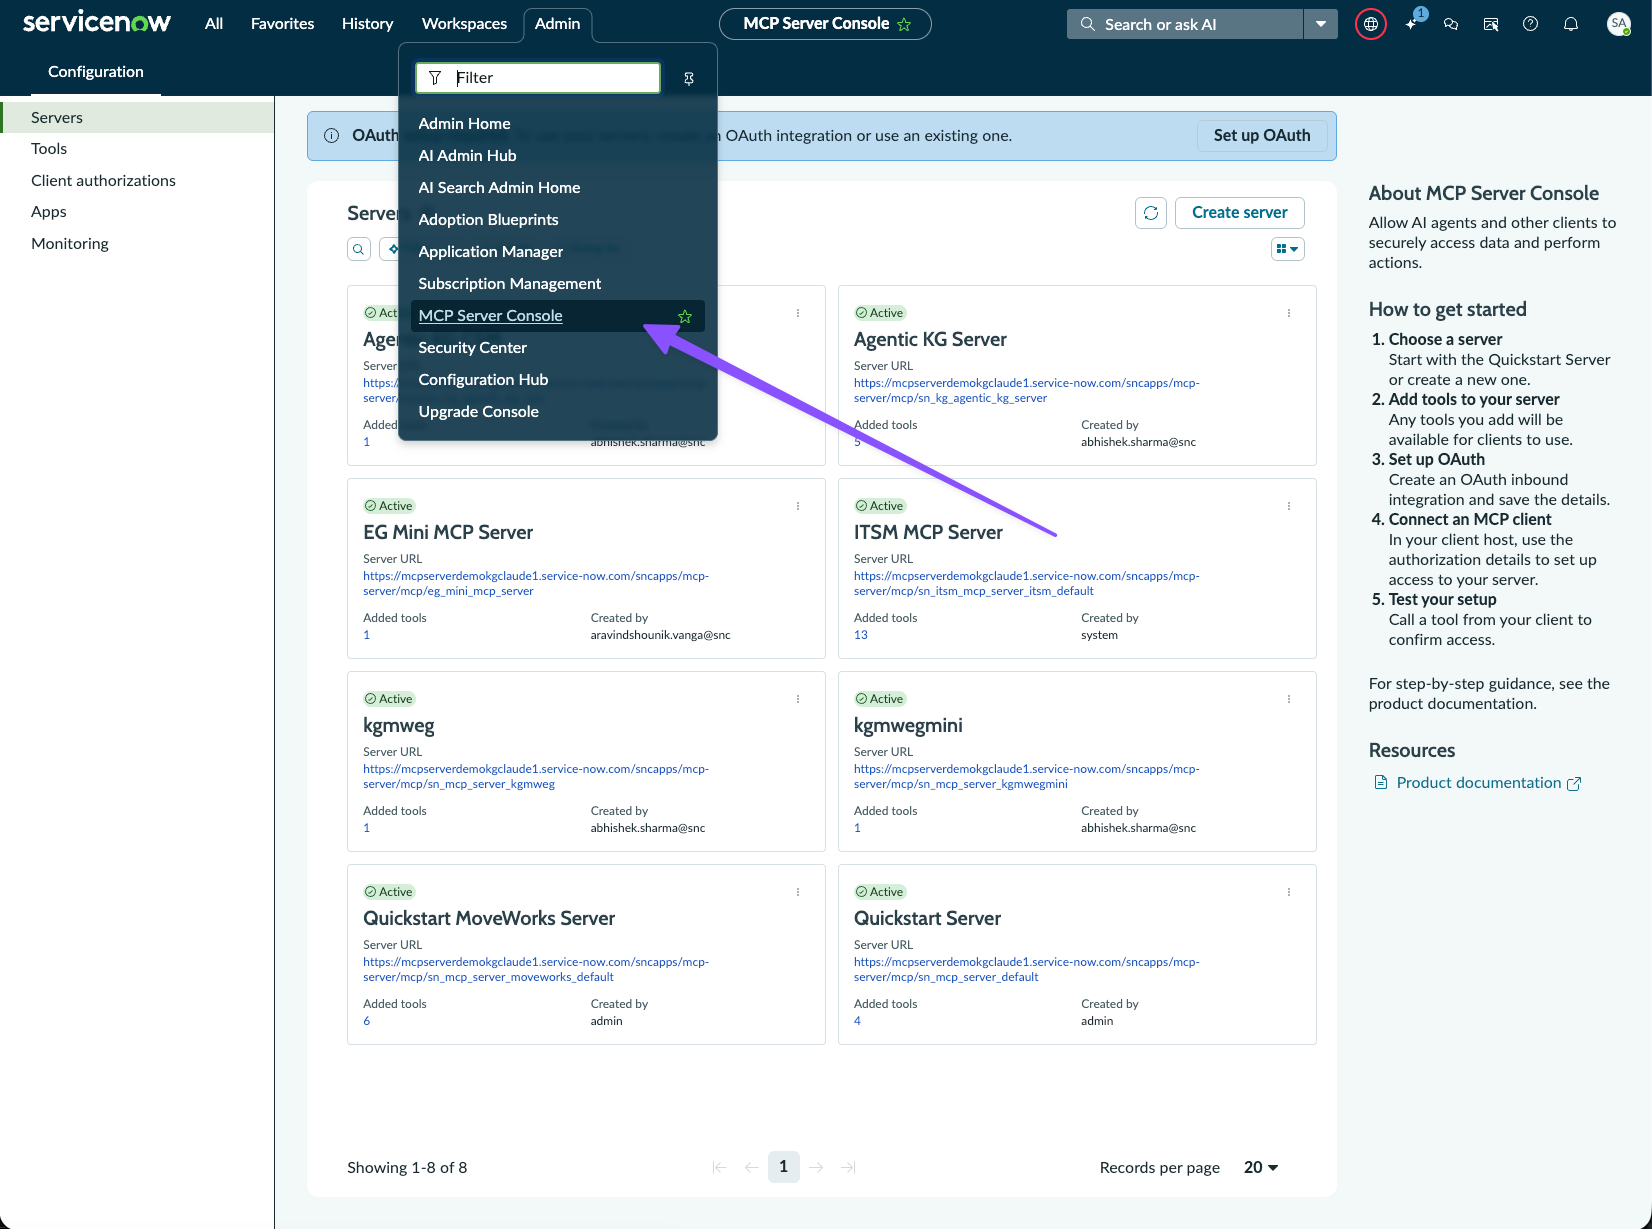
Go to Admin > MCP Server Console.
-
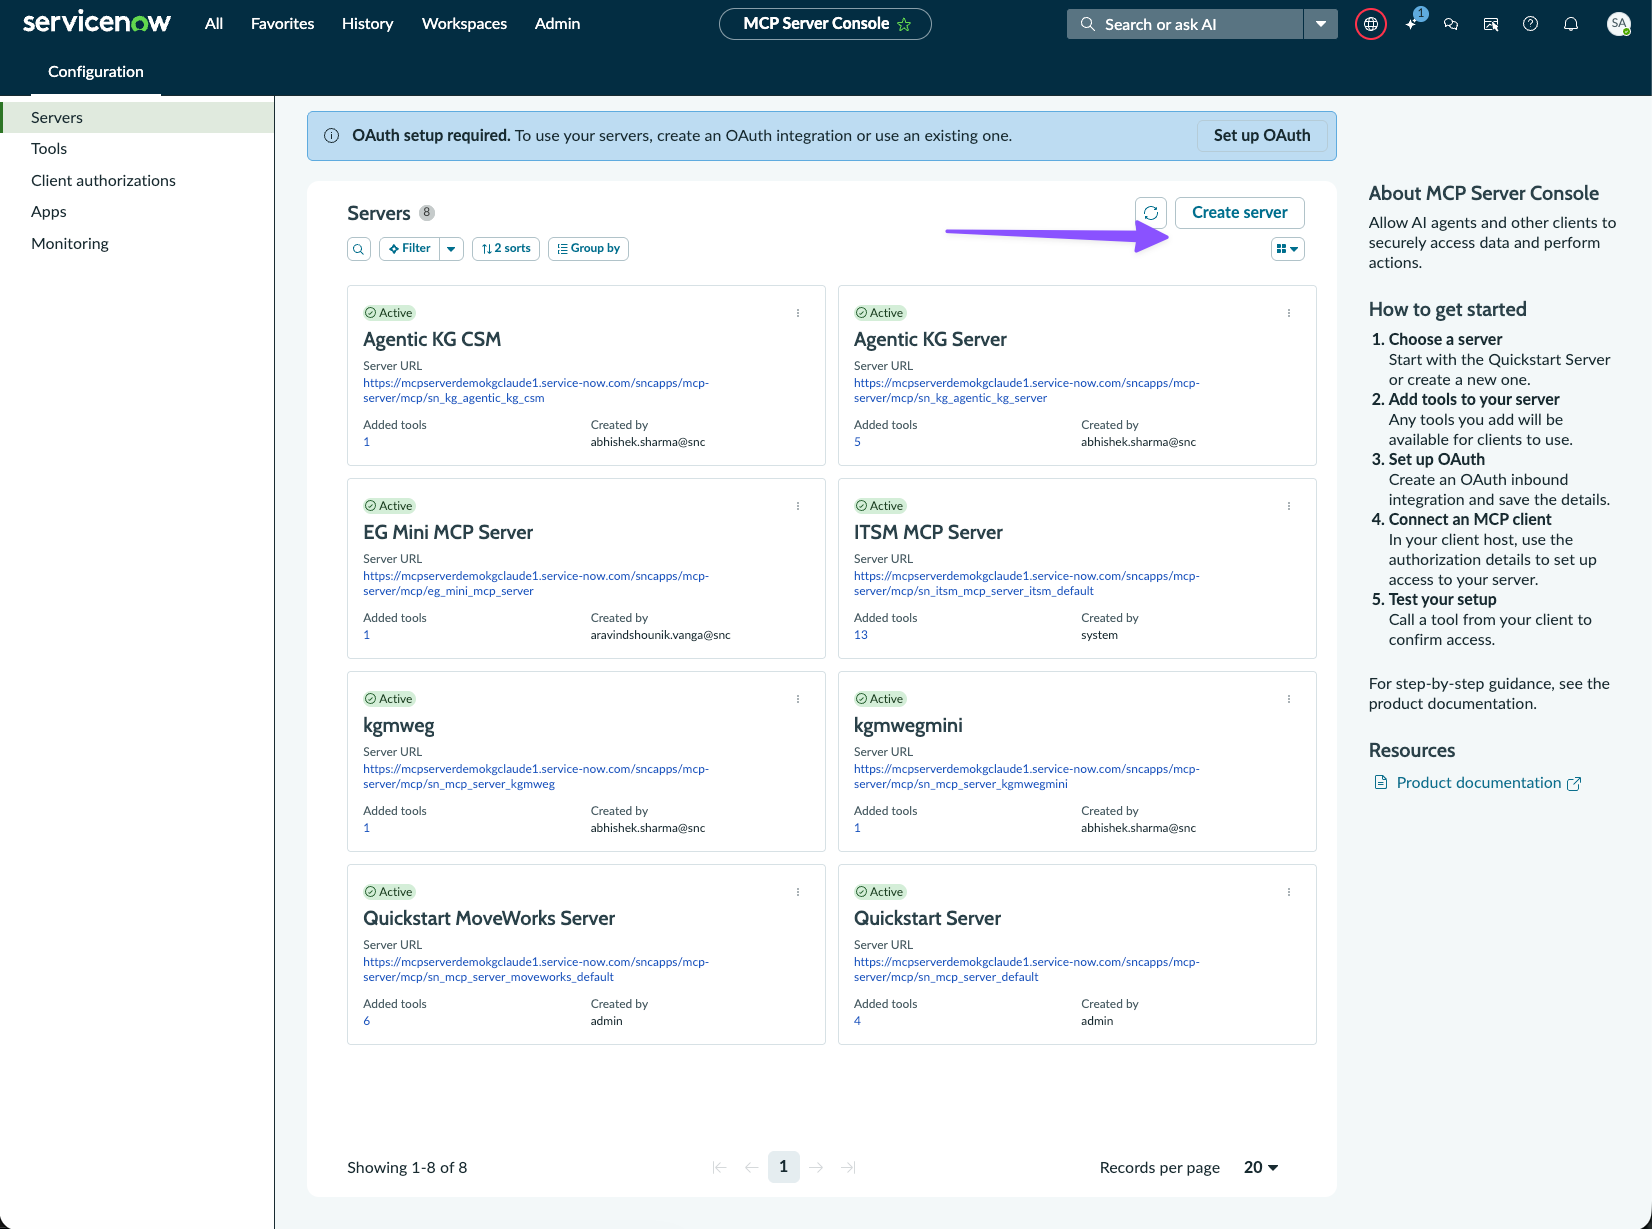
On the Configuration tab, select Servers, then select Create server.
-
Enter a Label (for example,
Vendor Data) and a Short description of what the server can answer. The Name is generated from the label and becomes part of the server URL. For the full field list, see ServiceNow’s Create a Model Context Protocol server.
Add the Knowledge Graph Tool
-
In the Tools section of the server form, select Add tools.
-
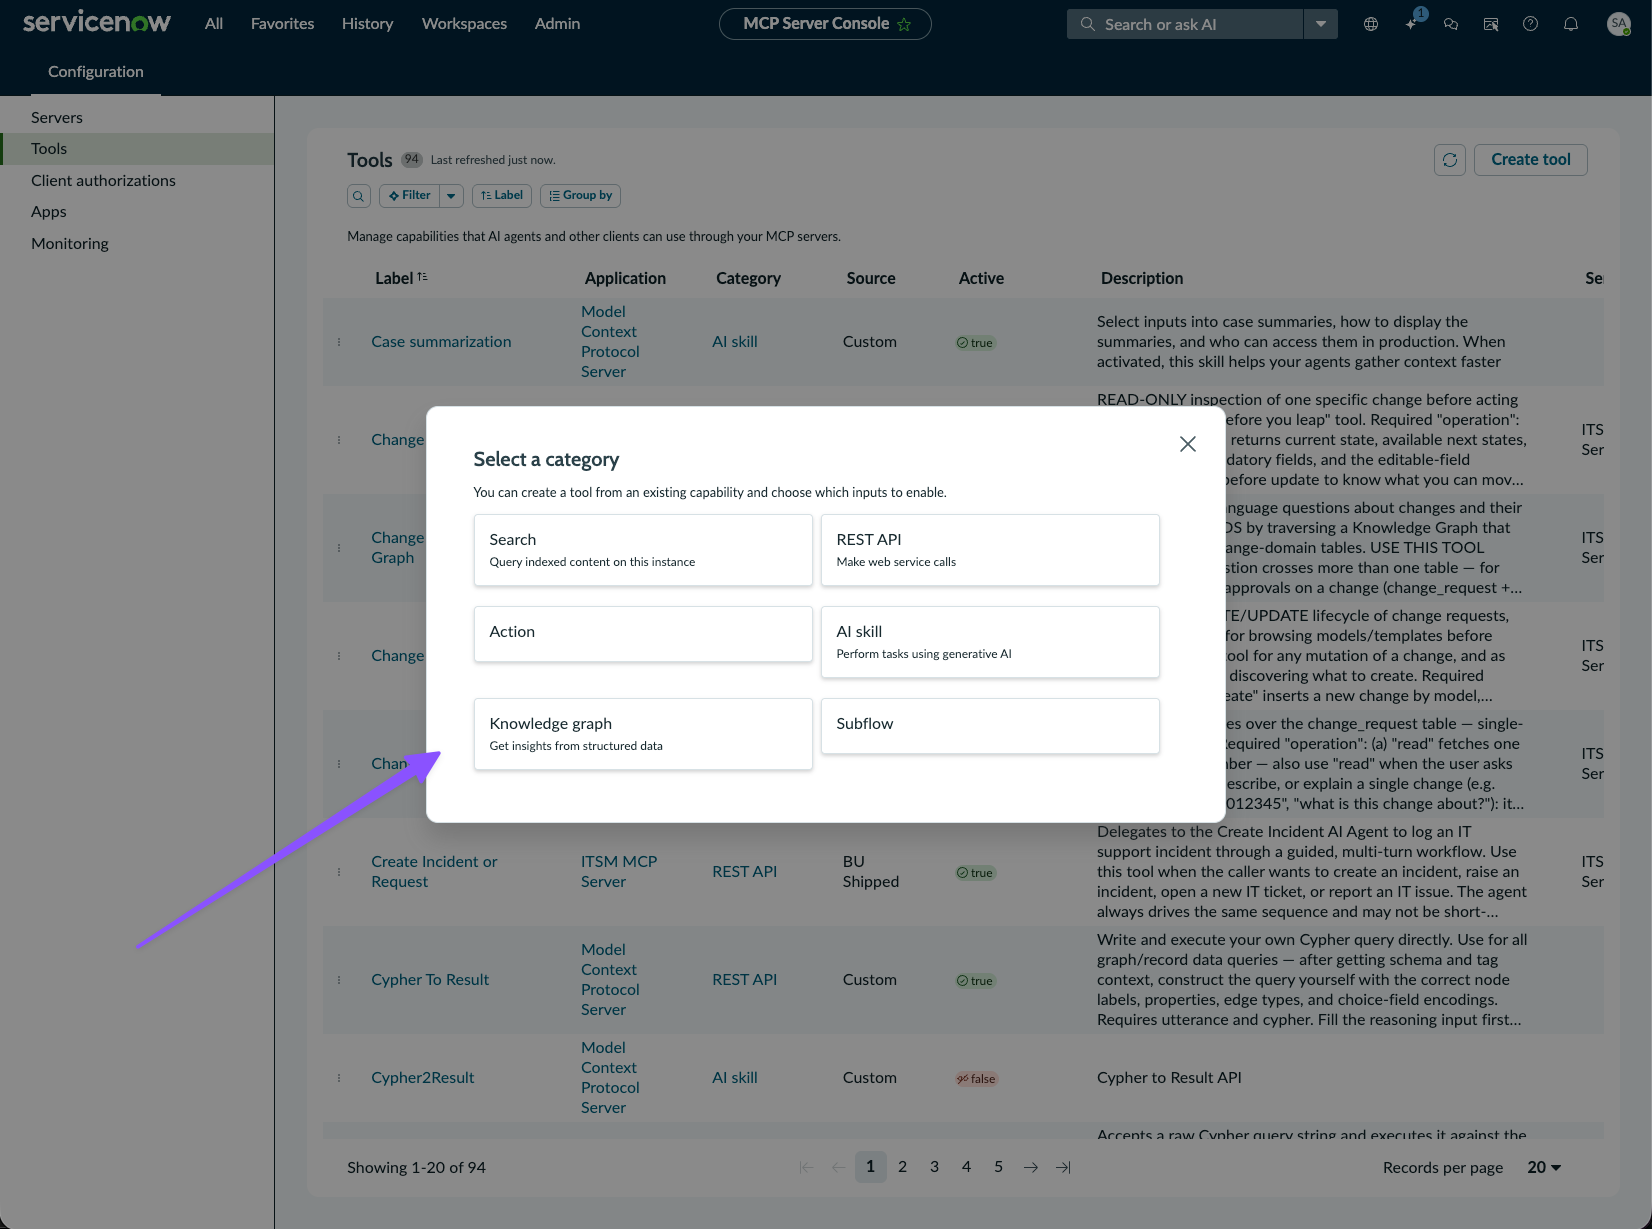
Select Create tool, then choose Knowledge Graph.
-
Fill in the tool fields below. ServiceNow documents these fields in Create a tool from a Knowledge Graph.
-
Review the Tool inputs section (see below).
-
Select Create, then select the tool and select Add.
-
Back on the server form, select Create to activate the server.
-
Copy the Server URL. It looks like
https://<instance>.service-now.com/sncapps/mcp-server/mcp/<server-name>. You’ll need it in Step 4.
Tool Inputs
The assistant fills in these inputs when it calls the tool. You can turn off optional inputs you don’t want it to set.
- ❌ “Vendor KG”
- ✅ “Answers questions about suppliers, their contracts, and related incidents, such as contract end dates, risk ratings, and open issues by vendor. Use the
vendor_managementtag. Use when someone asks about a vendor or supplier.”
Editing a tool’s name, description, or inputs changes it on every server that uses it. See Creating tools for a Model Context Protocol server.
Step 3: Create an OAuth Inbound Integration in ServiceNow
If you already set this up for another ServiceNow MCP server, you can reuse the same integration and skip to Step 4.
-
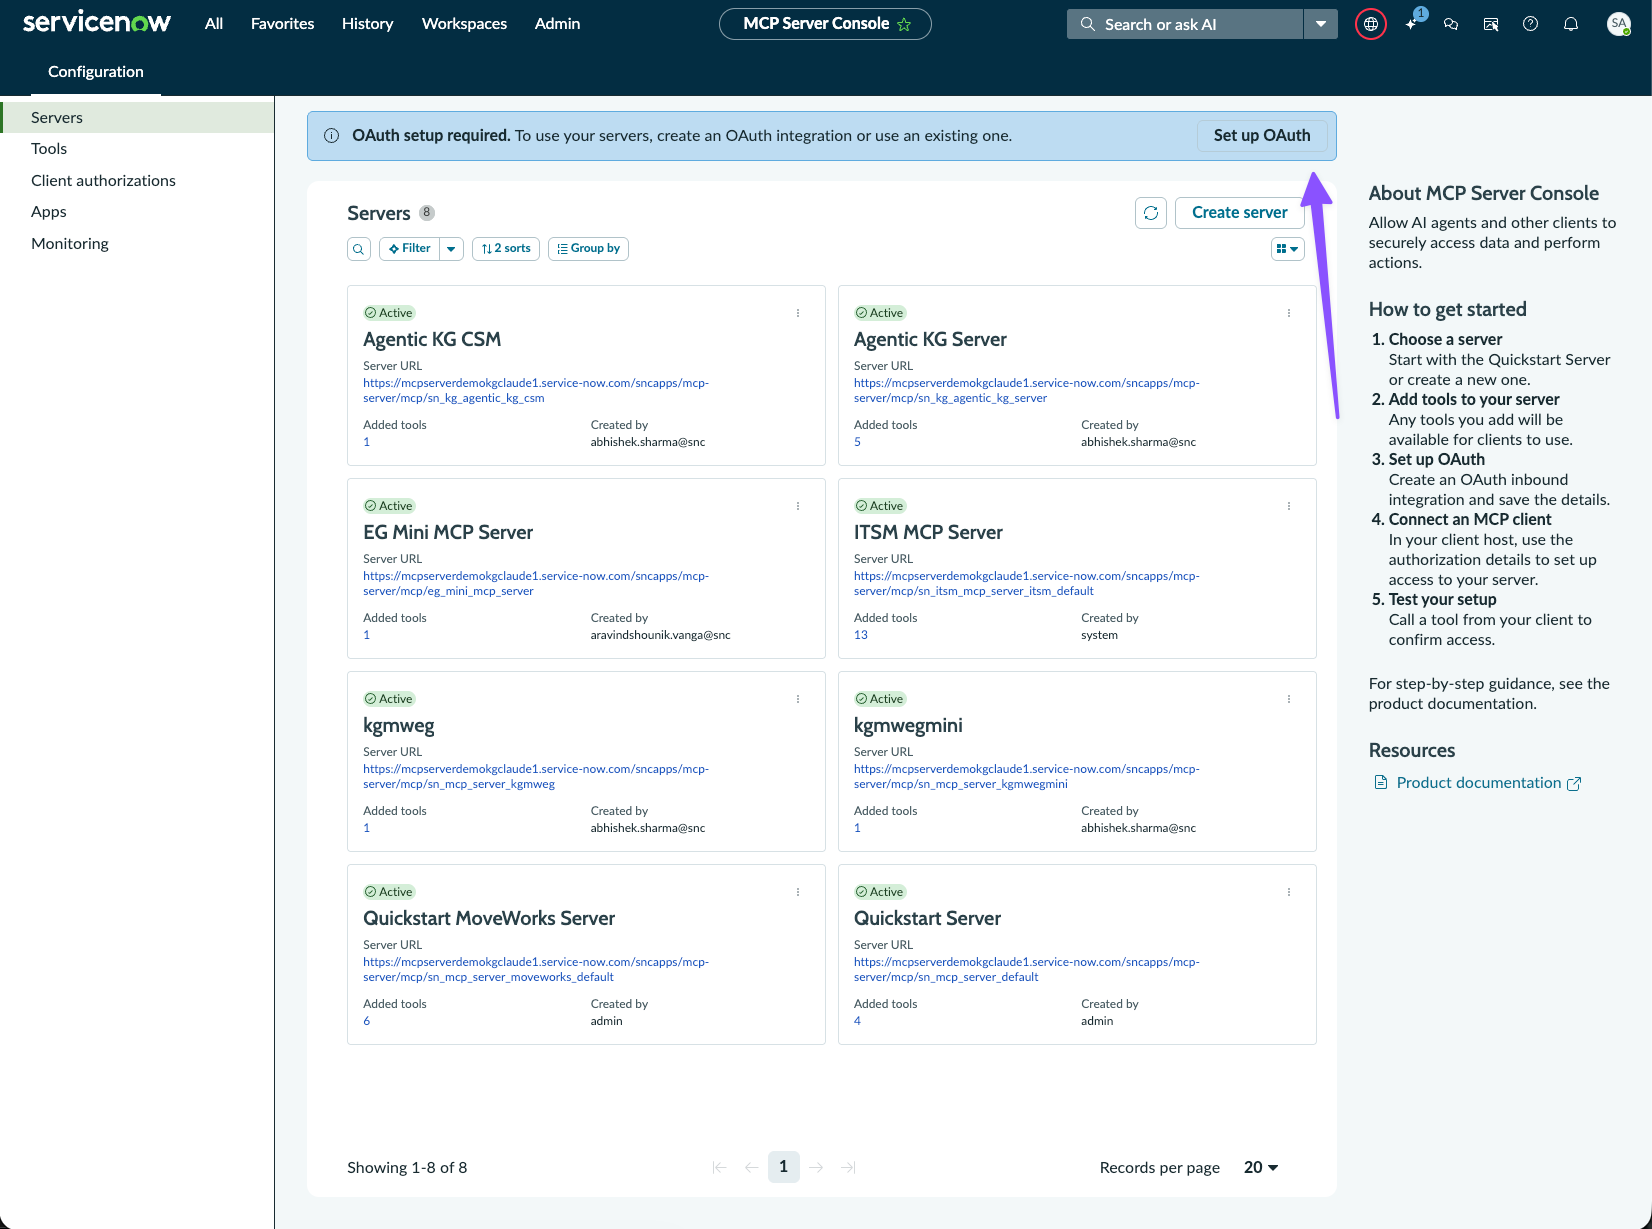
In MCP Server Console, select Set up OAuth in the banner. You can also go to All > Machine Identity Console and open the Inbound integrations tab.
-
Select New integration, then choose OAuth - Authorization code grant.
-
Fill in the fields below.
-
Select Save. If prompted to assign an auth scope, select Skip for now.
-
Copy the Client ID and Client Secret and store them securely.
ServiceNow MCP servers reject opaque tokens. This is the most common cause of authentication errors. Also, don’t reuse integrations that share a server’s name (with underscores). ServiceNow creates those for AI Control Tower monitoring.
Step 4: Connect the Server in Moveworks
If you already created an HTTP connector for ServiceNow MCP, reuse it and skip to Add the MCP Server.
Create an HTTP Connector
-
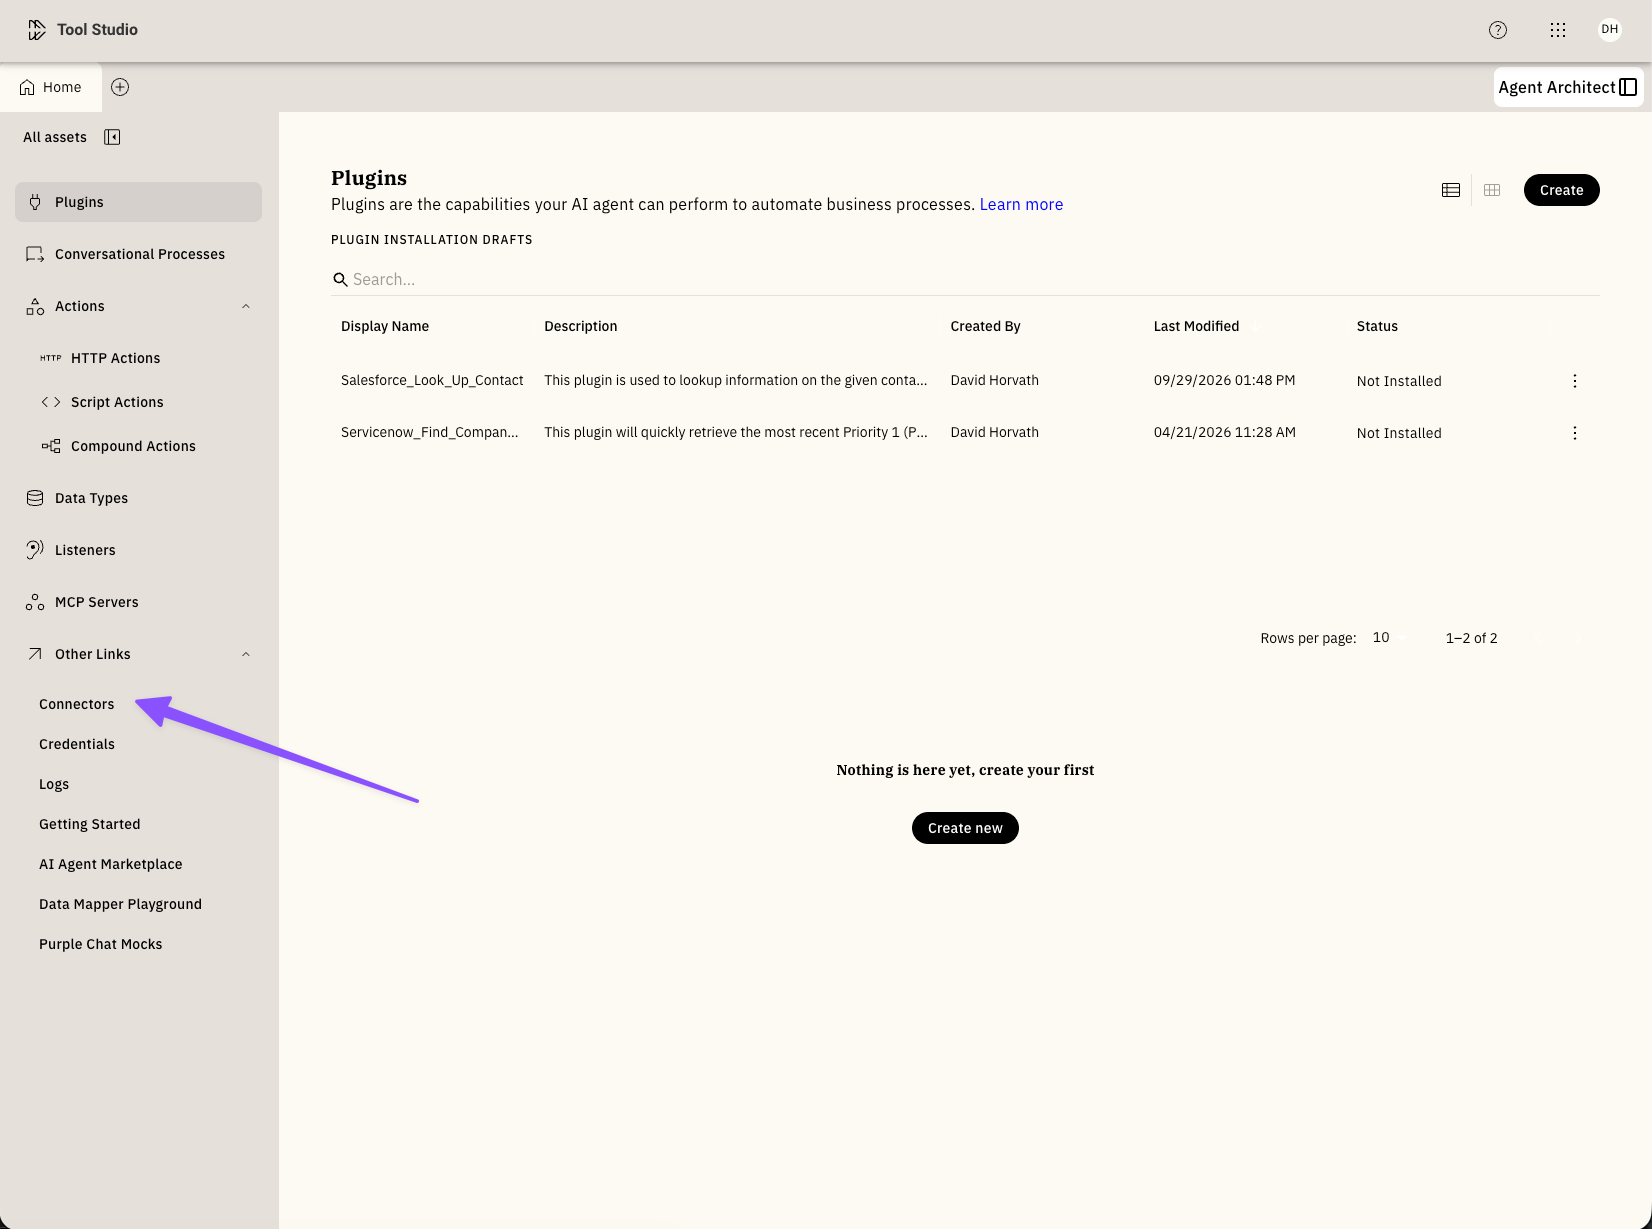
In Agent Studio, open Connectors and select Create.
-
Fill in the fields below, then select Save.
Add the MCP Server
-
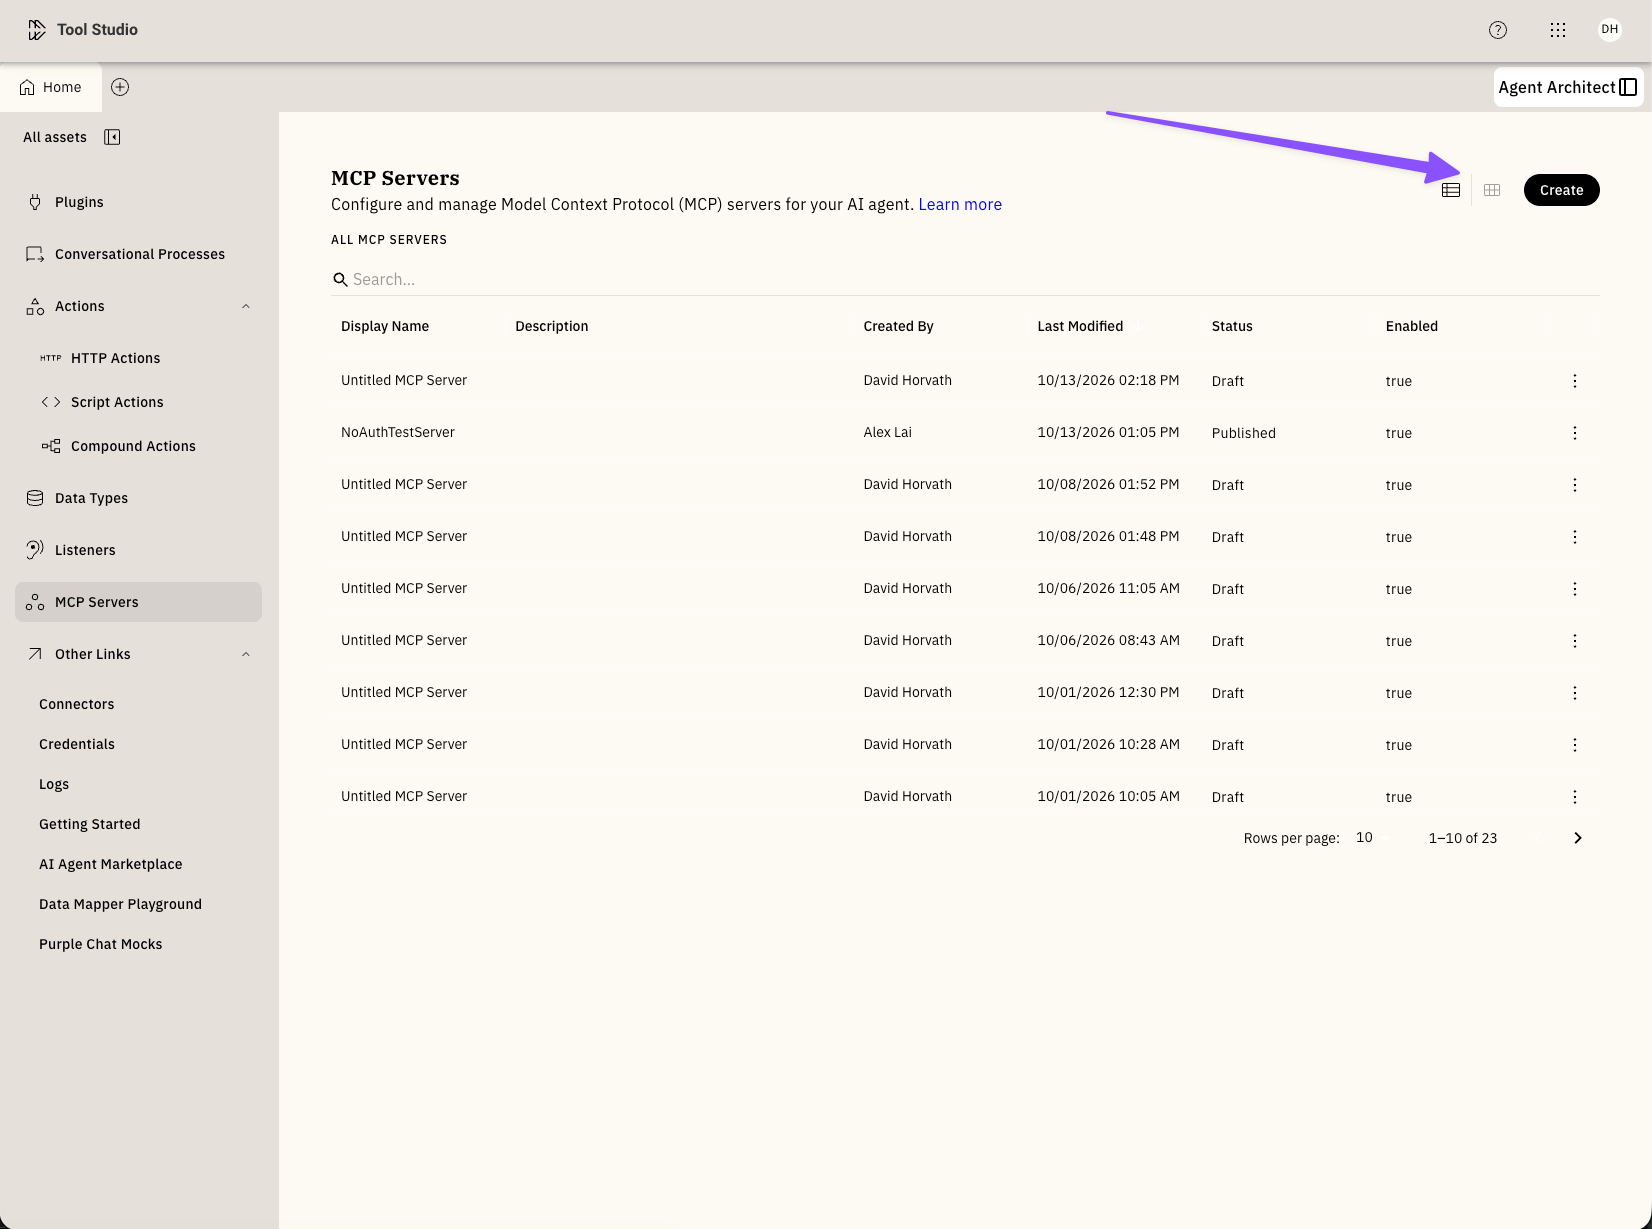
In Agent Studio, open MCP Servers and select Create.
-
Select Custom Server.
-
Enter a name and description. Describe what data employees can ask about, and note that the server is read-only.
-
In the URL field, enter
https://<instance>.service-now.comwith no trailing slash. -
In the Path field, enter
/sncapps/mcp-server/mcp/<server-name>from the Server URL you copied in Step 2. -
Under the connector section, choose Inherit from existing connector and select your ServiceNow connector.
-
Select Authenticate and sign in to ServiceNow. Select Allow when prompted.
-
In the Tools section, select Preview Tools. You should see your Knowledge Graph tool.
Set the Tool Approval Policy
Knowledge Graph tools are read-only, so the default Follow server guidance policy typically lets them run without asking the employee each time. Tools run without approval only when they’re marked read-only, non-destructive, and not open world. If you put write-capable Subflow or Action tools on the same server, consider Always ask user.
Publish and Launch
- Select Publish.
- Make sure the server is Enabled.
- In Launch Configuration, start with a small pilot audience.
For more detail, see Connect and Manage Servers.
Step 5: Test End to End
- Open the assistant as a user in your pilot audience.
- Ask a question your graph should answer, for example: “Which of our vendors have contracts ending in the next 90 days, and do any of them have open incidents?”
- The user should be asked to authenticate to ServiceNow.
- Confirm the assistant calls the Knowledge Graph tool and the answer matches what you see in ServiceNow.
- Test with a non-admin employee. Because ACLs apply at the node level, results depend on who’s asking. Make sure regular employees see what they should, and nothing they shouldn’t.
- Review MCP tool call logs to see the query the assistant sent and the results returned.
If answers are inaccurate, improve the graph rather than the prompt: add synonyms, AI instructions, data filters, or hidden columns in your tag or custom graph. Changes apply on the next tool call.